
|
|
|
#1
 07-14-2009, 04:01 AM
|
||||
|
||||
|
Hi, I'm asking for advice - again..
I'm repairing a 75 gallon aquarium as an upgrade from my 27gallon, I'm progressing slowly, but I'm in no real rush at the moment... So far I've discovered how to get the back panel out of an All-Glass aquarium - it's not easy, and that glass is stronger than I'd ever have imagined. Now I need to work out what to do for plumbing as I'd like to get the holes drilled in my new back panel before I go too much further. I've never had a sump before, so I'm not that sure of what is the best way of doing it. I've got some ideas though ,so I'm looking for input. So please tell me if my plans are good/dim but show promise/plain bone-headed! I'm pretty much set on drilling because 1) I don't really trust a single syphon overflow box, so I'd need to run two, and 2) For the price of one syphon overflow I reckon I can do all my plumbing, probably buy the return pump too. I've read good things about coast to coast overflows, so as I'm starting from scratch I thought I'd have one running the length of the tank. I'm thinking of a flow of around 800Gph - would two 1" drains be enough - or should I go with three? I'd like one drain to be able to handle the flow in case either should block. I was going to create a durso type standpipe on the back of the tank with a T piece coming out of each bulkhead and the top capped with a small hole drilled so I can mix in air in a controlled fashion. From there I'd have a solid tube coming down to the back of the cabinet where I was going to run the final length with all the bends in it in flexible PVC so all the curves are smooth. The return would be flexible PVC so far, then solid, probably 1" pipe. Most of the T pieces I've seen are slip together ones, so presumably that means I need slip bulkheads - how exactly do you fit your 1" pipe into these? Are they pushed in under friction, or are they glued? Would I be better off with a threaded bulkhead and a threaded to slip converter which could be glued? Sorry if these are dumb questions, but I'm a complete newbie when it comes to plumbing.. Fortunately I have more of a clue when it comes to building the stand/cabinet than the plumbing! Thanks, Rob 
|
|
#2
07-14-2009, 04:25 AM
|
|||||
|
|||||
|
I would recommend larger then 1" drain pipes......they are really only good for about 300 gph each
here is a good article about it http://www.wetwebmedia.com/SystemPIX...Oneinchart.htm
|
|
#3
07-14-2009, 04:28 AM
|
||||
|
||||
|
Quote:
Rob.
|
|
#4
07-14-2009, 06:15 AM
|
|||||
|
|||||
|
Have you considered just building yourself an external overflow and then "notching" the back panel? Or are you going to build an internal overflow box? The reason for the overflow box is for surface skimming. Just something to think about. With an overflow box you can have a herbie style drain which is way easier to work with in my opinion and much quieter. Hope this helps.
|
|
#5
07-14-2009, 12:26 PM
|
||||
|
||||
|
A 1" pipe will slip into the bottom of a 1" bulkhead. Just use primer and PVC glue. If your bulkhead happens to be threaded internally on both ends then you will need an adaptor for it.
|
|
#6
07-14-2009, 01:33 PM
|
|||||
|
|||||
|
I am running a c2c overflow and love it. Running about 700-800GPH with 1 1" drain spit to 2 bulkheads. I run Herbie style, with 3 1" bulkheads in my overflow. the 2 on the ends are T'd together to a common 1" drain into the sump, the middle 3rd one is the emergency overflow. Handles the flow nicely. And the surface skimming is awesome with the c2c. just a thin film flows over the wier.
Here's a back pic of the plumbing. you can see the overflow on the side of the tank. Its a full length, 7" wide piece siliconed at an angle for the overflow. 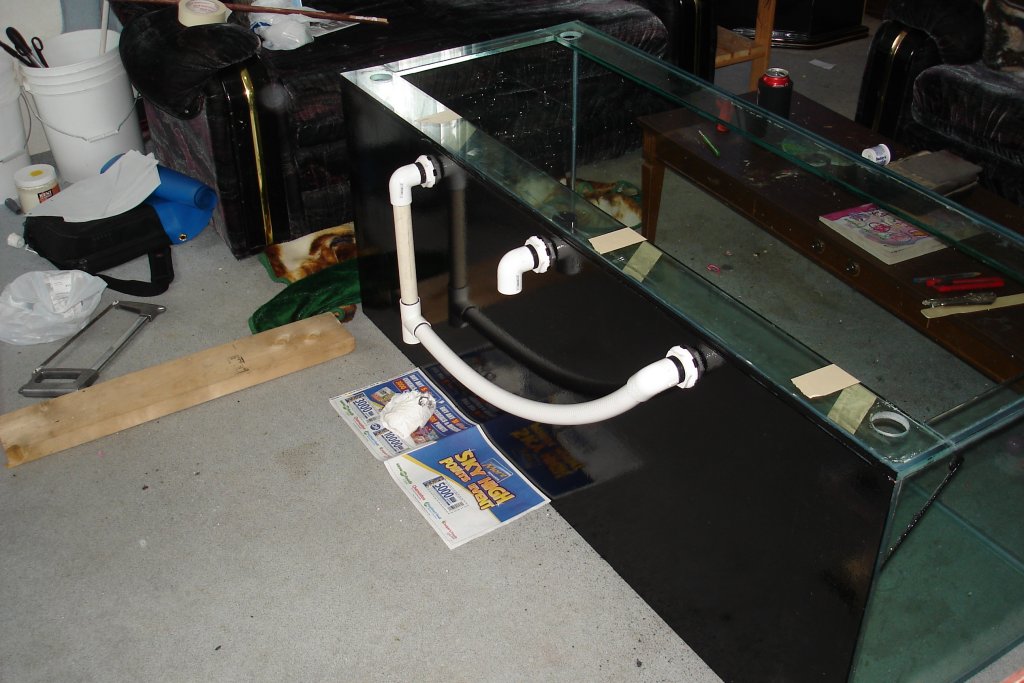
__________________
Dan Pesonen Umm, a tank or 5 Last edited by banditpowdercoat; 07-14-2009 at 01:38 PM.
|
|
#7
07-14-2009, 03:25 PM
|
|||||
|
|||||
|
Curious as to why you took the back panel out of the aquarium? You mean you cut the silicone and removed an entire pane of glass?
__________________
Mike 77g sumpless SW DIY 10 watt multi-chip LED build
|
|
#8
07-14-2009, 03:34 PM
|
||||
|
||||
|
Quote:
I guess I could've just stuck another piece on the inside of the old one, but I thought I might as well replace it. Just had a bit of a shock at the price of 8mm glass though, and the fact that it'll take 3 weeks to order in...
|
|
#9
07-14-2009, 04:44 PM
|
|||||
|
|||||
|
+3 for a Herbie overflow
Another thing that helps is to use plenty of unions throughout your plumbings construction. That way if you ever have to take it apart to modify it or any other reason you dont have to cut it up with a hack saw... Banditpowdercoat could we see a picture of the other side of your overflow too? It looks like something that I might copy for my next tank or if I get my present one drill a second time.
__________________
"We shall dive down through black abysses... and in that lair of the Deep Ones we shall dwell amidst wonder and glory forever." - H.P. Lovecraft Old 120gal Tank Journal New 225gal Tank Journal May 2010 TOTM The 10th Annual Prince George Reef Tank Tour
|
|
#10
07-14-2009, 06:55 PM
|
|||||
|
|||||
|
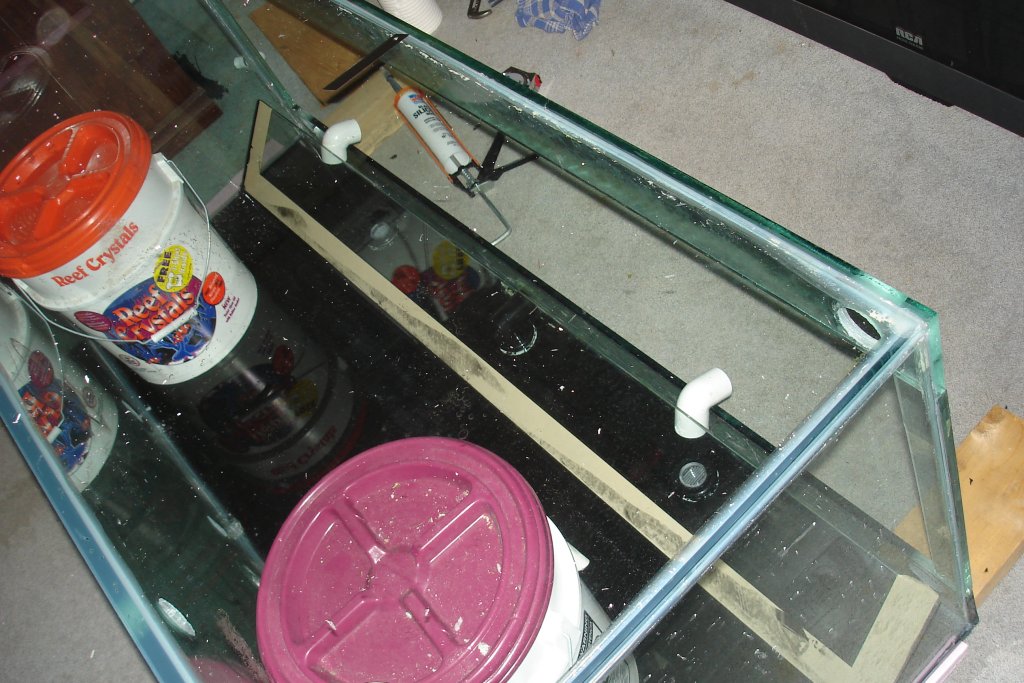
I'm not home right now, but heres a pic of when I was siliconing the wier in place. The tank is on its back in this pic.
 Here you can see it on the back. This was first fill, leak testing 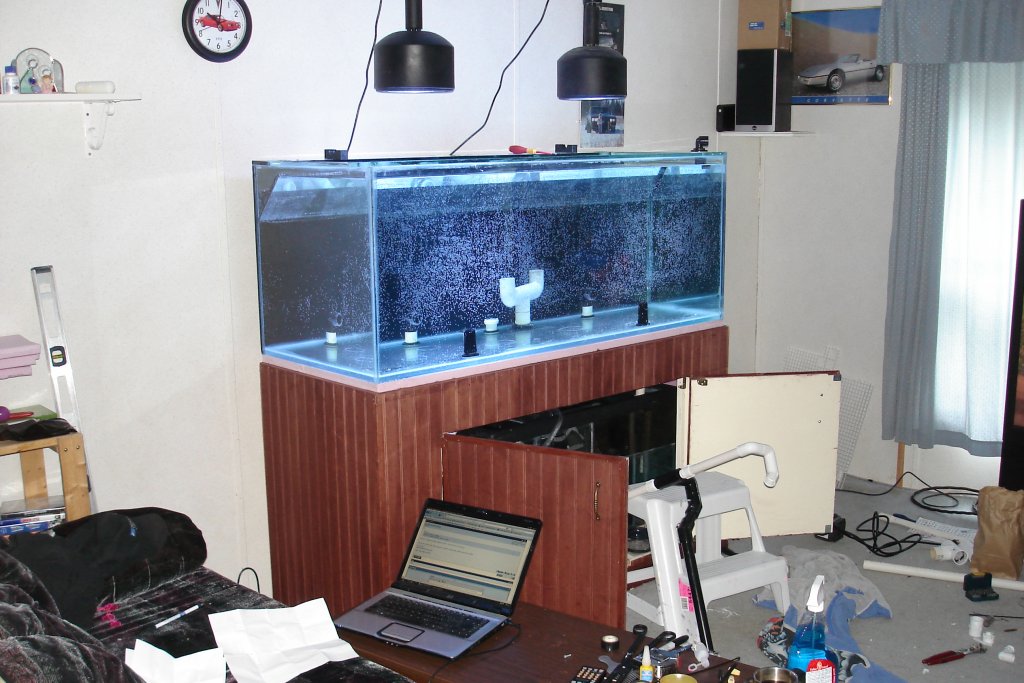
__________________
Dan Pesonen Umm, a tank or 5
|


 Linear Mode

