
 |
|
#1
|
||||
|
||||
|
Background: About a year and a half ago I purchased a 330 gal Starfire tank of a fellow reefer. One snowy December Saturday my wife and I took the company truck and headed from Williams Lake, BC over to Edmonton to pick it up. The tank had been cut apart to facilitate the move out of the basement. Upon arrival in Edmonton the seller informed us that in the process of getting everything ready for the pick up, the bottom pane of glass had gotten into a fight with physics and as usual physics won.
In light of the situation the seller decided to offer us the remaining glass for free, as I had to replace the bottom. He also gave us a whole pile of pvc, unions and ball valves as well as a diy 100gal sump and another 75gal tank that could be used as a refugium. I did purchase 2 Reeflow Snapper pumps as well as his remaining salt mix stockpile. 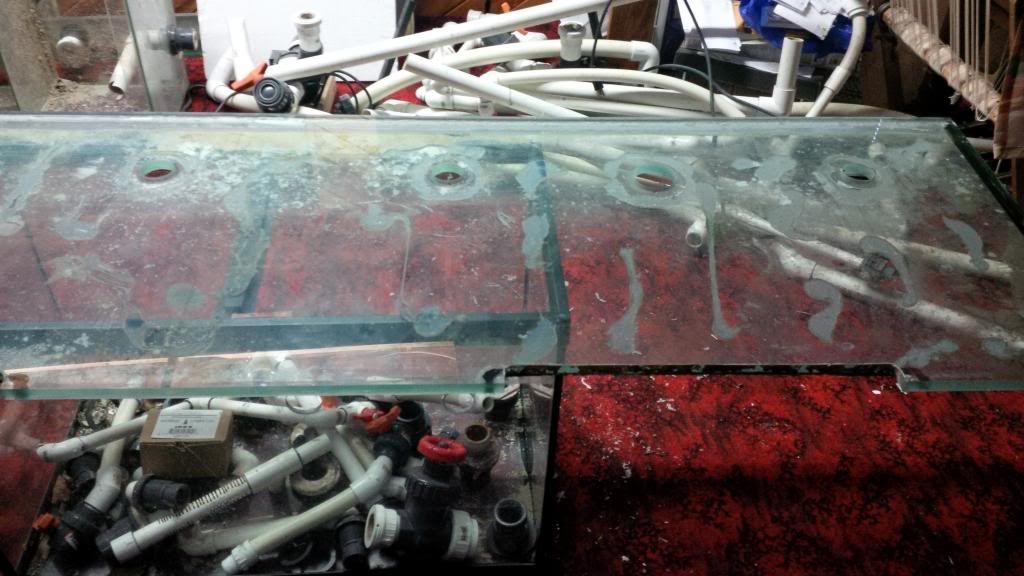 All that sat in our basement for about a year until I could muster up the energy to get into the build. After getting a price for glass, 19mm ~88.5" x ~28.5", shipped to Williams Lake and weighing against that my desire for viewing my coral through the bottom, I decided to explore other alternatives...like plywood. This went right along with my theme for this build as I wanted to do as much diy as possible, not necessarily for money savings but for the fun of building something and see it working. So my plan for the build turned out to be: Tank: 19mm 90"L x 30"W x 27"H, plywood/fiberglass bottom. Front and left Starfire viewable. Stand: PT 2x6, 1" plywood top, 3/4" plywood front and sides Sump: The 100gal diy, modified to meet current needs Circulation: The picture above is of the back glass, you may notice it is drilled for closed loop. The 2 Reeflow Snappers have been converted to Darts and one is driving a 2 in 4 out CL the other is returning from the sump. This should provide just shy of 20 times turnover in the DT. I also use a Tunze Wavebox 6215 to slosh the water around. Not sure tho what this would equate to as far as turnover. Lighting: Was thinking diy LED, but after checking pricing on the components I went with 6 Evergrow 115 watt LED fixtures. Skimmer: 36" tall Lifereef skimmer with a Blueline 1200gal/hr pump and a Mazzei injector. (Have not regretted this) Also, 2 diy reactors for GFO and GAC |
|
#2
|
||||
|
||||
|
following along, sounds interesting making a plywood/fiberglass bottom
You might find this large tank build with a fiberglass bottom interesting. https://www.youtube.com/watch?v=OtVt...mwd1wwlxQIsbKU |
|
#3
|
||||
|
||||
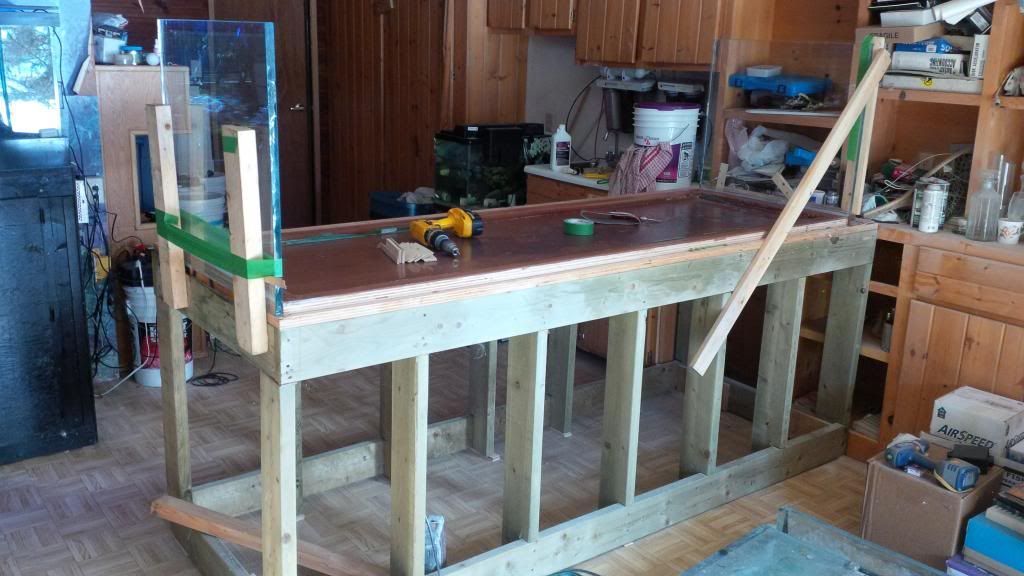 So here we go, stand is build and leveled. Fiberglass has been poured over matting to about 5mm thickness. I glued/screwed a 1" x 2" plywood frame, with the tank's inside dimensions, on top of the plywood bottom to provide me with a surface to silicone the glass to. 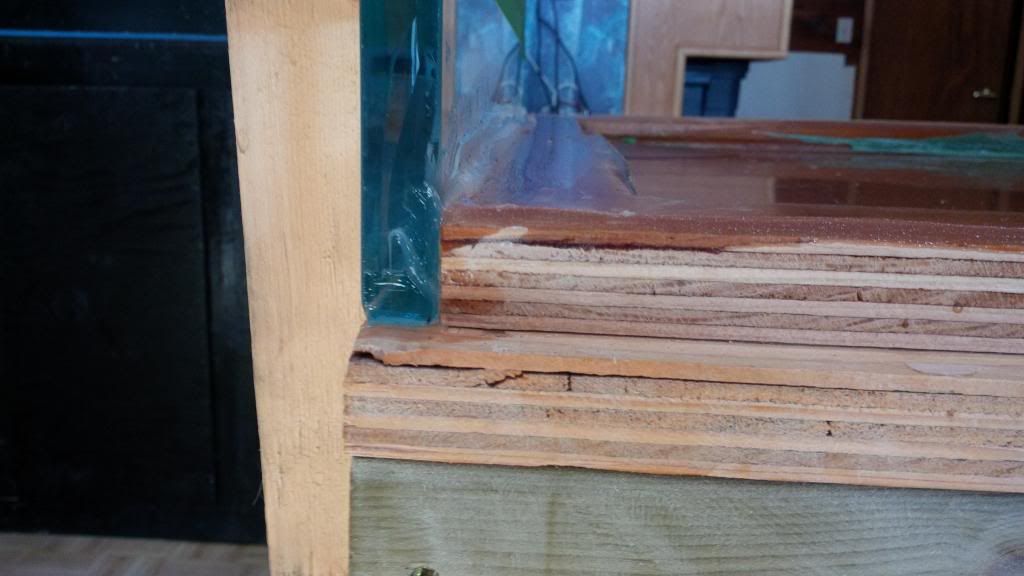 After I had finished assembling the tank I chickened out and glued pond liner to the fiberglass just in case it may develop a crack. I used polyurethane to glue the liner. As you can see, I also started on the plumbing for the CL 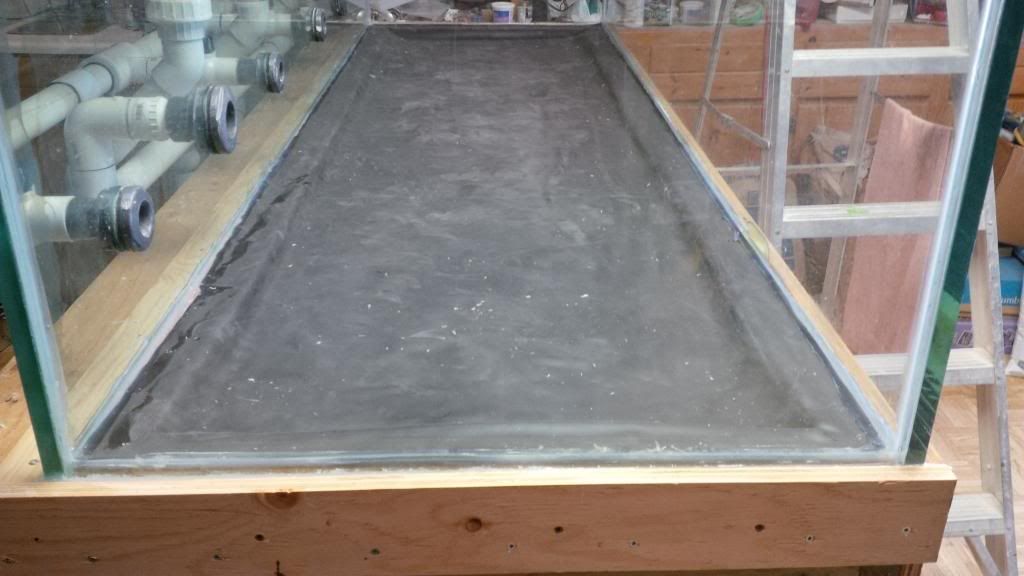 Time to hang the external overflow box for the coast-to-coast and get going on the BeanAnimal style plumbing 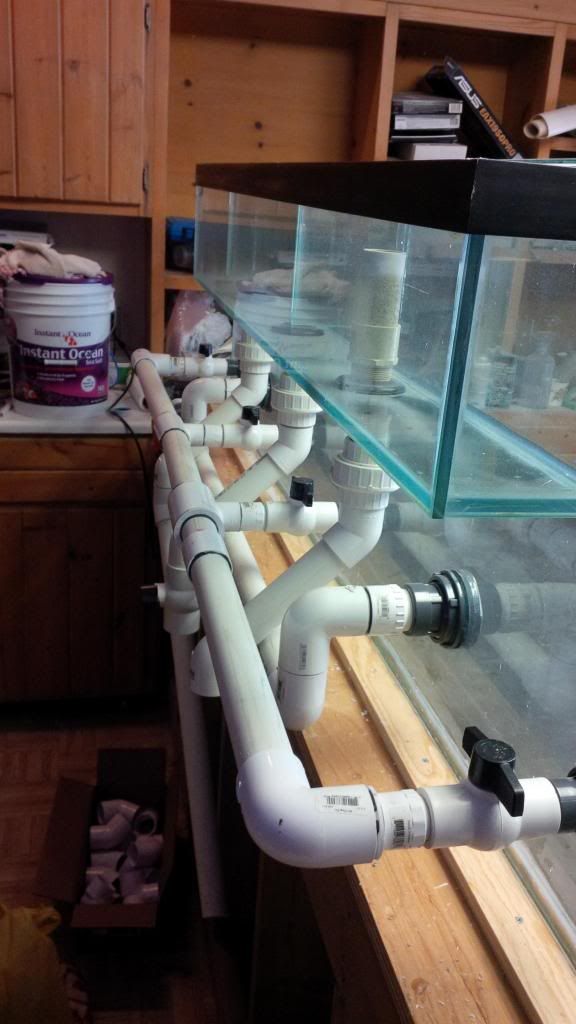 Overflow and closed loop plumbing is done 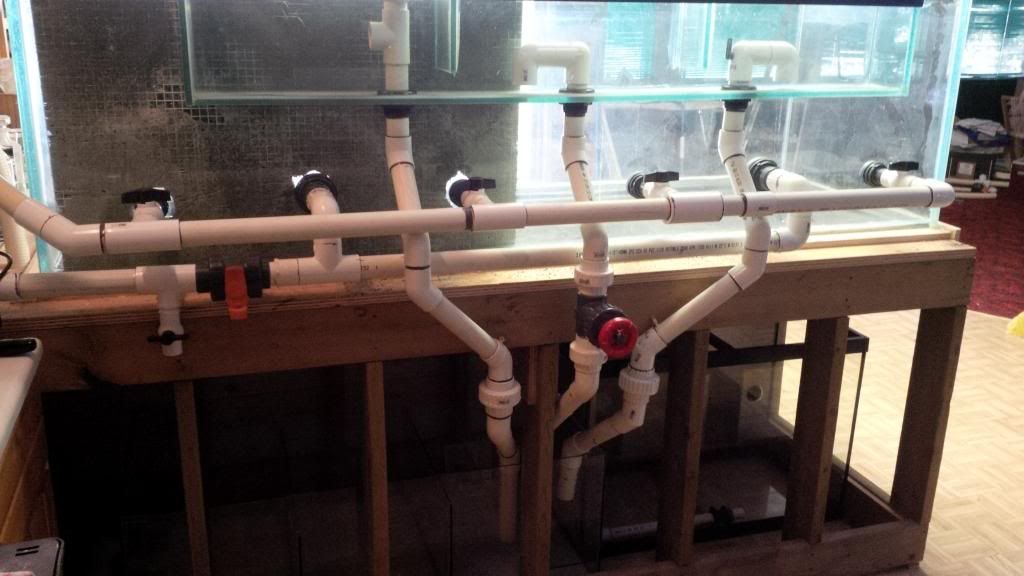 For my back wall I wanted a solid live rock structure, diy for sure. Starting out with 2 sheets of the reefers secret weapon, I ended up with this. 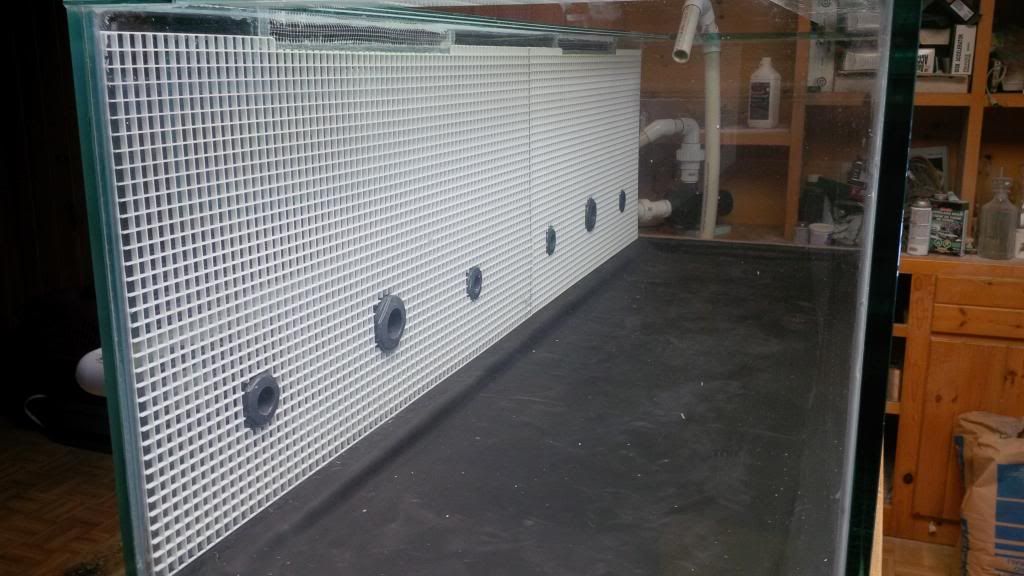 |
|
#4
|
||||
|
||||
|
Getting into diy live rock was fun. There are lots of recipes on the web about it as well as lots of discussion on the pros and cons of it. Hours of reading if you are up to it. I did settle on going for it and went with 2 part cement Portland Type 1, 4 parts crushed oyster shell (the chicken stuff from the feed store) and water softener salt (for porosity). I mixed up a batch of the ingredients in a bucket and just dumped it onto a plastic sheet on the basement floor in the shape of a simple pile and let it cure.
After it had set I took it outside and crushed it with a sledge hammer into random chunks. IMO, this provided me with much more natural/random looking rock then I could have made using molds. I then mounted these chunks to the eggcrate using a 1 to 1 cement/oystershell mix, little on the wet side to get into the eggcrate and the pores of the LR. 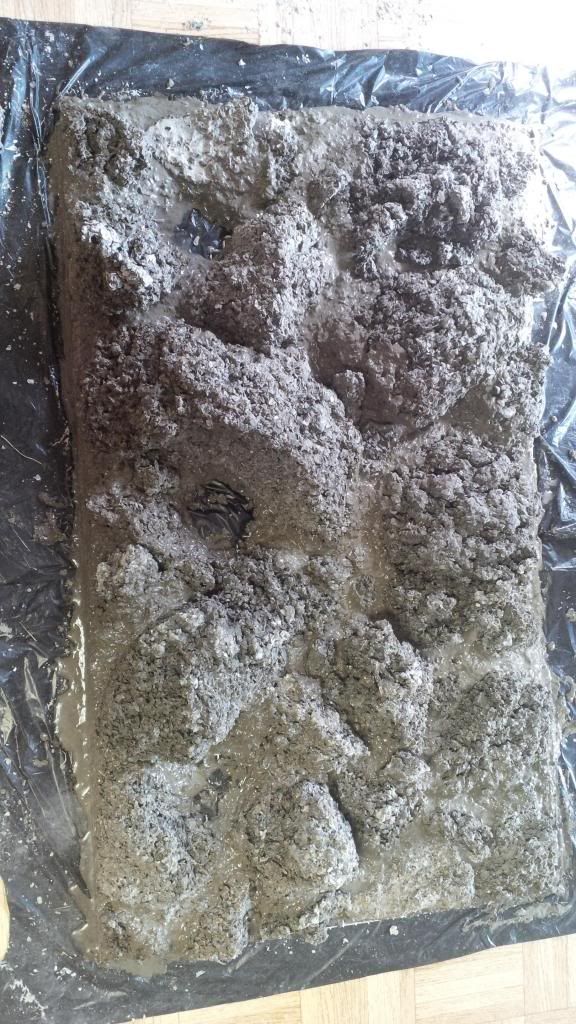 Close up of the rock 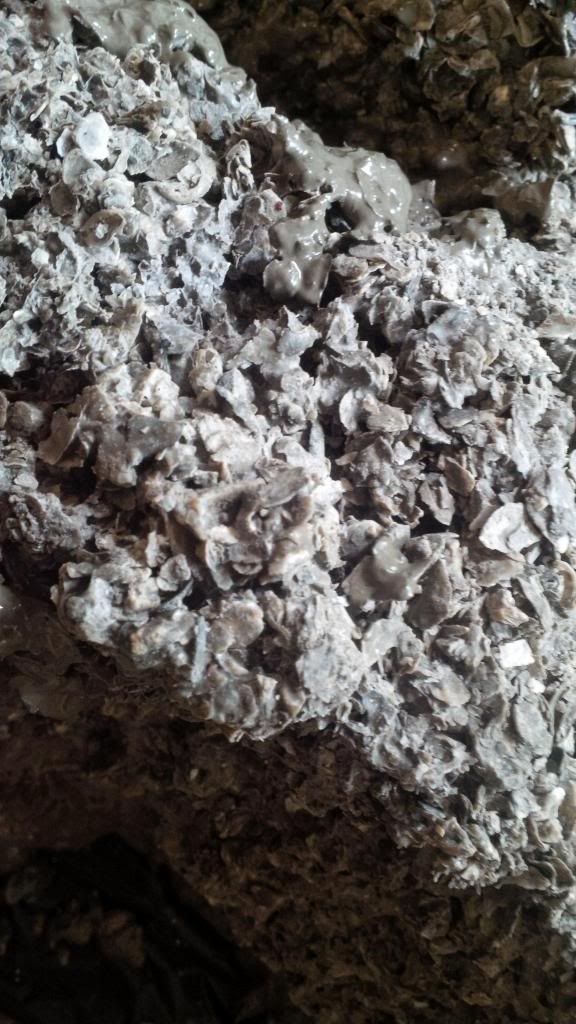 Back wall is finished. Btw, make sure you eat your Wheaties lifting these 2x4 sheets into the tank, apparently concrete is heavy! 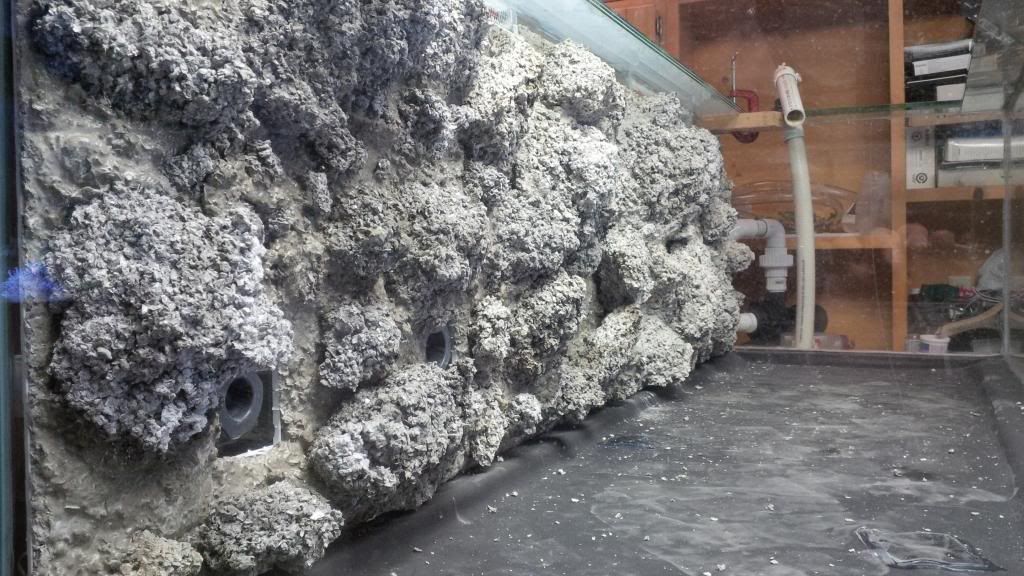 |
|
#5
|
||||
|
||||
|
Thank you for following along, hillegom
|
|
#6
|
|||||
|
|||||
|
This looks like quite an interesting build. The texture and shape of the wall is amazing. What holds the egg crate/rock structure to the rear glass to keep it from falling forward?
__________________
"We shall dive down through black abysses... and in that lair of the Deep Ones we shall dwell amidst wonder and glory forever." - H.P. Lovecraft Old 120gal Tank Journal New 225gal Tank Journal May 2010 TOTM The 10th Annual Prince George Reef Tank Tour |
|
#7
|
||||
|
||||
|
That looks like a great start to an interesting build. Following along!
|
|
#8
|
||||
|
||||
|
I have heard that cement leaches a lot of lime and will raise the ph too high for a month or so. When u put water in, put in fresh first and monitor the ph for a while to see what happens.
|
|
#9
|
||||
|
||||
|
I glued a few short pieces of 1.5" PVC under the back euro brace to prevent the wall to tilt forward. Also, the bottom edge of the sheets is about 1" away from the glass and leaning back slightly
|
|
#10
|
||||
|
||||
|
Quote:
I currently have about 300 lbs of concrete curing to be used for additional structures. As of this writing the tank finished cycling about 3 weeks ago, ph is stable at 8.4 and I have fish in it. I dropped in about 2lbs of real live rock and I am just waiting now for purple spots to pop up I am just slow in catching up with the build timeline and getting pictures uploaded |