
|
|
|
#201
 12-24-2012, 09:22 PM
|
||||
|
||||
|
me please....from one home brewer to another,
__________________
65 Gallon FOWLR, 15 Gallon Sump, 4*36 T5 
|
|
#202
12-24-2012, 09:27 PM
|
|||||
|
|||||
|
Quote:
I placed a subtle hint of this in the pic  Last edited by sphelps; 12-24-2012 at 09:34 PM.
|
|
#203
12-24-2012, 09:45 PM
|
||||
|
||||
|
Quote:
__________________
65 Gallon FOWLR, 15 Gallon Sump, 4*36 T5
|
|
#204
12-24-2012, 10:22 PM
|
|||||
|
|||||
|
Wow, mad skills right there man. I should have asked for your basement for Christmas.. At least now we know where the next reef meet will be. :-D
.. But only if you serve wings.
|
|
#206
12-24-2012, 11:03 PM
|
|||||
|
|||||
|
HOLY SHYTE Steve! That look absolutely incredibly awesome!! Big change since I dropped off the stand, very very nice.
__________________
Feed the bear goodies, make a new friend, don't feed the bear............... 8' - 165gal Reef DIY LED's Build 2012 Nano Contest Winner Febuary 2013 POTM Winner 300 gal + 60 gal Complete DIY Build
|
|
#208
03-03-2013, 03:42 PM
|
|||||
|
|||||
|
Got busted buying some plumbing parts yesterday during Brett's regular stalking routine so I figure I should probably post a little update.
Decided to rebuild my sumps since I pretty much have the equipment I want figured out and I was getting tired of how it was setup before. Always room for improvement and with the help of a friend I came up with a more efficient and simplistic way of setting things up. I've also been itching to build some acrylic sumps again Here's what it looked like before I started: 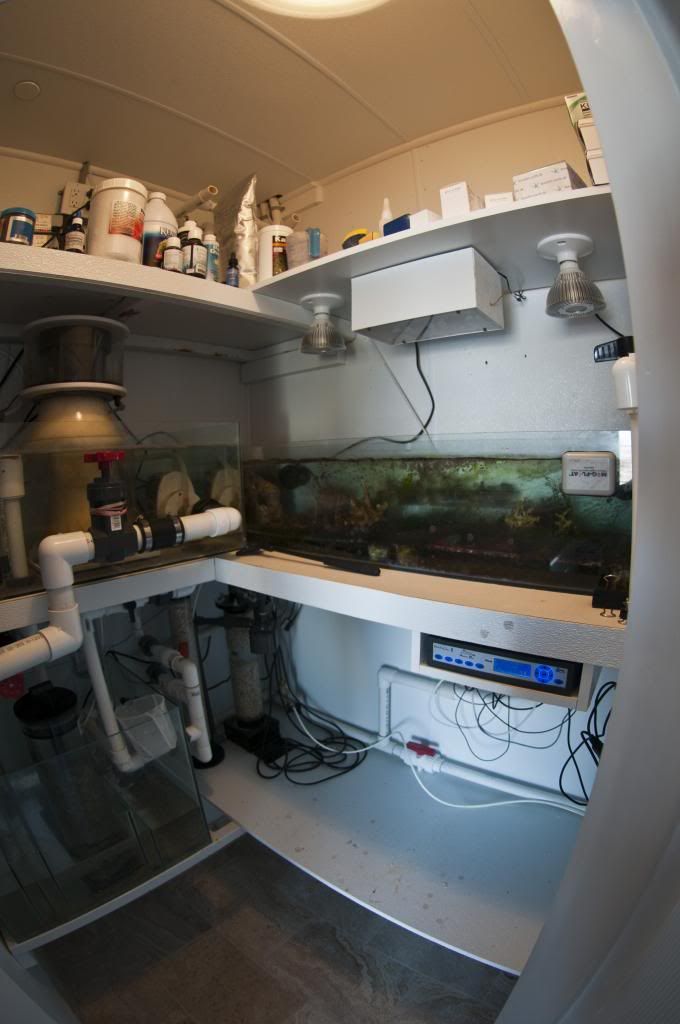 Here's the new acrylic sumps to replace the old glass ones: This one is basically a frag tank, the black boarder around the base will support my new custom frag racks that I still need to make. 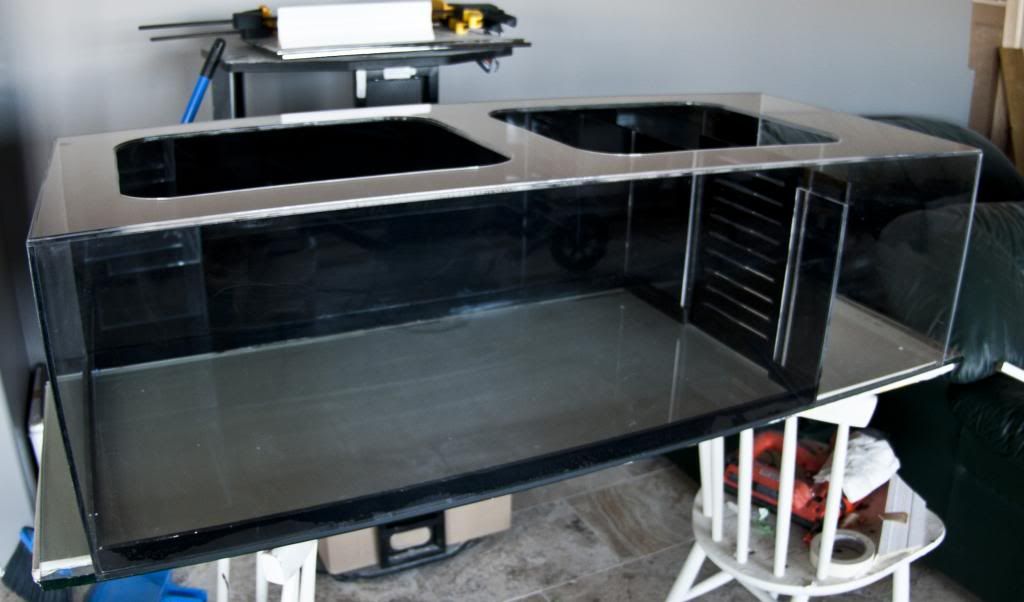 This one will hold all the equipment. 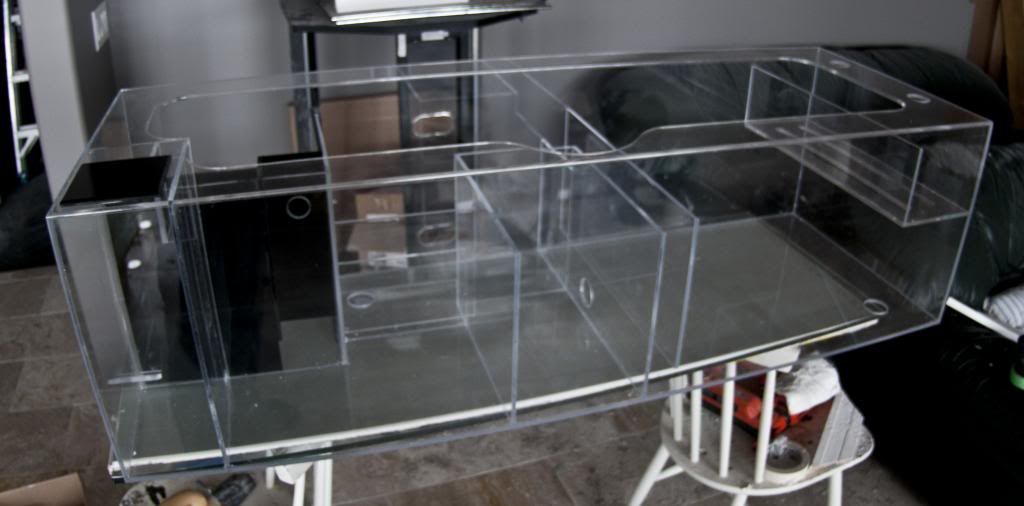 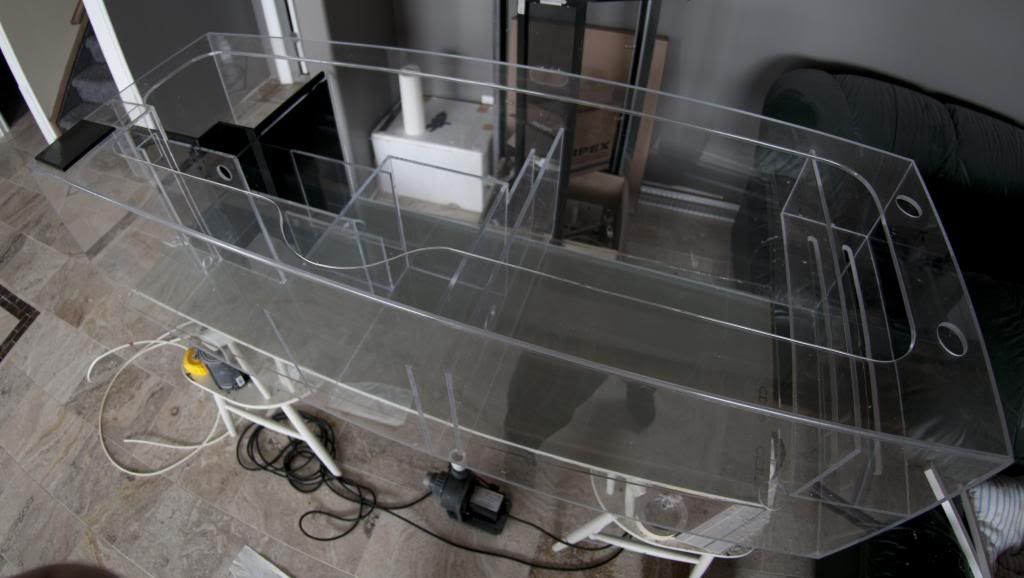 Here's some midway pics from this morning 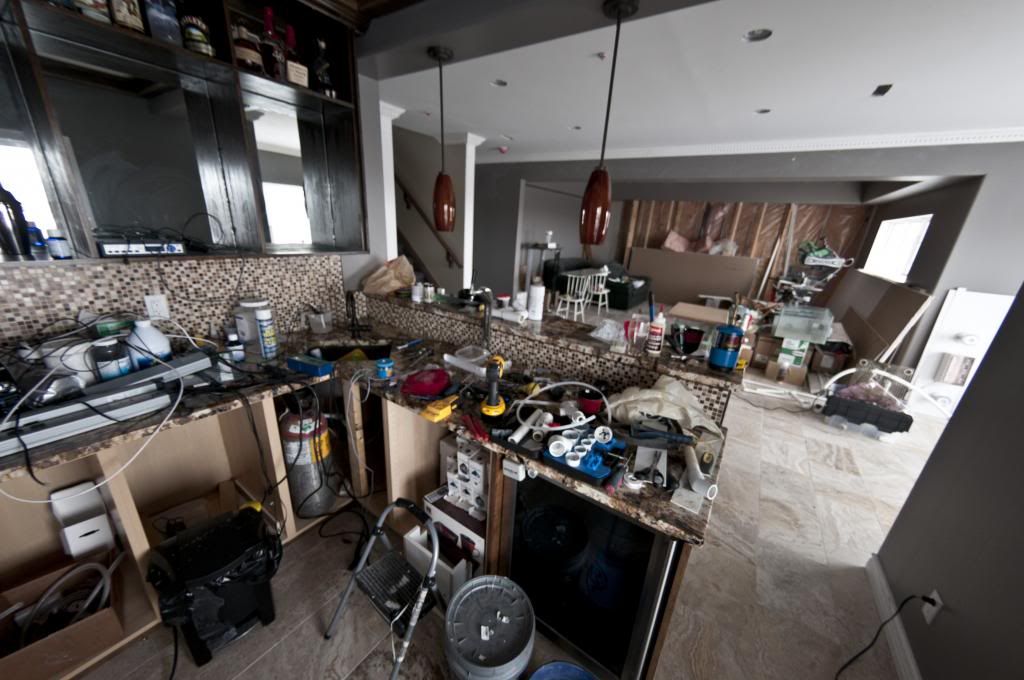 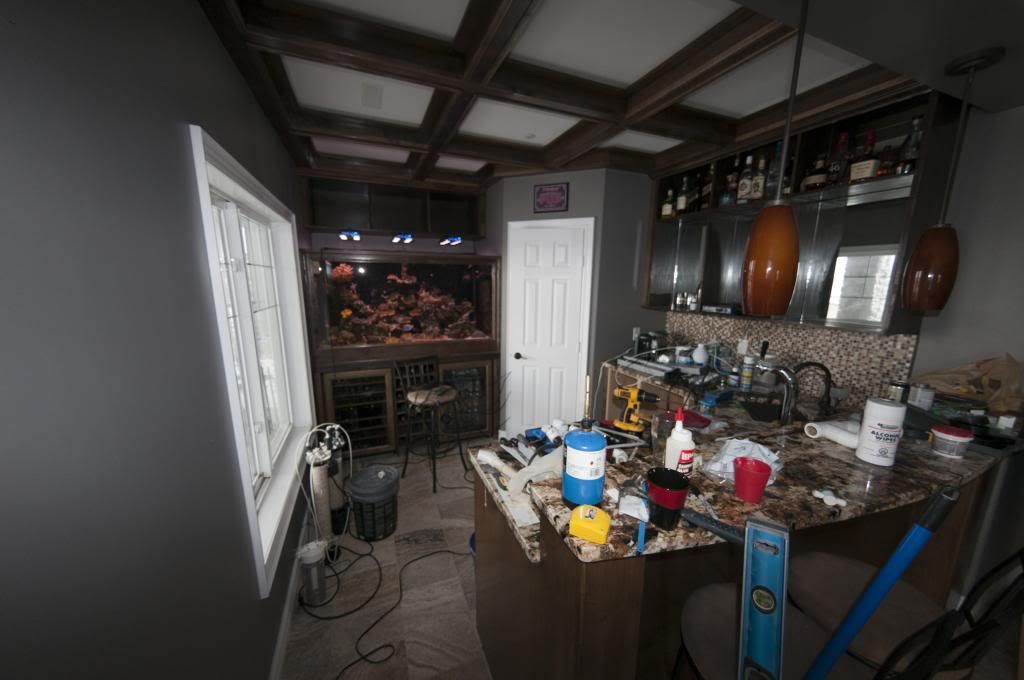 And here's my progress so far, plumbing pretty much all done. 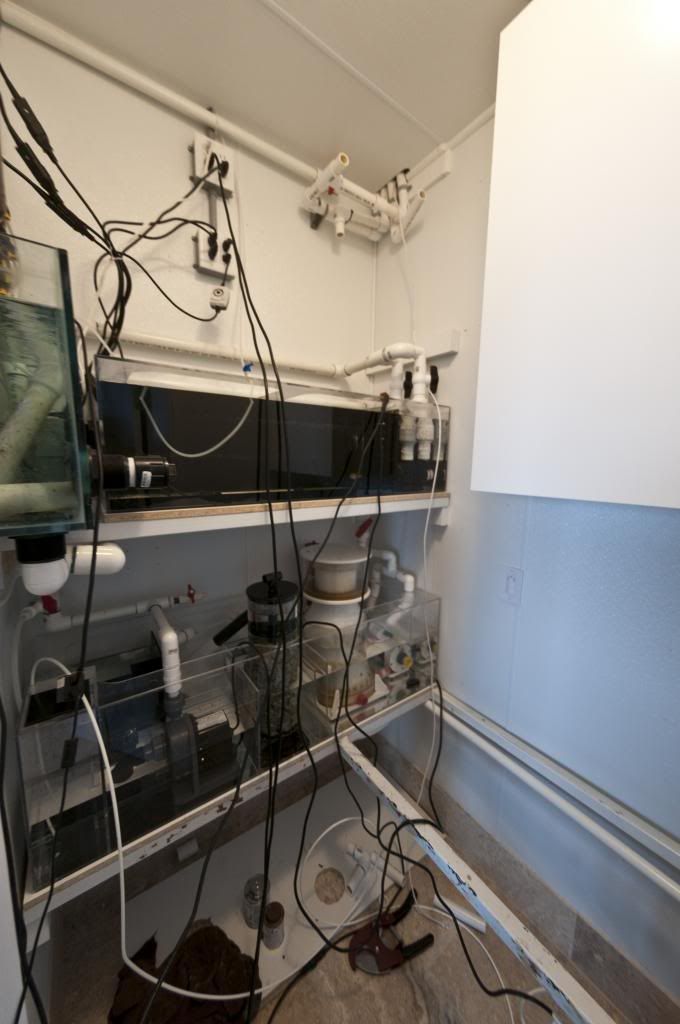 Here's my basic plumbing layout 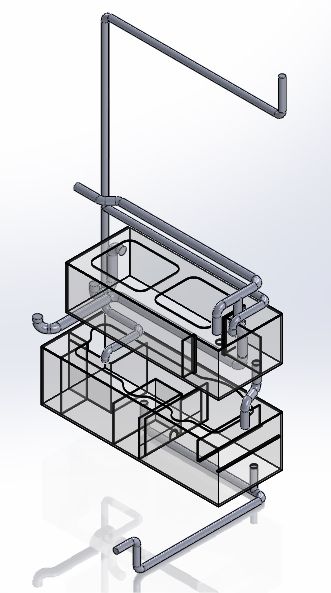
|
|
#209
03-03-2013, 04:27 PM
|
|||||
|
|||||
|
Looks good Steve! I can't wait to give the setup a try on my tank. Denny said he was going to send me some pictures of the tank soon.
Where is your overflow water draining into? I see a line that runs along the bottom of your top sump but can't tell where it connects to. The return from the lower sump is on the top right corner correct?
|
|
#210
03-03-2013, 04:52 PM
|
|||||
|
|||||
|
What happens at rona stays at rona I was giving you a free pass
 Did you build the sumps yourself? Those look sick! What thickness did you use?
|


 Linear Mode

