
|
|
|
#11
 08-17-2012, 06:01 AM
|
||||
|
||||
|
I will just use few pvc 90 and build that return, over the rim of the tank, and back into the water. and drill a small hole on the pvc at water line which will act as your siphon break.
way less work than drilling holes on the back pane and have to worry about too much water drain into the sump during power outage.
__________________
150DD mix reef with 90 gal sump and 40gal frag tank purple tang, sohal tang, yellow eye kole tang, fairy wrasse. cleaner wrasse, leopard wrasse, and misc fish. GHL Mitras 6200HV X 2, MP40 X 2, MP60 X 1, tunze 6095 X 2, Vertex RX6 calcium reactor, Bubble King SM250, Aquamaxx bio pellets reactor, Profilux 3 
|
|
#13
08-26-2012, 04:24 AM
|
|||||
|
|||||
|
Yup, you do
 I need some stocking advice for my tank. Right now I have in my 77gal: 1 Yellow eye Kole Tang 1 Flame angel 2 Occelaris clowns 2 Schooling banner fish 1 Starry blenny 1 purple fire fish 1 Two spot goby 1 Green mandarin 2 skunk cleaner shrimp 2 peppermint shrimp misc assorted hermits and snails 1 sand sifting star fish 1 tiger brittle star 1 electric flame scallop 1 Crocea clam 1 frog spawn 1 torch coral 1 duncan tons of pulsing Xenia a few acropora a few montipora zoa's GSP 1 birds nest 1 poccillapora and probably a few other corals I've forgotten The banner fish, clam, mandarin and two spot goby are likely just visiting, helping out a friend after a move crash. What I'd like to add to the list when I stock my 210 is another tang or 2. Because of my battle with Dichtyota, and the fact I like their looks, I was thinking a Naso tang and possibly a yellow tang (not sure if it'll get along with the kole tang though) I'd also really like to get a shoal of fish. I was originally thinking 5 Bartlett's Anthias. Has anyone had any experience with these? I'd also like to add some kind of wrasse if it's compatible. My new aquascaping will probably be a small wall on one side of the tank with a couple islands. I really like negative space on the sand and want to use the islands to create that effect. Right now I'm running 2- 250W MH's with some VHO T-5 actinics. I'll eventually be building an LED rig for the 210 as well but that's probably a year down the road. I obviously like the look of a full mixed reef, SPS, LPS, softies etc. so lighting will be everything from very well lit to darker areas. Any recommendations of fish you've absolutely loved? Any thoughts to when I should introduce each fish is also going to be of great help. Especially when I should be introducing the yellow eye kole tang and the Naso. I won't be tearing down the 77 DT until the 210 is fully operational, so introductions can be made slowly.
|
|
#14
08-26-2012, 04:53 AM
|
||||
|
||||
|
yellow tang is almost a must in any reef system. and a tang from Acanthurus family or more if you can introduce them at the same time.
Kole can go in first, acanthurus, yellow, then naso. Probably lot easier if everything goes in the same time. School of yellow tangs is actually quite cool. I have 3 right now, thinking and planning on 2 more of them.
__________________
150DD mix reef with 90 gal sump and 40gal frag tank purple tang, sohal tang, yellow eye kole tang, fairy wrasse. cleaner wrasse, leopard wrasse, and misc fish. GHL Mitras 6200HV X 2, MP40 X 2, MP60 X 1, tunze 6095 X 2, Vertex RX6 calcium reactor, Bubble King SM250, Aquamaxx bio pellets reactor, Profilux 3
|
|
#15
09-08-2012, 03:04 AM
|
|||||
|
|||||
|
Houston.... we have a bit of progress.
Well, after a long last couple weeks I've finally been able to get some work done on the sump I plan on using for this system. It's a 110 gallon I helped liberate out of Brad's back yard. Thanks again Brad!  I got 'er all cleaned up and removed all the old baffles and with the help of Greg, Sphelps and a couple others I came up with a design I think will do what I want it to. Thanks guys! Greg: I really like the way you mounted your heaters and I think I'll be doing something similar in the very first chamber where my drains dump into the sump. Here's a pic I took tonight while doing a water test on the sections. The first section is going to be where the drains empty into. The water will fill this chamber and overflow into my filter socks. Thanks to Greg, I raised the end baffle in this area an extra inch or so, so water wouldn't overflow and skip the socks as easy if they plug up just a bit. The next chamber is going to be my skimmer section. The skimmer will be held at the correct depth by sitting on egg crate that rest on 4 - 4" diameter ABS pipe cut the correct height for my SRO skimmer. There will be as many 2" holes as I can cut into the sides of those 4" pipes to allow for water flow in and around them. In my existing sump, I've actually even filled them with LR rubble and will no doubt get as much rubble in this section as possible too. The next section is where I plan to set up a DIY turf scrubber and more LR. And finally, the last section is the return chamber. I've yet to decide where I'm going to drill the bulk head for the external pump. I'm tempted to drill the bottom and put some LR in here as well. Brad: If you're reading this, do you know if the bottom is tempered? The plan is to have a remote refugium. Anyway, here's the pics: 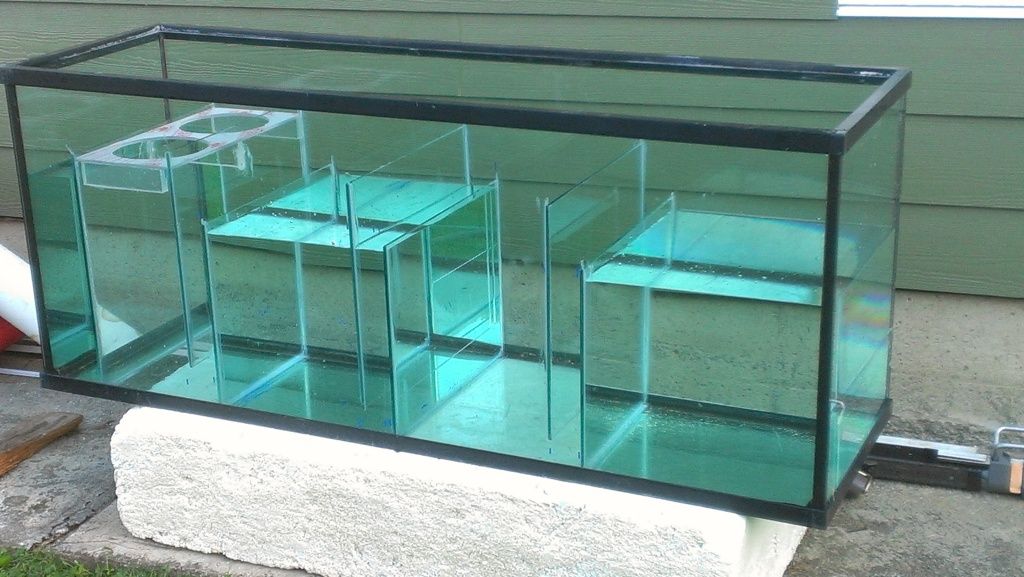 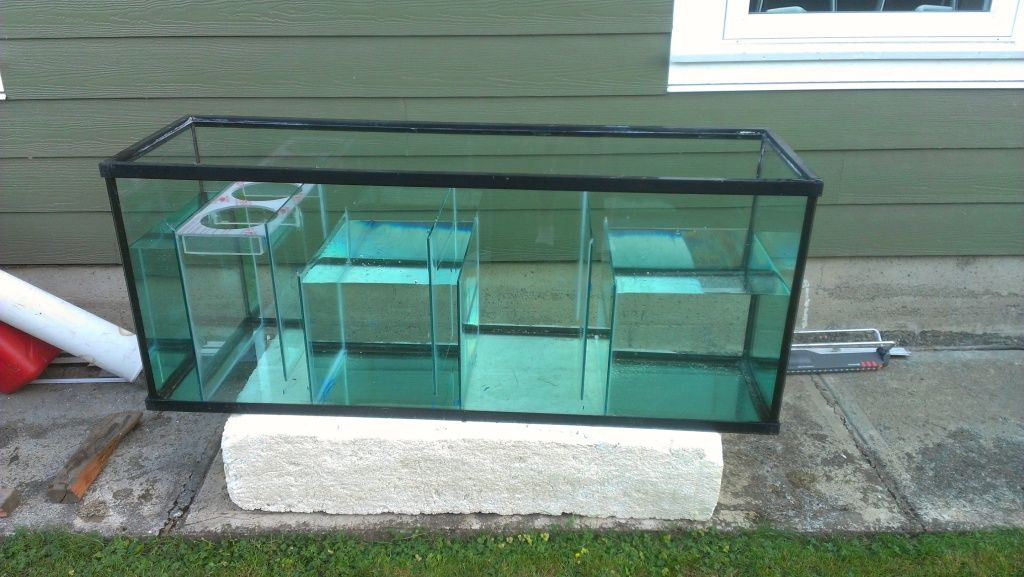 I also finally got my calcium reactor on line tonight. What a pain bleeding the air out of that first section. Little air bubbles constantly keep getting caught in the plastic media in there. Is there a trick to getting all that air out so the pump isn't sucking air into it for an hour and a half? Hmmmm, may have to do more reading on that me thinks. Anyway, we have a bit of progress. If work ever slacks off, maybe I'll find time to build my stand for the sump and the one for the tank. Last edited by daplatapus; 09-08-2012 at 03:06 AM.
|
|
#16
09-08-2012, 03:59 AM
|
|||||
|
|||||
|
Lookin' awesome so far
I gather you mean me when you talk about Greg and the heaters and sock overflow ... I drilled my sump for a return pump and an accessory pump The first time I hooked them up I had a small disaster Long story short, I siliconed the holes shut and now run my return and acces pumps internal Nothing like having flexibility when the tank is not drilled Plus, the less holes in the glass the better I like where you are putting your heaters as they will not be bypassed like mine can - potentially Are those sock holes 7" ? Keep the pics coming
|
|
#17
09-09-2012, 06:36 PM
|
|||||
|
|||||
|
Ya, I did mean you.
(it is Greg isn't it?) lol I liked what you did with your sump and your use of limited space. I'm running a Reeflo Barracuda for a pump and I don't have much of a choice but run external with the amount of flow I need. Half the problem is 12' of head I need to push against. I drilled my existing sump on the side and it works really well, but because of it a do lose a bit of space on that side as I also tied in my dump valves for my water changes there too. And it's really the only side I have access to for working on it. So if I had drilled the bottom, I wouldn't have to step around a bit of plumbing, as all that piping would be under the sump. I have 4 - 7" filter socks already so I figured I might as well make my sock holder for them. It looks like it's going to work really well and I can't wait to get it plumbed in.
|
|
#18
09-09-2012, 09:24 PM
|
|||||
|
|||||
|
Ya, it is Greg, but I'm not the only one on here
You're going to like having 7" socks I only went with 4" to save space Maybe my next sump ...
|
|
#19
10-31-2012, 11:33 PM
|
|||||
|
|||||
|
Well, like I posted in my 77 gal build thread my new sump is up and running. You're right Greg, LOVE the 7" socks and the new filter holder I built for them. Way easier to change now. Something is a bit weird with the sump but not sure what it is. Here's a pic:
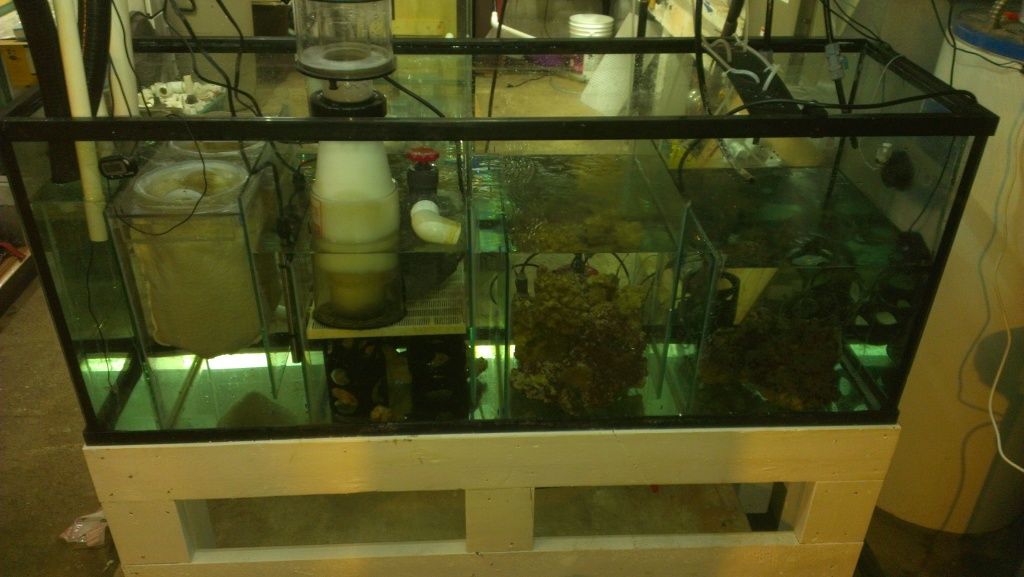 The return chamber on the right for some reason gets a bit of a pressure wave across it and it's really screwing with my Tunze ATO. The wave, which gets to be about 2"-3" high, makes the infrared eye bob in and out of the water and messes it up and it overfills the return chamber. I don't know what causes it. The other bit of progress we have is I finally got to finishing re-sealing the 210. A pic my wife felt she had to take and post on here 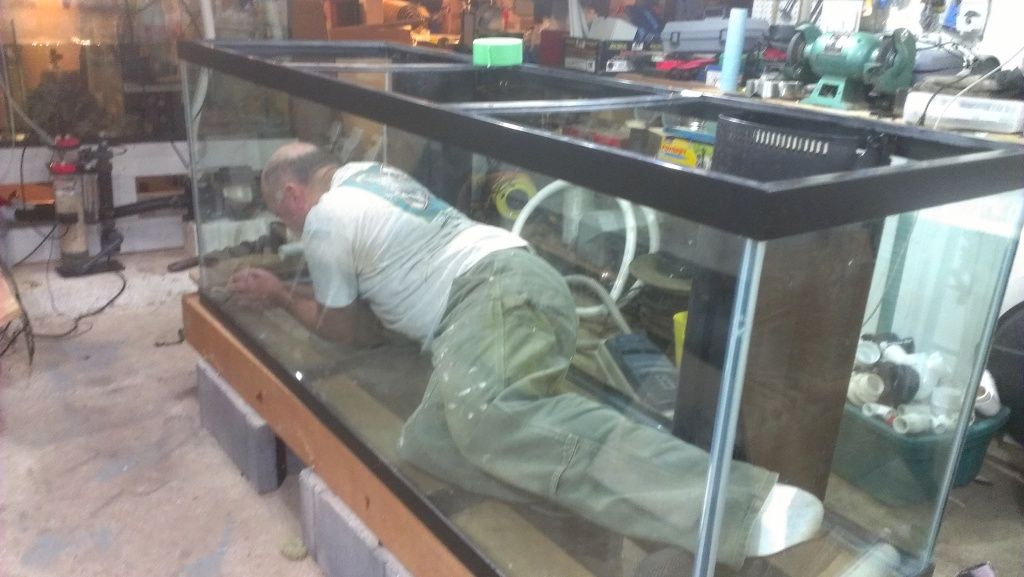
|
|
#20
11-01-2012, 01:59 AM
|
|||||
|
|||||
|
How high were you at the end of the re-seal inside the tank haha... I'm betting either of these 3.
1: As high as the clouds 2: Virtually unaffected 3: Cut my head off, its going to explode. Looks good now its time to put water in the tank 
|


 Linear Mode

