
|
|
|
#11
 05-07-2010, 07:23 PM
|
|||||
|
|||||
|
Yeah, Reef Geek does pack the tubes extremely well. I was a bit worried since they had so far to travel but I don't think the bulbs would have broke even if UPS had rolled their truck.
As for a bulb combo, I went with 6 ATI Blue Plus, 3 ATI Aquablue specials, 1 GE 6500K Daylight, and 2 KZ Fiji purples. When all the tubes are on, the tank has an ~14K look to it so I'm much more pleased with this than my 8 bulb fixture tube choice which gave me more of a 10K look. I also just sold the 8 bulb Stealth yesterday. Now there are 2 of us in Regina in the Italian Lighting club. Not the best pic but you get the idea 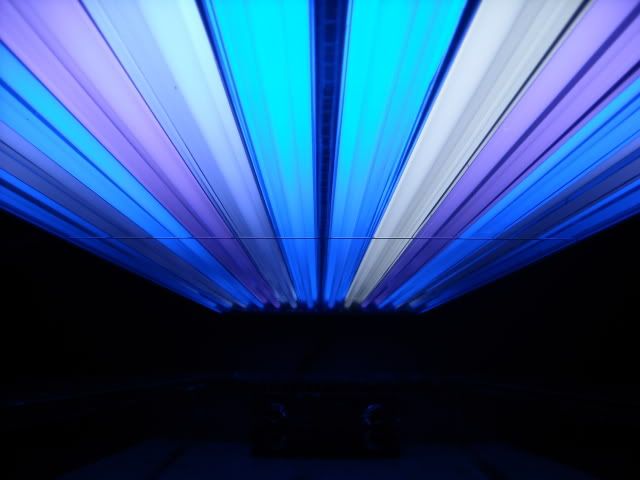 Also made some progress on getting my electrical cord holes cut in the eurobracing. 1 down, 3 to go. Hole saw jig I made out of acrylic. Keeps the bit centered and acts as a damn to hold water around the bit. 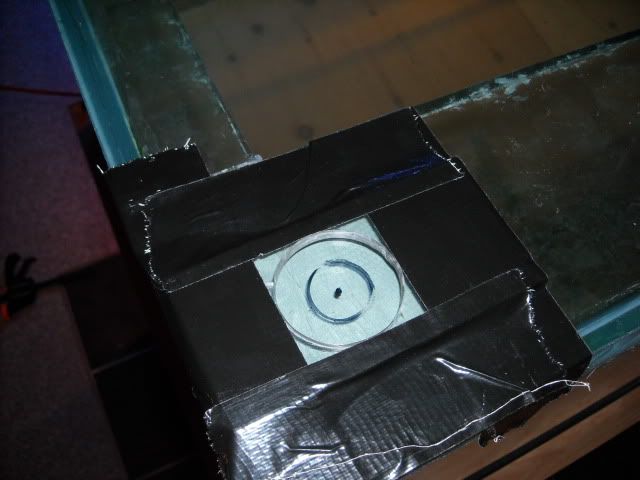 All finished up with the uniseal installed. I ended up with a few minor chips on the bottom side but I'm not worried since its only the eurobracing and you won't be able to see them once I have the trim installed around the top of the tank. 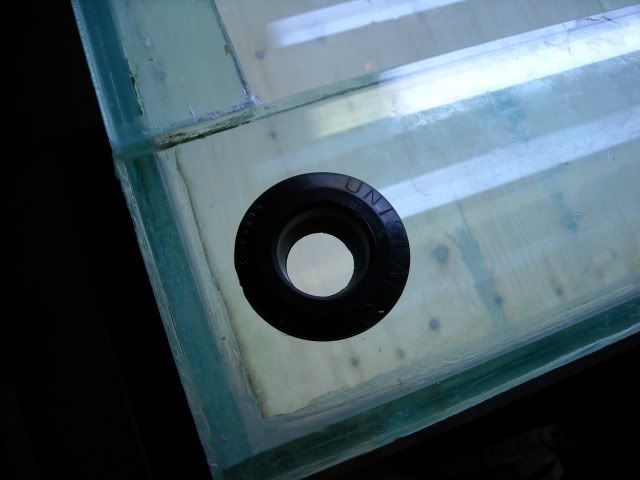
__________________
Do or do not....there is no try. 
|
|
#12
05-07-2010, 07:47 PM
|
|||||
|
|||||
|
Nice touch with the uniseals.
Yeah that combo is darn near exactly what I was running but I used 2 procolors instead. I never had coral in there but to my eyes it sure looked like ANYTHING would have looked very nice under it.
|
|
#13
05-11-2010, 05:54 PM
|
|||||
|
|||||
|
Great job on the build so far! Looking forward to seeing the light in action once the tank is stocked.
__________________
Tim - Aquatics Elite North American Distributor of SFILIGOI Technologies www.aquaticselite.com info@aquaticselite.com
|
|
#14
05-11-2010, 07:33 PM
|
|||||
|
|||||
|
I like the build so far. Looks very simular to what I'd like to do. I even have the same lights, the most prize piece that I've aquired thus far. I really like the schedule 80 so much better than the 40, to bad its so pricey. Great work so far

__________________
Mike 150g reef, 55g sump, T5's, Vertech 200A, Profilux III - German made is highly over rated, should just say Gerpan made. Reefkeeper - individual obsessed with placing disturbing amounts of electricity and seawater in close proximity for the purpose of maintaining live coral reef organisms.
|
|
#15
05-11-2010, 11:59 PM
|
|||||
|
|||||
|
Thanks for the compliments everyone. Luckily I was able to get the tank salted before I got called back out to work. I couldn't believe it took nearly 2 full pails of reef crystals to get the tank up to 1.025!
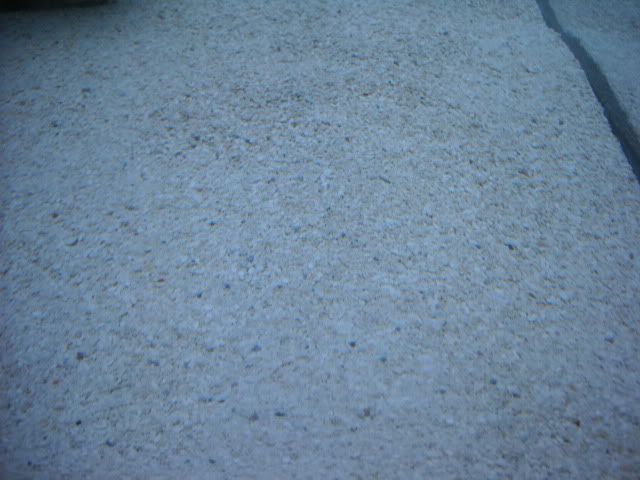
Also got my substrate put in the tank but I didn't have time to snap any pics. I ended up going with Caribsea Seaflor Special Reef Sand. I had sugar sand in the previous setup before moving and I always had bare glass showing on the bottom of the tank due to my vortechs. I really wanted to avoid this but I didn't want to go bare bottom either. I'm hoping this substrate is large enough that it won't get blown around. So far its been behaving but the vortechs are still in the 90 gallon so all the flow is coming from two 3/4" eductors run off my mag 18 return pump. I really like the look of schedule 80 pipe as well. I tried getting most of what I needed for the plumbing off of BRS but plans changed and I ended up having to get about 2/3 of the fittings and all of the pipe from a local pump warehouse. I'm sure I ended up spending over $300 on the pipe and fittings whereas I could have probably done the whole thing in schedule 40 for under $100. Since nothing has prices on it there, you get a nice surprise when its time to pay. After seeing my invoice, I remember that the 2" sched 80 "T" fitting was $22 and I ended up needing 2 of them.......brutal. I also got the last 2 holes drilled in my eurobrace so I now have a 1" uniseal in each of the 4 corners. If (more likely when) I get a new tank built, I'm definately going to leave drilling the holes to the experts. The first 2 holes I used duct tape on the bottom side of the eurobrace to hold the glass in place so that the glass disc wouldn't fall into the tank when the bit finally cut all the way through. On both of these holes, I ended up with significant chipping when the drill bit punched through the final bit of glass even though I was taking my time and making sure to keep as much weight off the drill bit as possible. So on the last 2 holes, I decided to brace the bottom of glass with a piece of 3/8" acrylic that I clamped to the eurobrace instead of using the duct tape. My thinking was that if the glass was braced from the bottom, when the drill bit would cut through the bottom of the eurobrace, I wouldn't get any chipping seeing as the acrylic would be pushing up against the glass. In theory, everything sounds good. But in reality, I ended up with the same amount of chipping as I did using the duct tape. Its is still pretty minor as most of the chips are only ~1/16" or less in thickness but it is still angering to say the least. With the uniseals installed and after I get the trim put back on the top of the tank, the chipping won't be visible and I'm not worried about the structural integrity of the eurobrace as there was no cracking.
__________________
Do or do not....there is no try.
|
|
#16
05-16-2010, 09:35 PM
|
|||||
|
|||||
|
So I had the past 24 hours off work and made a bit more progress on the build. First, here's a close up of the substrate I used after the water cleared up.
 Once the water cleared and I got the substrate pseudo-level, I started with the rock work. 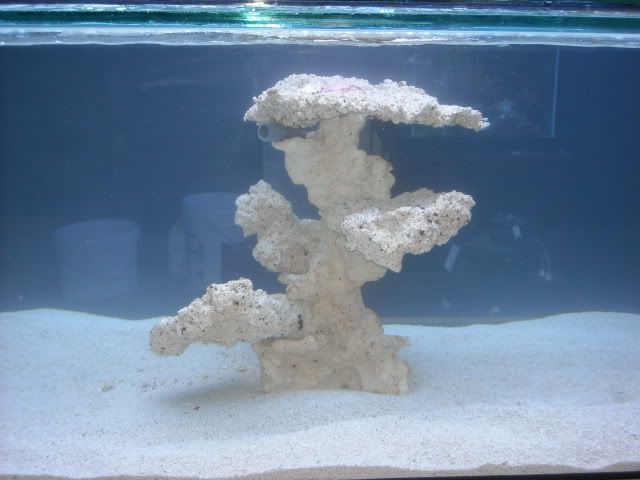 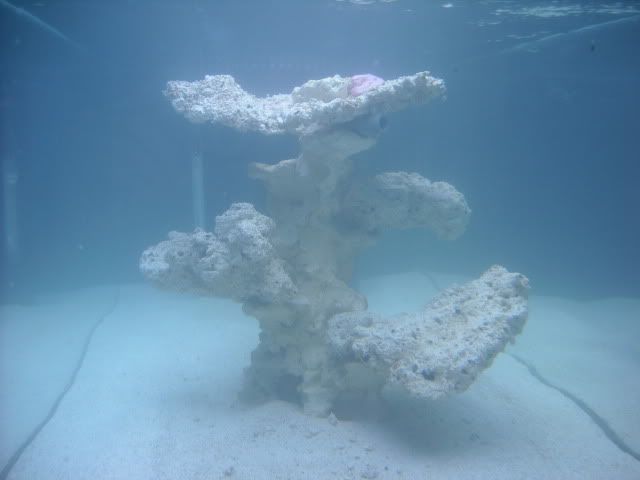 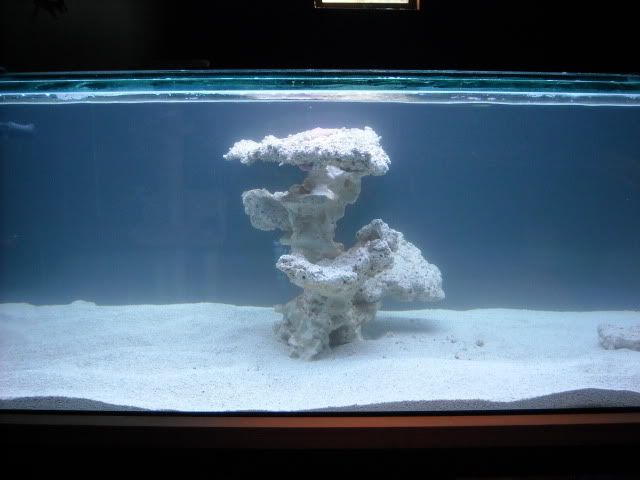 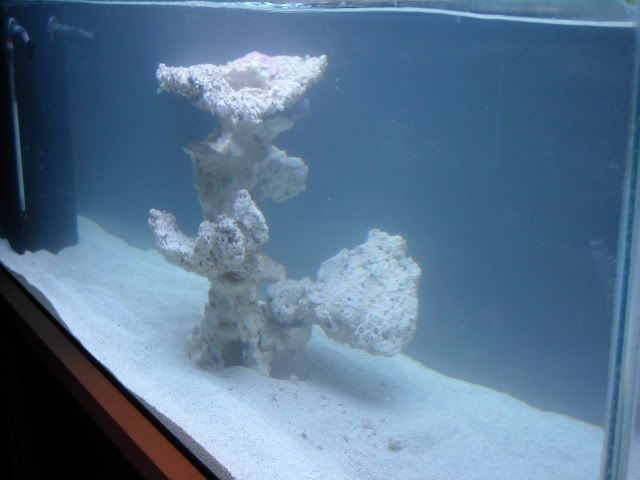 That 1/2" barbed fitting jammed in the rock is only temporary. Once the epoxy cures, I'll remove it however I may need to jam a small piece of live rock rubble in that space to help support the flat piece of rock on top of the structure. I still have about 300 lbs of actual live rock to put into the new tank as well however about 200 lbs of that is still in my running 90 gallon tank. Hoping to get the aquascaping all finished up later this week when I'm finished this stint at work.
__________________
Do or do not....there is no try.
|
|
#19
05-17-2010, 04:34 AM
|
|||||
|
|||||
|
I can picture your fish circling that thing covered in SPS. Going to look great!
The tough part with something so cool and unique...is finishing your scape. Just adding more cool towers to each side and it might lose it's appeal. But placing more basic piles in there may make it look out of place. Scaping is hella tough but rewarding when you sort it out.
|
|
#20
05-17-2010, 07:45 AM
|
|||||
|
|||||
|
that's a great looking structure indeed! Putting corals on that sucker is going to be loads of fun.
|


 Linear Mode

