
|
|
|
#11
 03-17-2008, 05:41 PM
|
|||||
|
|||||
|
When we talked, I thought all you were doing was replacing the 150w ballast with a 250w ballast. That's why I was so uninterested. LOL! What you're doing with the T5s is kinda cool though, but wouldn't it cost you less to sell the Coralife unit, and buy a new unit? Would you mind sharing a price breakdown?
 Last edited by Myka; 03-17-2008 at 05:43 PM. 
|
|
#12
03-17-2008, 05:56 PM
|
||||
|
||||
|
After you've done that at both ends, I also glued in the ballast. Now this can be tricky because if you choose the wrong spot on the reflector, it won't fit in the fixture. Fortunately, hot-gun glue can be stripped away fairly easily if you get it wrong.
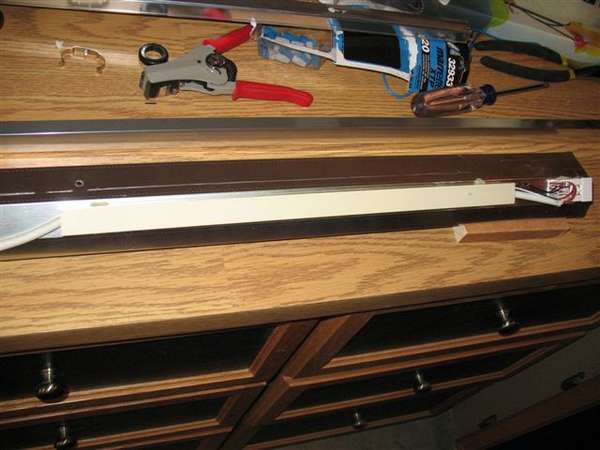 Repeat the above steps with the 2nd strip light so that both are side by side. Make sure that you have the "cut" end at the same side of the reflector so that wiring is easier. So now you need to re-wire the power together. I decided that rather than running new power cords out the Aqualight, I would splice into their power cord so that my switch still worked. So that you know, it's the center of the three power cords coming out the back. You will also need to break off or pop out the grommet holding that power cord at the back, otherwise you will not have enough wire to work with.  When you do this, you will need some extra wire to work with. Try to make it stranded as solid core wire is hard to twist and mar. Make sure you keep track of which color you used for white and black. I couldn't find white and black laying around so I used blue and brown. If you want to use the switch on the aqualight, then you will need to include it in wire twist you mar along with the wiring from the power cord out the back of the fixture. Unfortunately, I forgot to snap a few shots while I did this (my hands were full) To do this wiring, you need to lay the reflector on-top of where it will eventually snap down into. If you can make your extension wires long enough, then you can pull most of the mar-connections into the area where the coralife ballast is (thus making the fitting of the reflector much easier.  At this point you need to fit the reflector back into the fixture. This is not easy...expect to be working at it a while, especially if you didn't get the angle of the ballasts you glue on correct. I did experience a small fold in the reflector on one side that I couldn't get out because it was pressed against one of my mar-connectors. I don't see it affecting how the light works though. Here is a shot of the reflector ends in place. 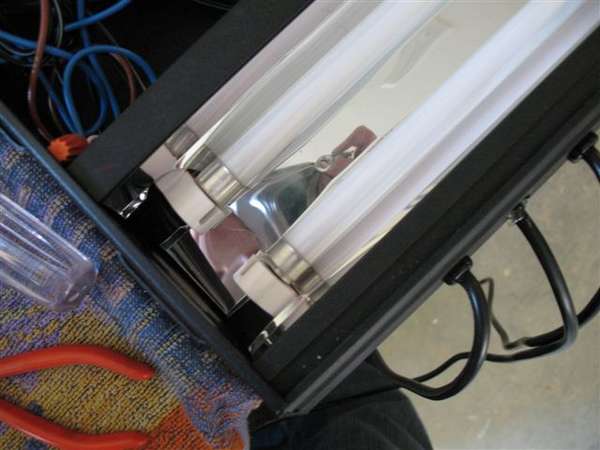 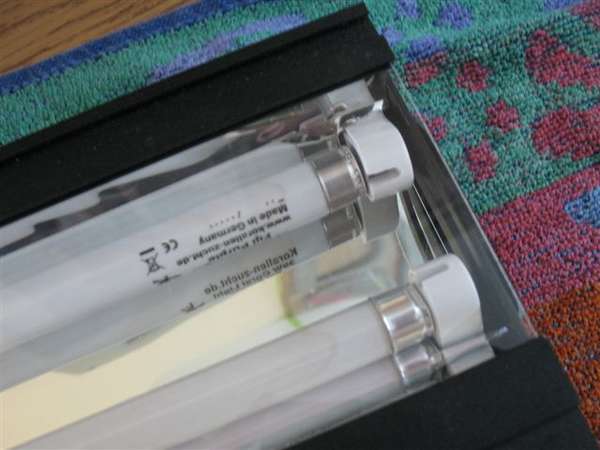 Again, you will notice that they are more to one side than the other. Here is a shot of the end of the fixture once they are all in place. 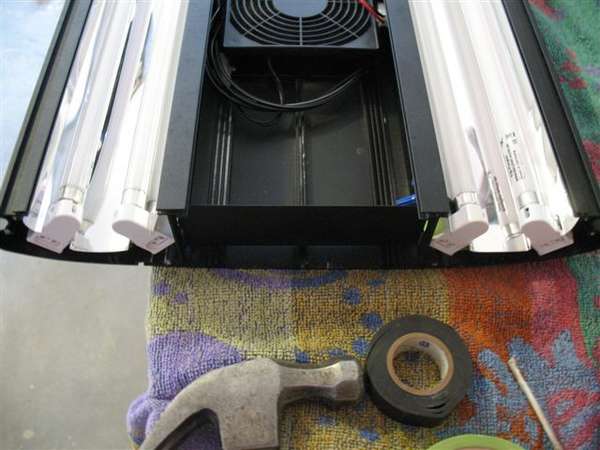 And here they are lit up. 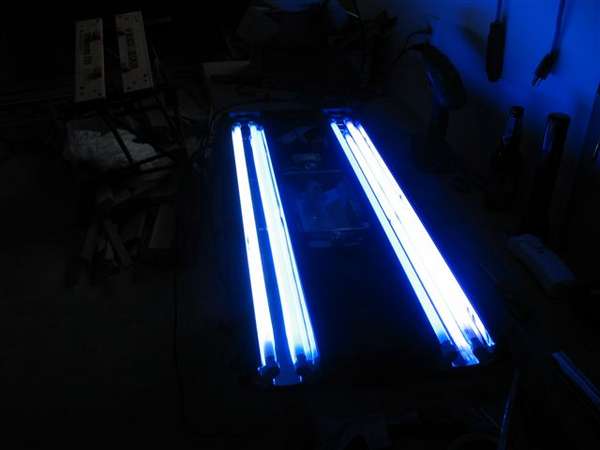 Last but not least, here they are on the tank. 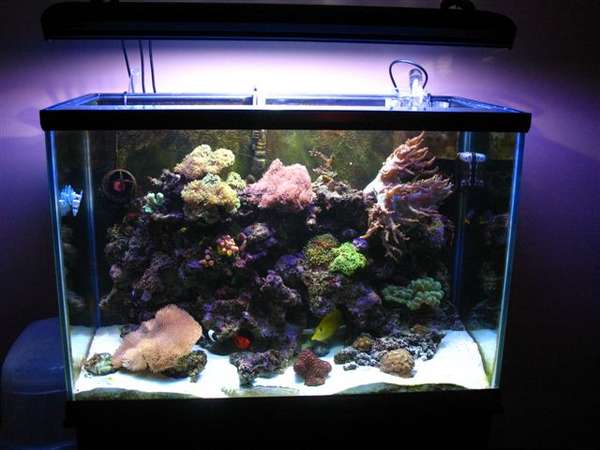 I hope that helps some people with deciding whether they want to try this mod. I am really happy with the change. As for coloring, that is simply a factor of the bulbs I have in, but at least with this setup, I can change the coloring a lot more easily.
__________________
Mark...  290g Peninsula Display, 425g total volume. Setup Jan 2013. Last edited by mseepman; 03-17-2008 at 06:02 PM.
|
|
#13
03-17-2008, 06:13 PM
|
||||
|
||||
|
Myka,
At first, I really considered replacing my fixture entirely too. But the only lights cheap enough were the Odyssea out of the US and I would have to spend money replacing their poor ballasts on top of the their purchase price. Since I bought this light originally in the Okanagan, I was already into it for far more than it sells at the coast. J&L sells it for $530 now but I'm into it for about $700 from AJ's from 2 years ago. So here's a breakdown on the mod pricing: 4 Sunblaster strip lights $130 plus tax 4 T5HO bulbs of my choice: $87 plus tax Wiring and mar-connectors: $2.50 plus tax Total cost: $248 including taxes. Since my PC bulbs were due for replacement they would have been $70 plus tax at J&L, so I see my real costs as being about $170 plus my time, but I get the ability to mix my lighting up a bit and a lot more PAR.
__________________
Mark... 290g Peninsula Display, 425g total volume. Setup Jan 2013.
|
|
#14
03-18-2008, 12:01 AM
|
|||||
|
|||||
|
good, job, the only thing I would have done different is used solid wire for your marette connectors as that what they are designed for and stranded will work loose over time.
you could use a smaller bell shaped crimp connector if you have it apart again as these would give you more room as they are about 1/2 the dia of the marette connectors you used. you can get them from car stereo installers or suppliers along that line. Steve
__________________
 *everything said above is just my opinion, and may or may not reflect the views of this BBS, its Operators, and its Members. If cornered on any opinion I post I will totally deny having ever said this in a Court of Law
Unless I am the right one* *everything said above is just my opinion, and may or may not reflect the views of this BBS, its Operators, and its Members. If cornered on any opinion I post I will totally deny having ever said this in a Court of Law
Unless I am the right one*Some strive to be perfect.... I just strive.
|
|
#15
03-18-2008, 12:11 AM
|
||||
|
||||
|
I agree with you Steve, but the only thing that made me change my mind on them was that Coralife used them originally and some of them were burned right through and melted when I opened it up the first time. That alarmed me, so I thought I would use marettes instead.
__________________
Mark... 290g Peninsula Display, 425g total volume. Setup Jan 2013.
|
|
#16
03-18-2008, 12:48 AM
|
|||||
|
|||||
|
Quote:
Thanks for the price breakdown.
|
|
#17
03-18-2008, 05:24 AM
|
|||||
|
|||||
|
Quote:
I have been looking for the extrusions they use to make these light fixtures so I can make my own setup, but they are hard to find.. I guess getting a old unit and breathing new life into it is an option now that I see some one else has done it Steve
__________________
*everything said above is just my opinion, and may or may not reflect the views of this BBS, its Operators, and its Members. If cornered on any opinion I post I will totally deny having ever said this in a Court of Law
Unless I am the right one*Some strive to be perfect.... I just strive.
|
|
#18
03-23-2009, 06:44 PM
|
||||
|
||||
|
Quote:
thank you so much for the diy mod instructions. i have a coralife aqualight lunar deluxe model, 48" PC lights and so i decided to mod one set of the light fixture to T5s as per your instructions. i found some of those sunblaster T5HO single strip fixtures from a local hydoponics shop, which they sold for 49$ (the 48" ones are 54W). i bought some 54W T5HO bulbs at LFS for 20$ each. everything worked out great except for two things.... there were two main differences. 1. the sunblasters i got had an off/off switch so i ended up with less wiring than expected cuz i had to cut closer to the ballast. this was fine once i figured i needed to add alot more wire than expected. 2. i used the hot glue gun to glue the end plugs to the coralife reflector as per your instructions. UNFORTUNATELY, once the lights came on, everything got hot and the glue ended up melting away! so as a mod on your mod, i would recommend not using the hot glue gun. thanks for the idea tho, corals are much more vibrant looking and it didn't cost me an arm and a leg for the upgrade!
|
|
#19
03-23-2009, 06:47 PM
|
||||
|
||||
|
Quote:
|


 Linear Mode

