
|
|
|
#11
 03-10-2008, 03:04 AM
|
|||||
|
|||||
|
Quote:

|
|
#12
03-10-2008, 04:19 AM
|
|||||
|
|||||
|
I have had this tank up since Oct 07. I see no large build up of detritus in the bioballs section. Having said that this tank is run with fish and corals. This tank also has 40lb of LR and a deep sand bed. Nitrates are taken up by the caulerpa in the tank, not in the fuge. I just do a little harvesting when it starts to over grow. The fuge tank needs more light but what it needs more is better internal circulation. To date I have had zero problems.
|
|
#14
03-19-2008, 04:43 AM
|
|||||
|
|||||
|
Quote:
I have been informed that the panels just left today by FedEx with delivery of March 27th. Seeing that I ordered the tank and cabinet on February 4th I am certainly learning the art of moving slowly in this hobby. In the meantine I purchased ~35lbs of live Cuban rock from Chris at Interior Reef. I had it bathing in a Rubbermaid tub but I had a problem getting the temperature to stabilize so I moved into the bare bottom tank. (I also purchased live sand, heater, test kit etc. from Chris. Great to have him setting up shop in the valley.) The tank is perched on my workbench with the rear compartments facing out. That has given me a chance to study the "layout" of the tank and compartments. When the cabinet is constructed then I will tear down this temporary installation and start again at the tank's final placement. I will take a few photos of the temp setup soon. Everything is running well. I will need to deal with the microbubbles generated by the skimmer and reducing the waterfall sound as water enters the refugium. Anxously awaiting final installation.
|
|
#15
03-28-2008, 04:36 AM
|
|||||
|
|||||
|
Well the replacement cabinet parts arrived this afternoon. I have pretty well finished putting the cabinet together. By Sunday I hope to have moved the tank and LR from it's temporary location on my work bench into it's final display location in the house.
I will start posting on a regular basis as the installation proceeds. Now for a beer.
|
|
#16
03-28-2008, 05:04 PM
|
||||
|
||||
|
Looking forward to seeing it. I'm heading to Summerland tonight Oscar and thought maybe I could check out the tank tomorrow if you're around. I have to head into Oroville to pickup a Hellolights order I made (they won't ship to Canada) in the morning but I should be around later and would love to see the Cad.
__________________
Mark... 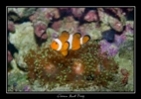 290g Peninsula Display, 425g total volume. Setup Jan 2013.
|
|
#17
04-04-2008, 12:18 PM
|
|||||
|
|||||
|
Ok, here we go.
Now that I think I know how to post photos I thought it was time to get back to the journal. On February 4th I placed an order for the CadLights 39G all-in-one tank plus the cherry cabinet. Since February 5th was the start of shipping for this new tank I had to wait another week for the shipment to leave Brooklyn NY. After reading all of the notes regarding shipping horror stories I was keeping all of my fingers and toes crossed. The tank and cabinet were shipped in 2 separate packages via UPS. I tracked them on their website which was indicated that the cabinet was on the way but the tank never left (I think that according to the website it still has not yet left NY). First to arrive was the cabinet  Then a few days later the tank and lights arrived.   But even though it looked like the lights had a rough trip it was actually the earlier arrival of the cabinet that was a problem.
|
|
#19
04-04-2008, 03:52 PM
|
|||||
|
|||||
|
Quote:
But the glass lid will come in handy if I hang the lights from the ceiling, which I think I will eventually do. The hanging of the lights will give more room for tank maintenance.
|
|
#20
04-05-2008, 02:10 AM
|
|||||
|
|||||
|
Although the box looked great on the outside somehow UPS damaged two of the cabinet panels. The only way to do that was to have bent the box on a sharp object or is was elevated at both ends during transport.

|


 Linear Mode

