
|
|
|
||||||||
| Portal | PhotoPost Gallery | Register | Blogs | FAQ | Members List | Calendar | Search | Today's Posts | Mark Forums Read |
 |
|
|
Thread Tools | Display Modes |
|
#11
 12-02-2008, 05:32 AM
|
|||||
|
|||||
|
Never seen an overflow done like that! Not too invasive and looks cool too. Guess it can't be married with a Herbie really...that method brought me TOTAL silence when I finally got my gate valve perfect.

|
|
#12
12-02-2008, 05:36 AM
|
|||||
|
|||||
|
Quote:
Does that make sense? Basically the emergency drain can be anywhere as long as it leads back to the sump and is above the water level of the main drain. It has been done by a guy on RC on a 180G tank (I think). He says its dead silent and he has a coast to coast overflow. Not really seen in the tank. I wish I had the second hole! That is my favorite way to plumb a tank by far. It really is dead silent.
|
|
#13
12-02-2008, 05:58 AM
|
|||||
|
|||||
|
The lights.
 I just made a simple box to retrofit lights I already had. Dual 400 watt Metal Halide and 2 - 24 watt Actinic T5's. Overkill for a shallow tank but so far so good. I love them and my corals really seem to be happier than ever. I am running the 14K bulbs 8 hours a day and Pure Actinics 12. Originally I hung the fixture from the ceiling but I felt uneasy because it is a bit heavy and the ceiling is concrete. Getting a good anchor in it was hard. Oh and ceilings are 14' tall in my place so the cables were really long and just didn't look right. I rigged up a way to use the fixture I built though in a unique way. I will post pics soon of how I did it. I absolutely did not want a canopy this time. Anyone have any ideas for reflectors to replace those ones? It would need to be something that has the same footprint to fit where those ones are. They are not great and I want to chnage them eventually.
|
|
#14
12-02-2008, 06:13 AM
|
|||||
|
|||||
|
Yeah I was referring to your lack of a second hole sorry should have mentioned that. 14 foot ceilings does make it tough. can you mount the canopy to the wall so it cantilevers out over the tank? I was going to do this but the wife vetoed and made me go the fixture route...
|
|
#15
12-02-2008, 06:24 AM
|
|||||
|
|||||
|
Quote:
No I don't want to drill onto the walls. They too are solid concrete and then finished with a thin coat of a nice concrete that crumbles really badly when you drill them. In the first pic you can see a plam tree. That thing is 10' tall. So gives you an idea of the height. I will get pics of what I have done with the light tomorrow. I think its ok but am looking for new ideas.
|
|
#16
12-02-2008, 09:00 PM
|
|||||
|
|||||
|
Is this similar to how some people are using a T near the end of their drain line to get air out and hopefully keep everything a bit quieter?
Advice? Red is where air would be escaping the drain. 
|
|
#17
12-02-2008, 11:29 PM
|
|||||
|
|||||
|
So if that would work ^^
Would this work just the same? Anyone know if this is how "T"'s are used to keep things quiet going into the sump? I really can't remember but I know its something kind of like this. Or is it pointless to have both the "T" at the top of the drain and near the bottom?  I wouldn't mind getting this glued tonight if someone knows...
|
|
#18
12-03-2008, 12:18 AM
|
|||||
|
|||||
|
I've never tried it but I think if nothing else, that the worst case scenario you have to account for is that the lower T may need a pipe that goes all the way back up to the top to ensure water will never come splashing out of it. I suppose even if it did it would just empty into your sump so maybe it's not a big deal.
Sorry, I probably shouldn't reply to a thread when my answer really can be boiled down to "DUH, I actually don't know, DUH" but I thought I'd throw my two bits in. Tank build looks great. Can't wait to see the results of your drain idea.. Why not just try it dry fit for now (yeah, the joins will leak a tiny bit but it would be enough to tell you if your idea is workable or not.. ??)
__________________
-- Tony My next hobby will be flooding my basement while repeatedly banging my head against a brick wall and tearing up $100 bills. Whee!
|
|
#19
12-03-2008, 01:38 AM
|
|||||
|
|||||
|
Quote:
I think I will just try everything without the T first and then see if I even need it.
|
|
#20
12-03-2008, 02:02 AM
|
|||||
|
|||||
|
This is the rubbermaid sump I am using. You can see, not much space to work with but at least I was able to get a 30G sump out of it. On the shelf to the left is a bucket that will be the Auto Top off (kalk). I would have preferred to keep using the garbage can I have been using for auto top off but there was no where to put it this time. Oh well...better than nothing I guess.
Not much else yet. You can see the drain plumbing on the right is not done. I have no idea at his point what I want to do with that.  And this is the overflow in the tank. You don't see it at all when viewing unless you are looking for it. 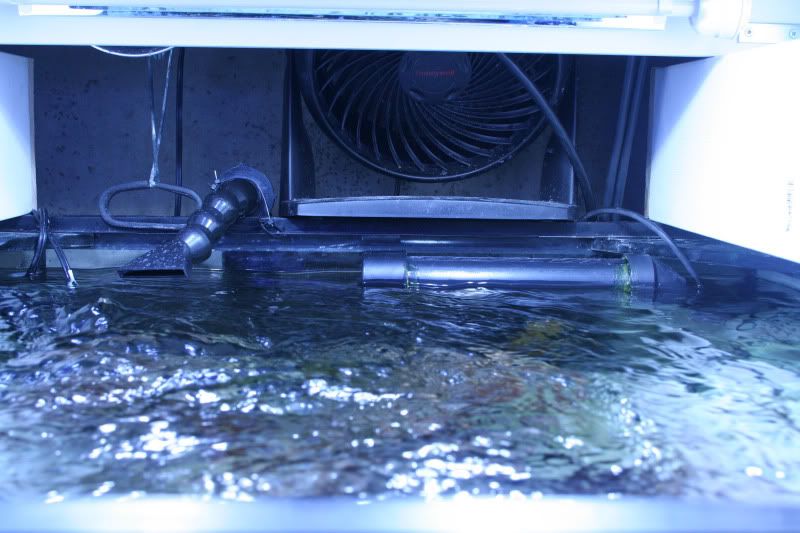
|
|
| Thread Tools | |
| Display Modes | |
|
|


 Linear Mode

