
|
|
|
#1
 01-09-2011, 06:25 PM
|
||||
|
||||
|
Mission statement: Building a SPS dominated reef tank with some not so "reef-safe" fish.
Background: After years of keeping corals and marine fish in some "smaller" tanks, I want to get a bigger tank to do a few things that I have learned throughout the years but couldn't implement in smaller tanks. One thing is that I always want to keep some large angel fish. I understand they are not reef-safe, but with a large reef tank, I hope the damage can be spread to various pieces hence minimizing the damage to one single piece. Also after keeping corals for so many years, my passion is back to the thing that draw me to keep marine system in the first place, which is reef fish. Keeping corals in a marine system is a way to re-create a more nature system for the reef fish. I will emphasize on fish instead of corals in this tank. below is my build progress.... Tank and Stand Sump Overflow - internal coast to coast Skimmer - Reef octopus SRO-3000Int Plumbing Auto Top Off (ATO) Last edited by George; 03-06-2011 at 05:35 PM. Reason: adding ATO 
|
|
#2
01-09-2011, 06:37 PM
|
||||
|
||||
|
First is the main piece, the tank and the stand. I had been looking for a used tank and stand for a while before I settled on a brand new set up. First of there weren't that many (true) used peninsula tanks for sale. A few that for sale were in not that good shape. I bit the bullet and purchased a new tank and a new stand.
It is a standard Aqueon (All glass) 180g, 6'x2'x2', with mission style stand. It wasn't drilled. I had the LFS drilled 2 holes on one side for me. It is intended as a peninsula style tank (room divider), therefore I had the holes drilled on the side. 
|
|
#5
01-09-2011, 10:43 PM
|
|||||
|
|||||
|
Have you looked at the deep-water angels in the Genicanthus sp.? They are more reef safe and less aggressive than some of the others. Maybe not as eye-catching as say a Regal or Majestic but some of them are quite nice. I particularly like the Bellus Angels. I have a Lamarck's in my reef and it has never touched a coral.
__________________
225g reef
|
|
#7
01-10-2011, 06:12 PM
|
||||
|
||||
|
Quote:
Yeah, I like bellus too. I plan to have a pair in my new tank. If I can find a couple healty ones to begin with. LFS had some from time to time. Not healthy at all. Some had decompression issues. Some were very thin. Last edited by George; 01-10-2011 at 06:19 PM.
|
|
#8
01-10-2011, 06:15 PM
|
||||
|
||||
|
Quote:
|
|
#10
01-14-2011, 08:28 PM
|
||||
|
||||
|
Picked up a used sump the other day. Dimensions are 36"(L)x18"(W)x20"(H). It comes out about 56 gallon. It is a little bit tall for my liking. I was going to get a 40g breeder. But on the plus size it holds more water in case of a drain from main tank to sump happening. It was not baffled therefore I needed to get some glass cut and glued them myself. It has 2 holes drilled and some plumbing connections but I don't plan to use an external pump therefore I will have them plugged.
I am just going to divide the sump into 3 sections, skimmer(drain, 11"L), return (10"L) and refugium (12"L). Pretty standard stuff. masking it before the gluing.  I am just going to skip the gluing process because it doesn't require any skills. A lot of patient waiting for one baffle to dry before doing the other because they are so close to each other when doing the bubble baffles. All three partitions are done. Bubble baffles are 9" high. Middle baffle is 1" above the bottom. 1" space between each baffles. Refugium baffle is 11" high. From left to right are skimmer section, return and refugium. Glass is 1/4".  Top down view 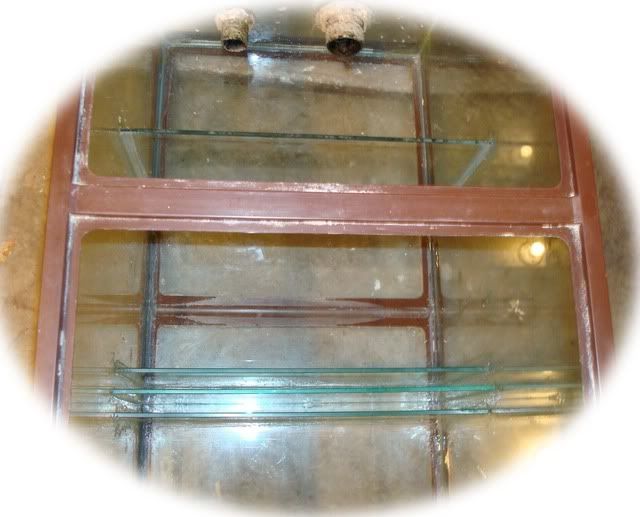 Lessons learned from DIY sump: 1. Get a longest tank you can get for your sump. A short tank making diving sections really challenging. 2. Probably should plan the skimmer first before the sump. A smallish skimmer section really limit the choice of skimmers. 3. Mask the hell out of the tank before applying glue. I got lazy on masking and applying a lot of glue and it shows in the pictures. Last edited by George; 01-14-2011 at 08:31 PM.
|


 Linear Mode

