![]() |
|
Portal | PhotoPost Gallery | Register | Blogs | FAQ | Members List | Calendar | Search | Today's Posts | Mark Forums Read |
![]() |
|
Thread Tools | Display Modes |
|
#1
|
||||
|
||||
![]() Well after planted tanks got boring I decided to cross over to the dark side.
![]() So after lurking through canreef and reefcentral I finally decided to pull the trigger on a tank. Im still waiting on the stand, I build it all out of maple, its at my cabinet guys shop beind stained and laquered, hopefully Ill have it by the end of the week...hopefully... I had Kevin at Red Coral set me up with a tank and everything else that I havent gotten used. Kevin has been more than helpful in getting me set up with everything I have needed, he has even set aside my lack of knowledge in reefing and given me a great hand. Nothing but good things to say in his direction. I picked up the tank today, the back is limo-tinted with an external overflow, looks great. It is 48long x 18 wide x 20 high ![]() ![]() 
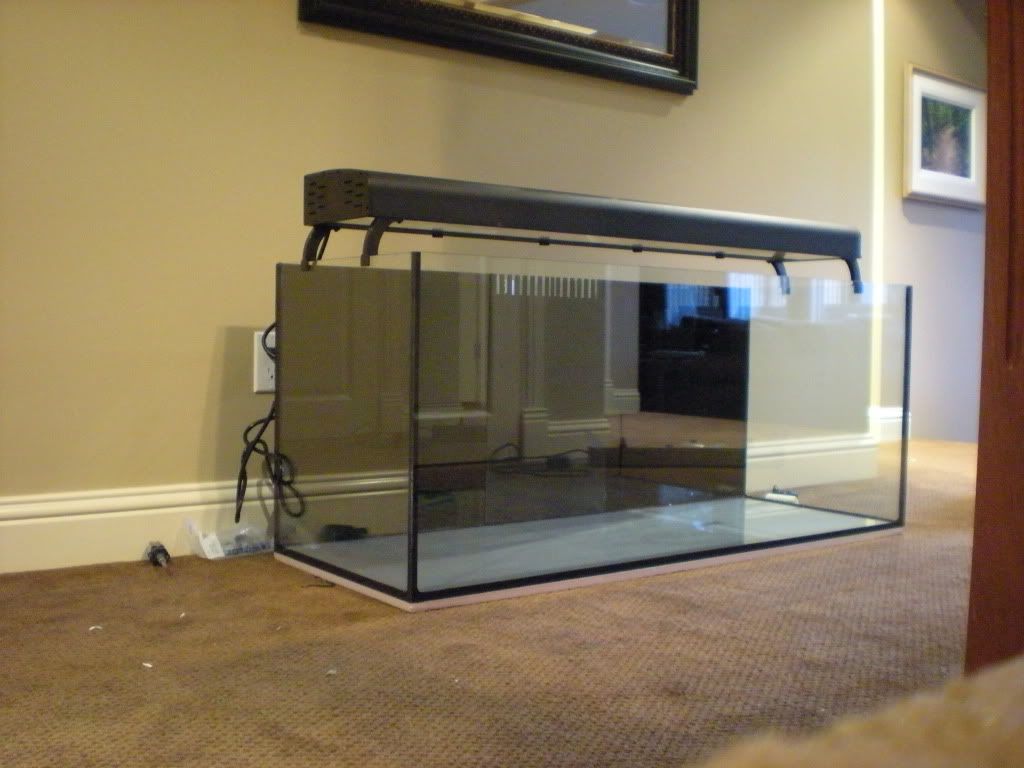
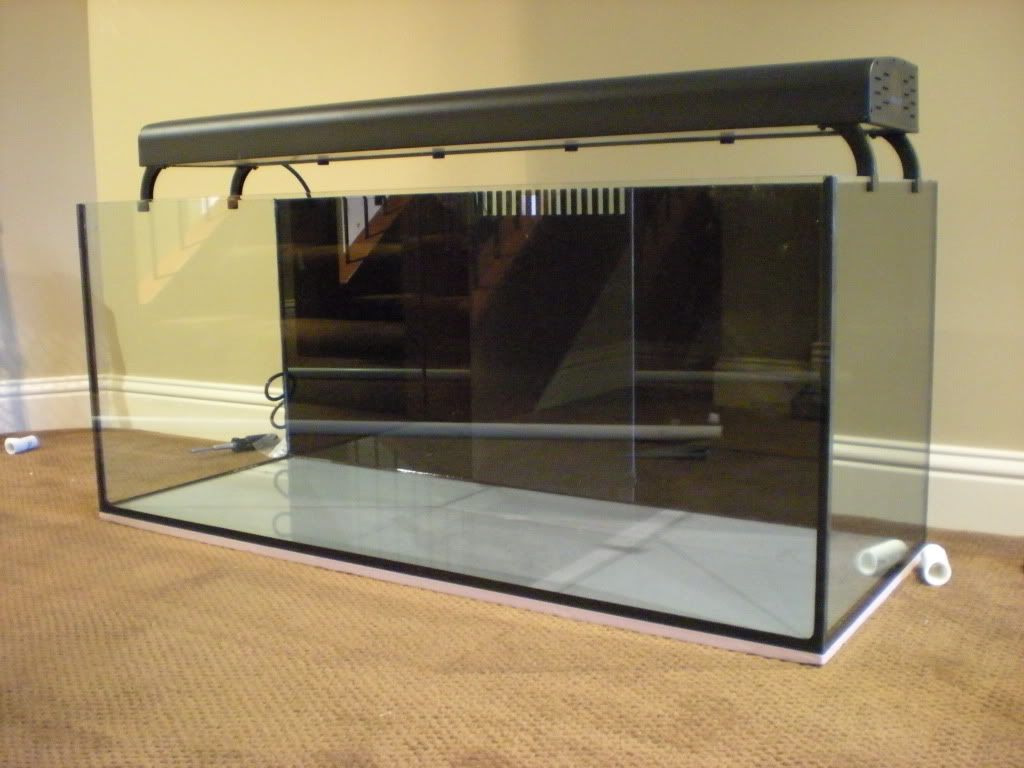
I had the pleasure of putting the tank against the wall to a mechanical room, so all of my mechanical will be ran through a cold air return and into the mech room. I put in a new 15A circuit to the area where the tank is and set up a few outlets to supply power to the equipment. The RO unit I got from kijiji and plumbed in so that it will fill a holding/mixing tank that will house a pump to fill the sump at WC's. I Tee'd off of the return pump and ran a hose directly to a drain so i can drain water with the turn of a valve. No more carrying buckets ![]() My sump and refugium are two seperate tanks, the sump is an old 20g that will hold a skimmer and phosban reactor, the fuge is a 10g. The tank will drain herbie style into the fuge and sump, the fuge will then drain down into the sump. with a simple 1/2" stanpipe. Front area where the tank will go, good distance from the pool table ![]() ![]() ![]() 
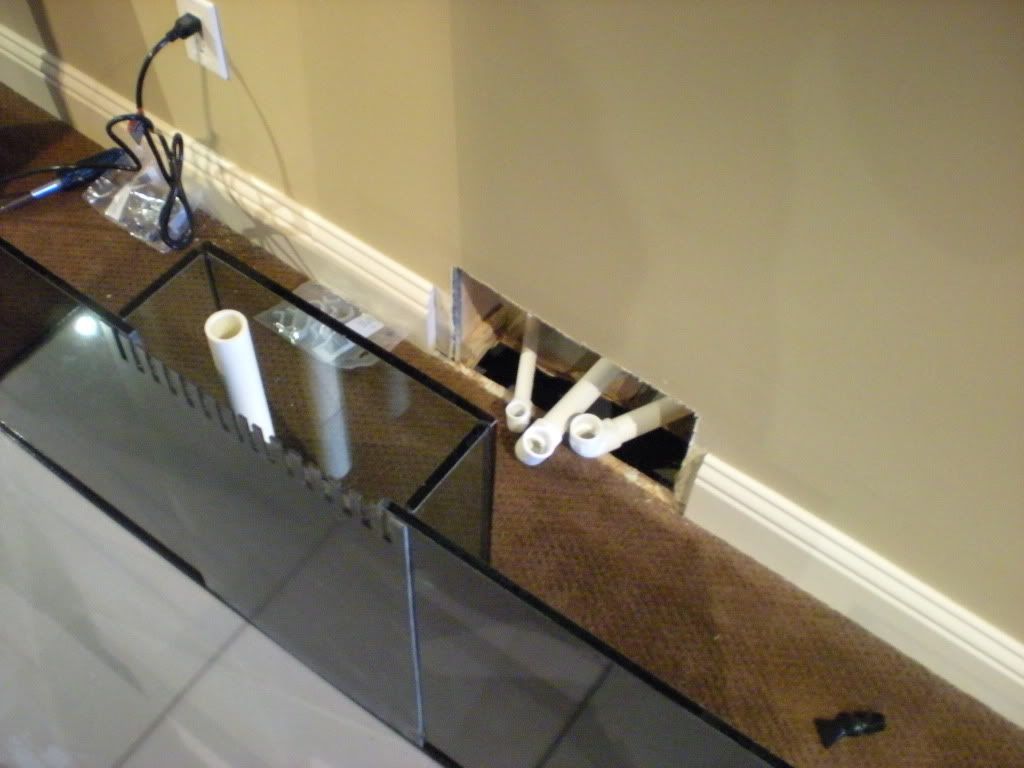
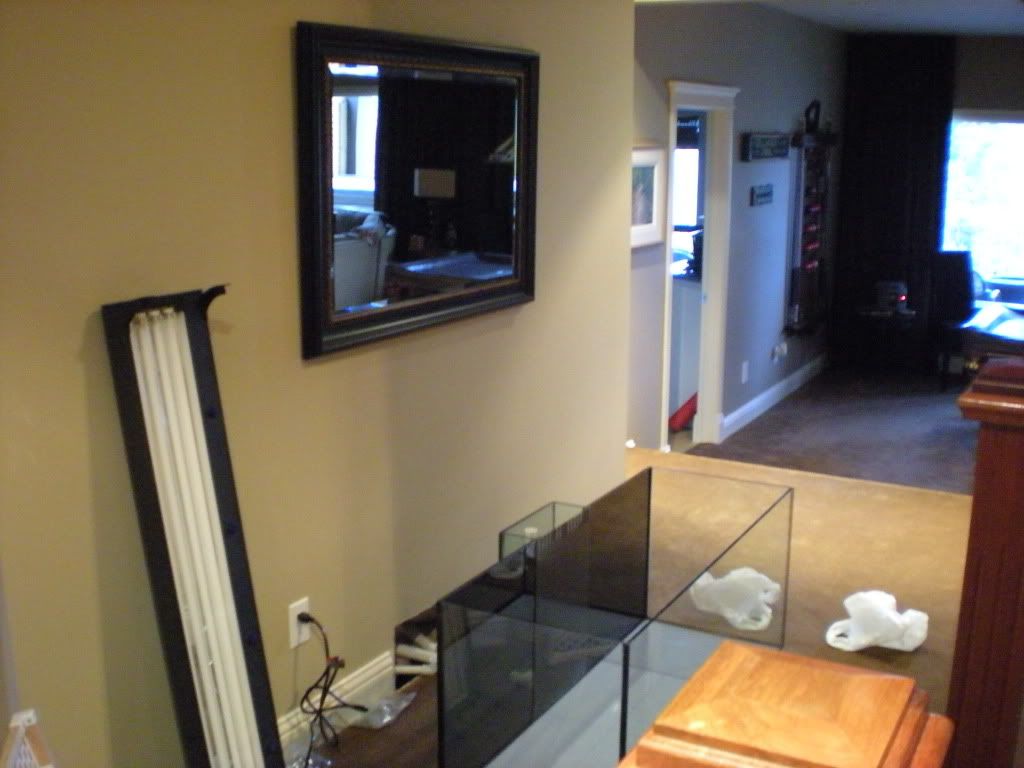
Where the overflow and return go through the wall.
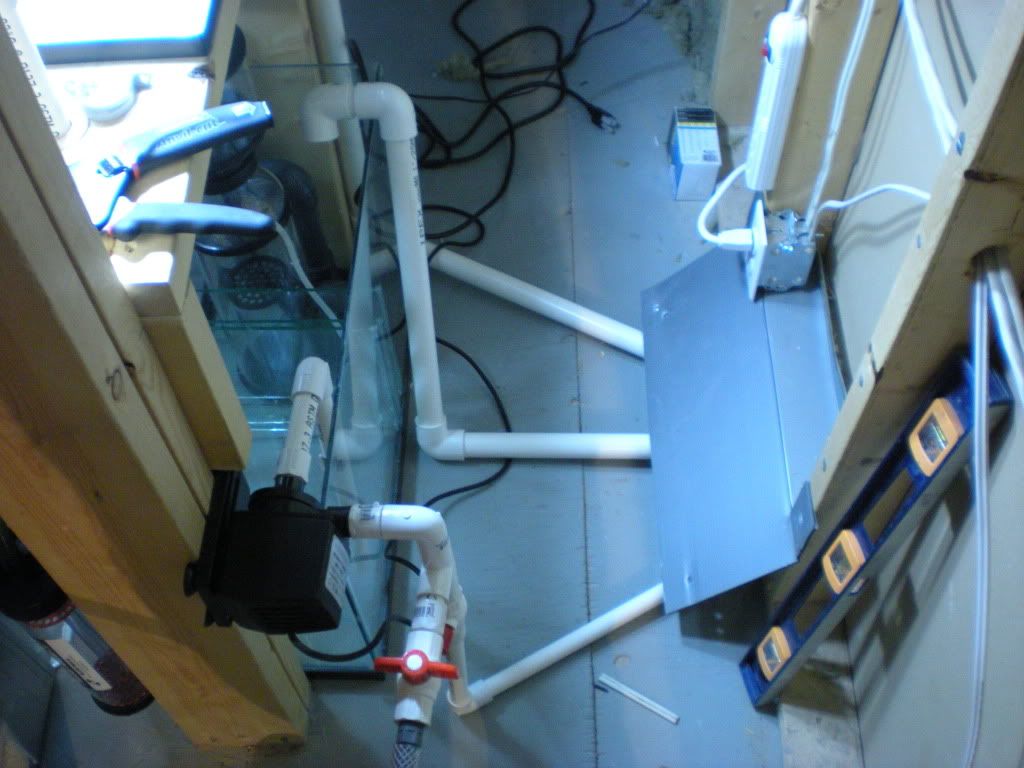
 ![]() Full shot of setup ![]() Sump with vertex in80 skimmer external 500gph return pump, and TLF150 phosban reactor. Then fuge with two 40watt cfl lights. ![]() ![]() 
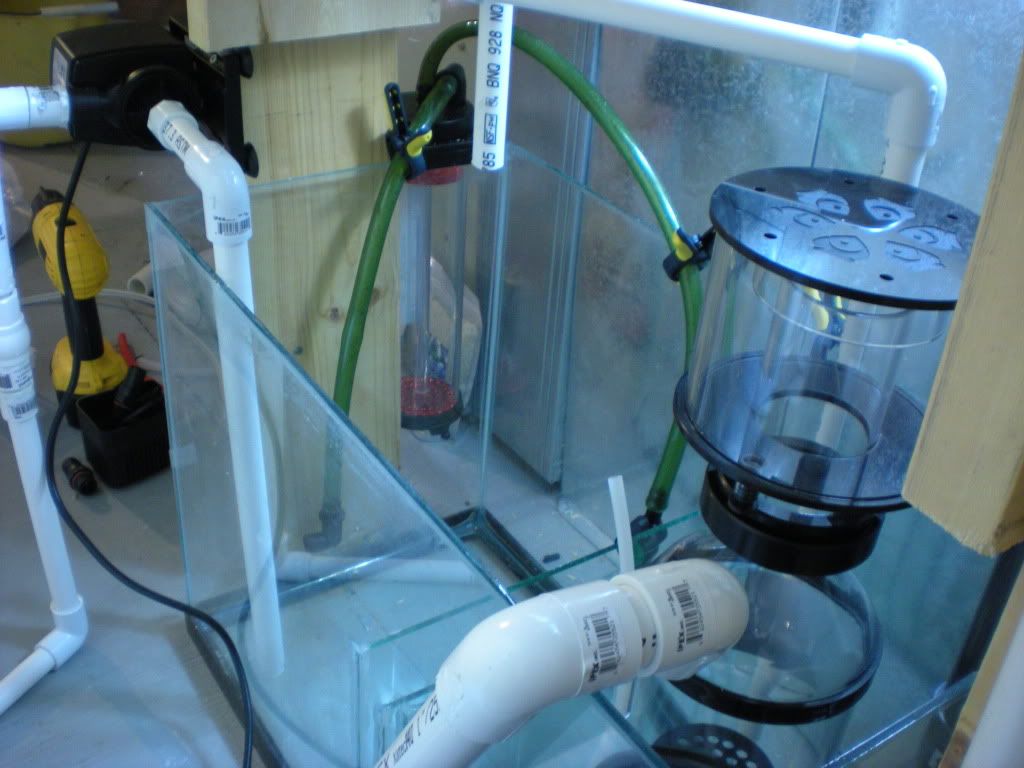
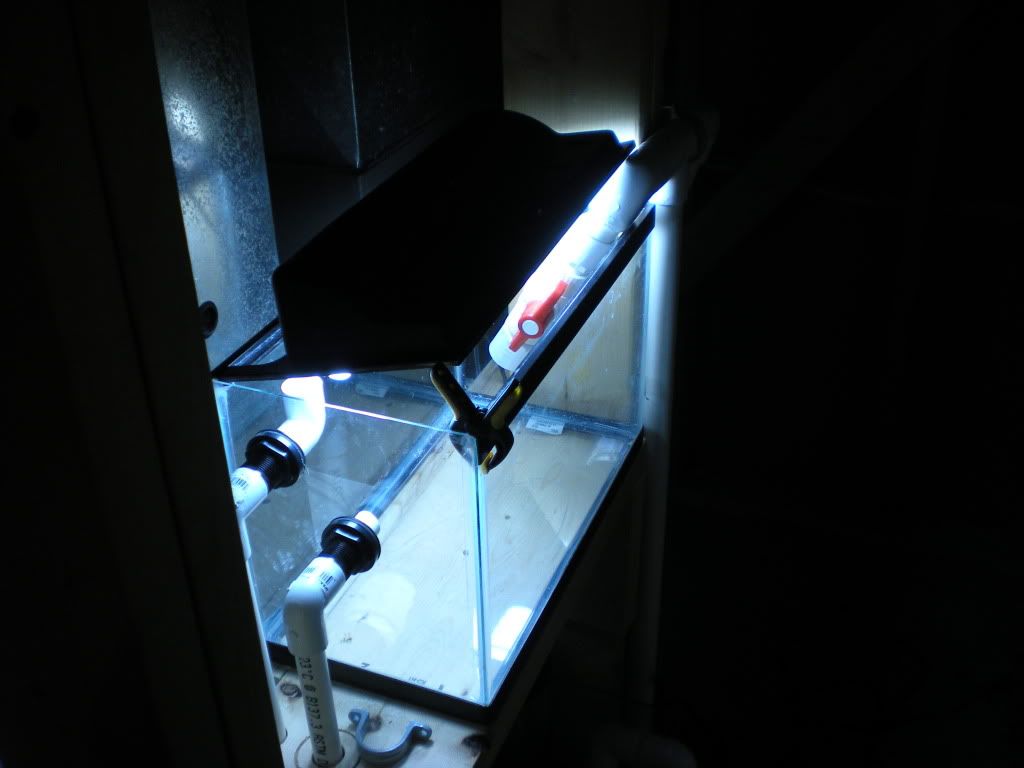
Hopefully ill have an update later this week regarding the stand, like i said im still waiting on the stain, and im just going to pick up the glass for the doors tomorrow. Let me know what you think ![]() Scott. Last edited by catchandrelease; 05-26-2010 at 03:25 AM. |
#2
|
|||||
|
|||||
![]() Really sweet so far.. Love the trimless tank.
Always been a fan of 75G systems. ![]()
__________________
180G Office Reef. Started Sept 2012 http://www.canreef.com/vbulletin/showthread.php?t=88894 62G Starfire Reef. Started Jan 2013 http://www.canreef.com/vbulletin/showthread.php?t=89988 |
#3
|
||||
|
||||
![]() I have always been a fan of the simple look a rimless tank has, so it was a no-brainer for me to do it that way.
|
#4
|
||||
|
||||
![]() I'll be tagging along.
Looks great. Can't wait to see the tank on your new stand. Kevin |
#5
|
||||
|
||||
![]() laquer is drying right now but its all done, get it in the basement tomorrow, get the tank on it and get some pics. Start gluing up the plumbing tomorrow as well. More pictures will be coming tomorrow.
|
#6
|
|||||
|
|||||
![]() tagging along...looking good
__________________
Current System 75 Gal with 30 Gal Sump Reef Past Tanks 60 Gallon True Cube 30 Gallon Breeder 165 Eurobraced Starfire Custom 10 Gallon Softy Tank(My First Tank) |
#7
|
||||
|
||||
![]() So i finally went and got the stand and the glass for the doors today. Put in the glass but one of the pieces was cut a half inch too big, dont know how that happened.
Got the tank levelled, glued up the plumbing returns, and started filling it up. The stand i made out of 3/4" maple plywood, the top is a double layer of 3/4", its sitting on a toekick made of 3/4" plywood. Base is wrapped in maple solid stock 1x4. The doors are made out of 1x4 solid stock that i milled a profile onto and put some glass into a rabbit cut i put in the back. The false drawer fronts I made out of 1x6 solid stock and milled a profile to match the doors. It is finished with a stain, then glaze, then laquer, lots of work but maple is tough to stain evenly and this process works great. ![]() ![]() ![]() ![]() So now Im just going to let the tank settle for the night and hopefully by this weekend get it drained and fill it with RO water with a little salt in it. Any feedback is welcome. |
#8
|
||||
|
||||
![]() great looking stand i always love maple
|
#9
|
||||
|
||||
![]() Really nice!!!!
With the extra length on the stand I see room for an upgrade. A couple questions though. So your overflow is coming down through the air duct and then coming back up into the sump? If so what is the height the overflow water has to come back up. I am concerned that you could be restricting your output flow. You might want to try 45 degree piping instead of the 90's But then again it just might be me. Also where is your emergency overflow run to? Kevin |
#10
|
||||
|
||||
![]() Hey kevin,
The water has to come up only 18" into the sump for the main overflow. The emergency runs to the sump as well (same 18"rise), i just finished playing around with the locline to break siphon before the sump overflows. The output flow is actually quite good, i was concerned with the 90's as well, im going to play around with it a little more and get things set up a little closer to where i want them, then i will have to see about changing the return plumbing. Thanks for the responses. |
![]() |
Thread Tools | |
Display Modes | |
|
|