
|
|
|
||||||||
| Portal | PhotoPost Gallery | Register | Blogs | FAQ | Members List | Calendar | Search | Today's Posts | Mark Forums Read |
 |
|
|
Thread Tools | Display Modes |
|
#61
 12-30-2012, 09:38 PM
|
|||||
|
|||||
|
A few additional photos showing the 5050 SMD LED RGB strip lighting I recently added to the fixture. Since I don't have a controller running the 10 watt chips, I'm using the RGB strips selected to blue on a timer to provide a crude dawn/dusk effect. I suppose I could have simply purchased a straight blue strip instead of RGB, but the cost difference is minor & it's interesting to play with the different colour combos possible with the IR remote control pad & the RGB strip.
Close up of the strips mounted along the center rail of 10 watt emitters. I simply drilled/threaded the center rail alumiunum angle in 4 locations & used small stainless steel screws to attach the angle holding the LED strips.  This shows a bit more of the fixture with the blue LEDs shining.  Now for some shots over the tank with different colours. Blue, red, violet/purple and white (using all 3 colours). I've left out the green since it's not a colour one would normally use on it's own over a marine tank. Photos are all with respective LEDs at full power. They can be dimmed down to near zero with the 44 key remote control.     As you can see the 'white' shot lights up the tank fairly well with the 2 rows of 5050 SMD LEDs at full brightness. Each row sports 63 LEDs in segments of 3 for a total of 126 LEDs. I have 174 LEDs left on the spool to use on another project. Someone with a FOWLR could easily build a suitable fixture using additional rows of these. Could even work for a tank with softies & LPS. You'd have to mount them fairly low & pack a bunch of rows together, but the stips are available with various levels of water proofing, so that shouldn't be an issue. There are brighter 5630 SMD strips available, as well as less bright 3528 SMD strips. A fairly simple diy to either build a full fixture, supplement existing lights or dawn/dusk effect which is what I use them for.
__________________
Mike 77g sumpless SW DIY 10 watt multi-chip LED build 
|
|
#62
12-31-2012, 03:26 AM
|
||||
|
||||
|
Just to comment, I brought in 4 x 50cm strips of the 5630 Samsung LEDS in cool white and they are very very bright. They came mounted on a thin aluminum strip with a surrounding aluminum mount and after running for 5 minutes you would be burned by the aluminum strip. The surrounding mount is still fairly cool. Mounted to a proper heat sink, these would shed a lot of light! Haven't seen them in any colours or RGB yet.
__________________
Mark... 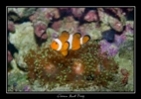 290g Peninsula Display, 425g total volume. Setup Jan 2013.
|
|
#63
12-31-2012, 05:02 AM
|
||||
|
||||
|
Quote:
|
|
#64
12-31-2012, 10:30 AM
|
||||
|
||||
|
Quote:
|
|
#65
12-31-2012, 03:18 PM
|
|||||
|
|||||
|
Quote:
I've actually been looking for LED car headlights myself & haven't found too much. Not sure they are even legal if retrofitted in certain jurisdictions. Most car/truck headlight retrofits seem to be HID & Xenon, not LED.
__________________
Mike 77g sumpless SW DIY 10 watt multi-chip LED build
|
|
#66
01-12-2013, 07:24 AM
|
||||
|
||||
|
Mike,
Thanks for sharing you LED build. I'm also in the process of designing me LED setup on paper. I will also be using the 10W LED's.......prob looking at 24 LED's for my 120 gallon reef tank. I will be using the Mean Well drivers instead of 12VDC 20A power supply with dimmers. I will also be just about finished building my programmable 4 channel light controller based on the Arduino PLC. The controller can be programmed to dim the lights throughout the day via PWM. The Mean Well drivers can be dimmed via PWM. Did you design you setup with a 12VDC for simplicity? Dimming the lights is done manually using the dimmers? Once again, thanks for sharing!
|
|
#67
01-12-2013, 02:25 PM
|
|||||
|
|||||
|
Quote:
As far as my decision to go with constant voltage 12 VDC power supply, simplicity comes into play a bit, but cost was another consideration. One of the things I'd like to do in the future is put up a solar panel array for my home & this could potentially provide most if not all the power for my LEDs. Most photovoltaic systems are designed to produce 12 or 24 volts DC to charge batteries, so I could potentially run my LEDs off the solar array or battery bank. Need to keep in mind that the charging voltage will be higher than 12 volts to charge the batteries, so resistors in series with the LEDs would be needed. This is one of the reasons I chose 10 watt LEDs as opposed to the larger chips. Most 10 watters have a Vf of between 9 to 12 volts, so that keeps things really simple & cuts down on the amount of voltage conversion (drivers & other hardware) to run the LEDs. I see now there are a few 20 watt multi chips LEDs that have a Vf in that range. For now I like the idea of only having 2 power supplies. The number of electrical outlets I have available for my current set up would mean I'd need a few more power bars to run multiple Meanwell or other constant current drivers. I already have enough of a wiring rat's nest around my tank & more power bars to run multiple drivers are just not an option at the moment. With respect to dimming, I like it simple there for sure. My dimmers are manual and I haven't touched them since setting the Vf at 8.5 volts for all the LEDs. I use digital timer power bars to bring the lights on line in a staggered cycle to provide a crude dawn/dusk effect. The RGB SMD5050 LEDs help in that regard as well. Less to go wrong, no programming or controller required and for my livestock, not much of a change from the blast of light they used to get from my old MH/T5HO rig. For a larger future build, I might go a bit more sophisticated with the dimming, maybe. I'll certainly consider using larger, fewer multichips mounted higher up with optics. This would also cut down on the number of drivers, fans, wiring, etc required. By the time I get around to that build, I'm sure the price will have dropped even more on those, better spectrum & other innovations will be available. If I were to rebuild using the 10 watt chips, I might arrange them a tad closer together, like 4 inches on center rather than 4 & 1/2. Maybe even 3 inches. That would allow more LEDs & additional colours to be packed into the same area. I see there are now 10 watt chips available with blue & white on the same chip. Might also consider getting the larger heatsinks for them that don't require a fan. This seems to be the weak link with my build at the moment. I've replaced 3 of the fans to date & a few more are showing signs of weakness. A positive side to this issue is that none of the LEDs have burned out despite some of them running for hours with a stalled fan with no apparent ill effects. It may well be that even these heatsinks don't really need the fan to sufficiently cool a 10 watt LED. The open design with aluminum rails may have something to do with that. Best of luck with your project, hoping to see how that goes.
__________________
Mike 77g sumpless SW DIY 10 watt multi-chip LED build
|
|
#68
04-03-2013, 01:35 AM
|
|||||
|
|||||
|
Tomorrow will be the 1 year mark running this DIY 10 watt multi-chip fixture. It's been working great, no LED burnouts despite the fact that a few of the fans failed and the LEDs are basically no name cheapies. I have replacement fans so not a problem there, but I would probably build it a little differently next time around. There are now slightly larger heatsinks available for 10 watt multi chips that supposedly cool sufficiently without a fan directly attached. I'll probably order a few of them to check it out. I think if I built a top on the fixture and added a couple of larger fans to move air through that, it may work without all the individual mini fans. I have something in mind along the lines of a semicircular piece of wood at each end, then adding thin slats across the top with a slight space between each. This will cover the top nicely while allowing air circulation similar to the open top configuration at present.
Livestock is happy, coral growing & my BTAs have never looked better. In fact they are taking over the tank. I'm still slightly underdriving most of the LEDs, so they should continue to plug away for another year or two no problem. The fixture is likely nearing the point where it will have paid for itself in power savings & not having to buy replacement halides and T5HO lamps. Starting to get the itch for another build though, this time with larger, fewer multi chips. Anyone contemplating a DIY LED fixture should at least consider these multi chips rather than the more common builds using 3 watt Crees etc. They may not be quite as efficient as the Crees or other big name brands, but the price is right & they work fine. They also now come in multi colour arrays on the same chip. Fewer LEDs can be used meaning less wiring & soldering. 
__________________
Mike 77g sumpless SW DIY 10 watt multi-chip LED build Last edited by mike31154; 04-03-2013 at 01:37 AM.
|
|
#69
04-03-2013, 04:15 AM
|
|||||
|
|||||
|
Hey Mike. I'm still wondering if I shouldn't have gone this way too. I chickened out and went with what I kinda knew already. I think if I get a frag tank running in my basement I might try and go this route and pick your brain again. If you get to making another, definitely log your progress, I'd love watch it get built.

|
|
#70
04-03-2013, 06:35 PM
|
|||||
|
|||||
|
Quote:
I continue to watch builds like yours with interest & may embark on something similar down the road, with programmable features. Folks like you are paving the way!
__________________
Mike 77g sumpless SW DIY 10 watt multi-chip LED build
|
|
| Thread Tools | |
| Display Modes | |
|
|


 Linear Mode

