
|
|
|
||||||||
| Portal | PhotoPost Gallery | Register | Blogs | FAQ | Members List | Calendar | Search | Today's Posts | Mark Forums Read |
 |
|
|
Thread Tools | Display Modes |
|
#132
 03-19-2012, 07:48 PM
|
|||||
|
|||||
|
Holy smokes Adam, this thing looks freaking amazing!!!
Kind off topic but what are you guys doing for appliances? Is that a Miele double WO with a built in Thermador F/F combo? 
|
|
#134
03-19-2012, 11:23 PM
|
|||||
|
|||||
|
Quote:
 Quote:
How do you know so much about appliances? Quote:
I'm gonna take some more pics now that the plumbing is *almost* complete, and the tank is running with water in it
|
|
#135
03-20-2012, 12:40 AM
|
|||||
|
|||||
|
K, the plumbing is almost complete, and it's currently running with tap water. I'm going to keep that going until the inspection.
Dining room side 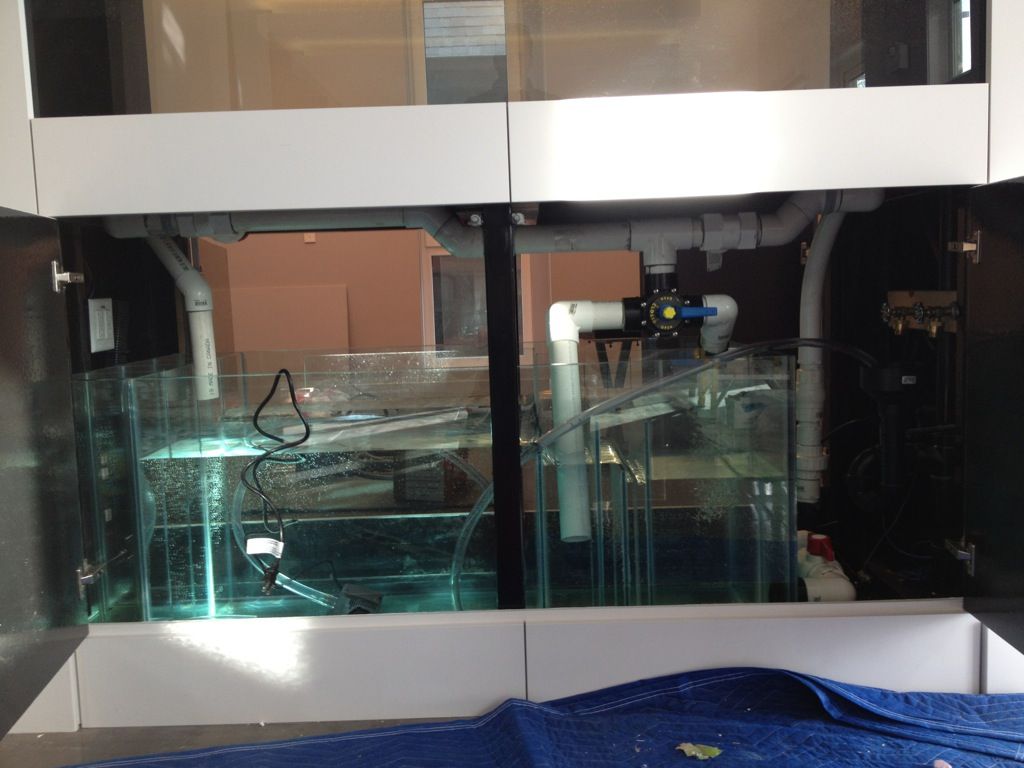 the long white PVC pipe is the alternate flow path. When the handle on that huge valve turns to the left, water from the tank flows straight in to the first part of the bubble trap, and bypasses the rest of the sump. However, when I started testing the system, I realized that I had made a critical error when I designed the sump: I didn't account for the fact that when 100% of the flow of the tank is entering the bubble trap/return chamber, it actually raises the level of water in that chamber by a full 3 inches, above the level of the baffle that separates it from the water change chamber. Essentially, as the plumbing is set up now, I can't isolate the water change chamber if there is the correct amount of water in the sump. This was terrifying at first, and had three possible solutions: 1. pull out the silicone on two of the bubble trap baffle, cut the baffle that sets the height of the return chamber down by three inches, and re-silicone it all in. This would mean that the water exiting from the water change chamber would fall 4 inches, and would be loud and splashy. This is the crappiest solution 2. use the herbies to manipulate the water level in the sump when the flow is diverted. I figured out that when I divert the flow, the water level in the over flow chambers falls by a couple of inches (which compounds the existing water level in the sump problem). I'm sure this has something to do with a principle of fluid dynamics that I barely understand. But, I also found that if I go and tighten the herbies up when the flow is diverted, I can cause the overflows to completely fill, then raise the water level in the display tank by about 1/16 of an inch, which is enough to drop the water level in the return chamber low enough to isolate the water change chamber, but still not reach the emergency overflow standpipe. This allows me to use the sump the way I designed it, but leads to 30 freaking minutes of tweaking the herbies to get them back to where I want after after every water change. huge PITA, and not really what I want to do. 3. The solution that we're going to move forward with, that I think is pretty elegant and simple. We're going to install a third gate valve here: 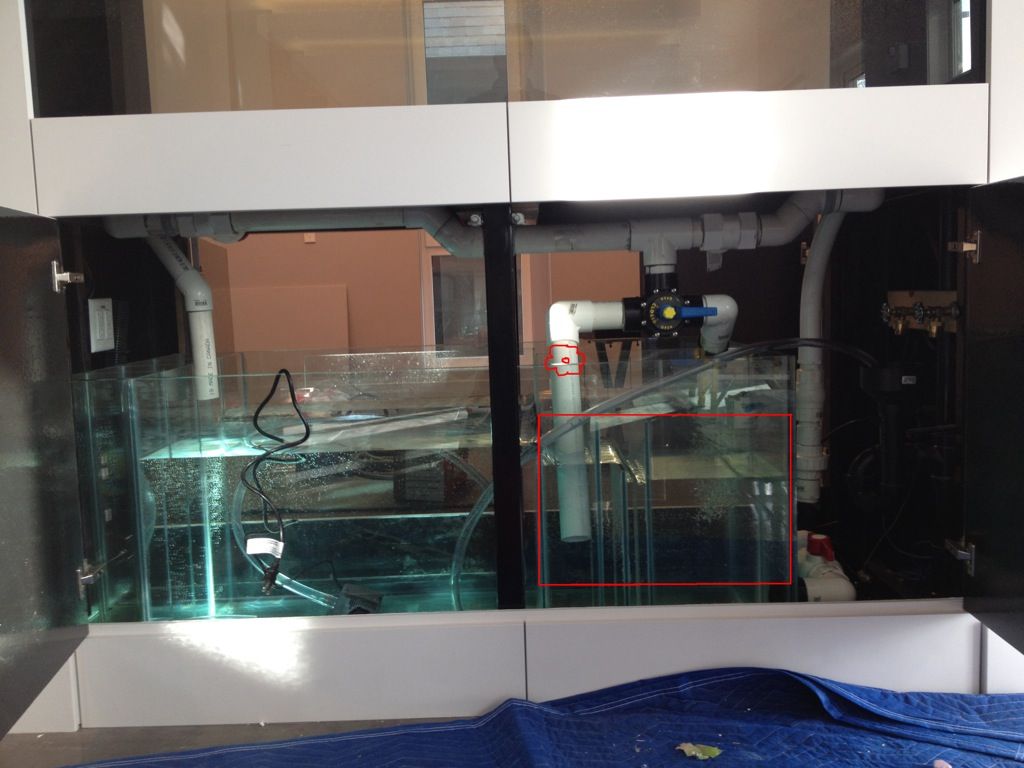 Essentially, it will act like a herbie on the herbies. During normal operation, water from the tank will flow in to the skimmer chamber, and the two main herbie gate valves will be set to the perfect spot and never touched. When I want to do a water change, I'll divert water in to the bubble trap/return chamber, and use the third gate valve to restrict the flow in to the sump even further. This way I can use that third gate valve to make the water in the return chamber set at whatever height I want. I'm sure with some playing, I can figure out exactly what setting it needs to be and leave it that way, so when I divert the water, the levels all just set themselves automatically. This will save me from having to fiddle around with the main overflow gate valves, plus, it puts the water change controls all on the same side of the tank, so I won't have to go running around in circle adjusting anything. phew, that was a whole lot of typing. I hope that made sense. Office side: 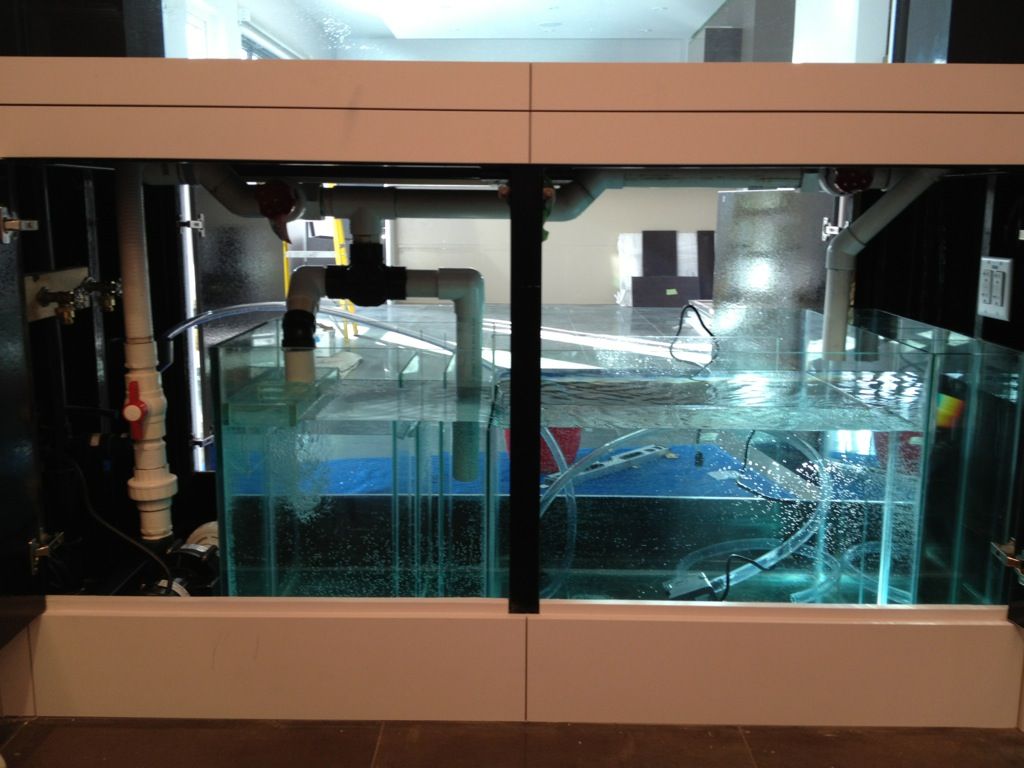 I assume the reason the herbies naturally set at a different level when I divert the flow from the skimmer chamber is because water has to travel different distances in the pipes between the two outputs. or something. I dropped physics. I was and am shocked at how much water moves through this sump. I was afraid my design wouldn't work at all, but other than one minor modification to the water change system, it works better than I expected. because the sump is so deep, I'm going to need to put a couple of koralias in the frag chamber and WC chamber to to prevent any dead spots, but I have a closet full of koralias from my first tank, and I'm not worried at all. The koralia in the WC chamber will serve double duty as the salt mixing pump! And finally: a FTS from the office 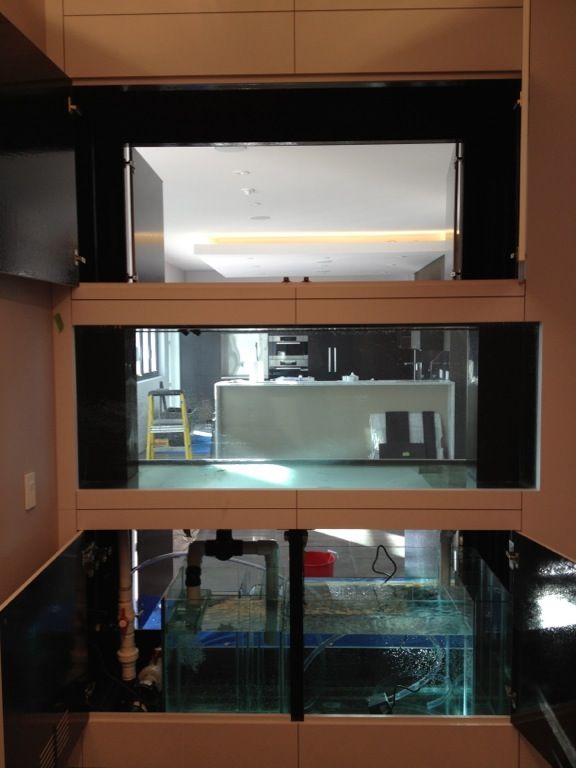 I am happier and happier with the choice to go Starphire. It probably wouldn't have mattered if it was only open on one side, but the cumulative effect of looking through two panes made it soooo worth it. The bottom panel isn't Starphire, so it's reflecting a little green, but once the bottom is covered in white sand, the glass will be nearly invisible.
|
|
#136
03-20-2012, 02:14 AM
|
|||||
|
|||||
|
Looks awesome, glad to see water in it
__________________
One more fish should be ok?, right!!!
|
|
#138
04-02-2012, 05:04 PM
|
|||||
|
|||||
|
*sigh*, I wish this was happening faster! But between not actually being allowed to move in to this house yet (the convoluted web of city permitting is infuriating), grad school, and daily commitments, I'm getting maybe one solid evening a week to work on it.
Anyway, here's an update, and I hope everyone has all sorts of comments on my rock work, because I'm not totally sold on it. Kevin came over last week and installed my R/O unit:  Because I'm impatient, I immediately filled the sump with R/O water. It took a day and a half. I also picked up up some plexi and cut long, 5 inch high stripes and caulked it to the euro-bracing 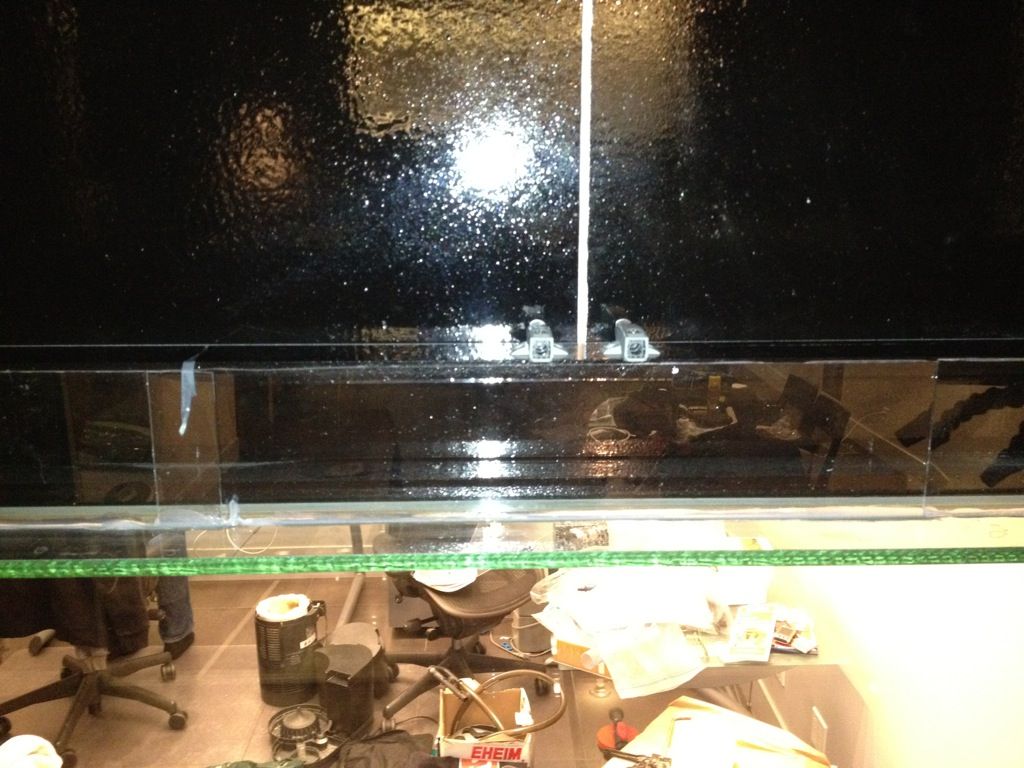 There was a small gap between the euro-bracing and the framing for the doors above that would have allowed splashed water to seep under the frame structure and run down the front glass of the tank. There was also a 3 inch cavity in the frame itself that I had visions of jumping wrasses getting trapped in. That's all sealed up now. Then I went overkill with the sand: 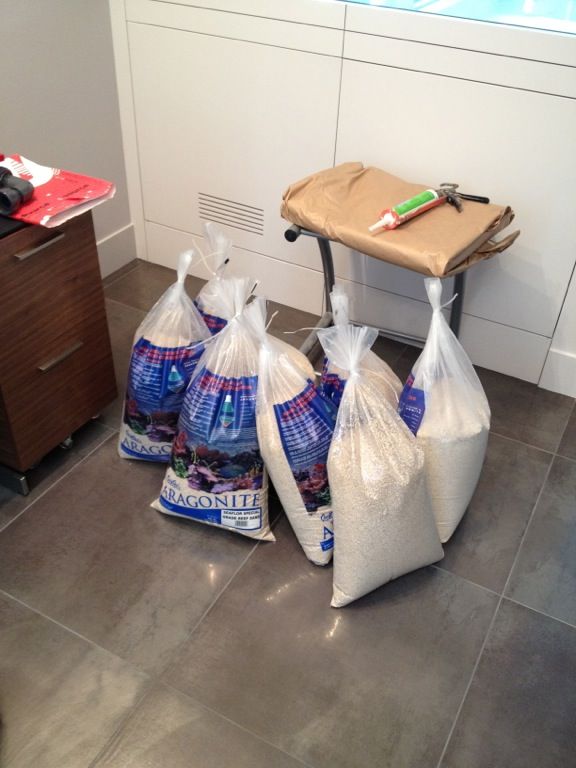 8 bags was excessive. I needed 5. Note to self: I bought enough to give me a 3 inch sand bed without rock. Then on Friday I picked up 207 pounds of Marco rock from Kevin at RCC. Note to anyone who's ever wondered: Yes, Marco rock WILL punch large, unsightly holes in the leather of your car's back seats. Take appropriate precautions. I didn't have the tools or the patience to do any fancy drilling of the rock, so what you see is simply rocks that are resting on top of one another. I hate the 'pile o' rocks' look, so I really tried to avoid that, while creating at least two major cavities that can't be seen from either side of the tank for a larger fish to sleep in (they're against the overflow boxes), and a relatively open structure, with a central 'canyon' down the middle. I'm not 100% sold on it, so any input would be appreciated. The plan is to eventually add about 50 pounds of real live rock from Walt Smith, so I'll likely end up removing some of the Marco rock (or sending it to the sump) rather than just adding 50 more pounds, as it's already a little cluttered for my taste. Dining room FTS 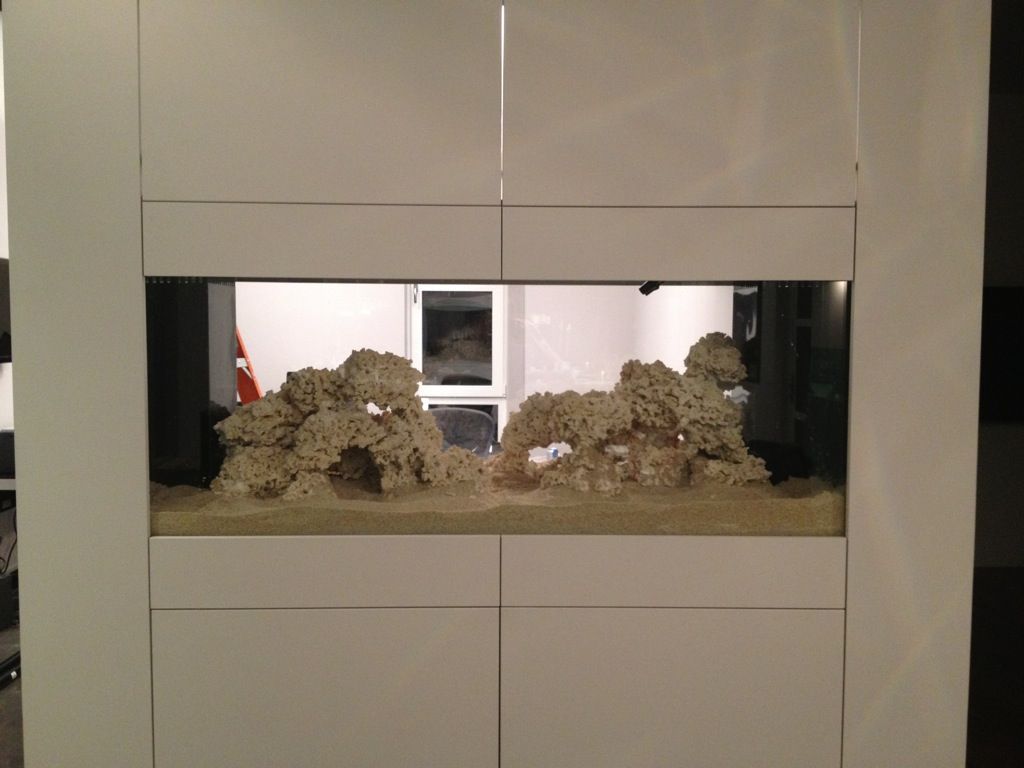 DR south end 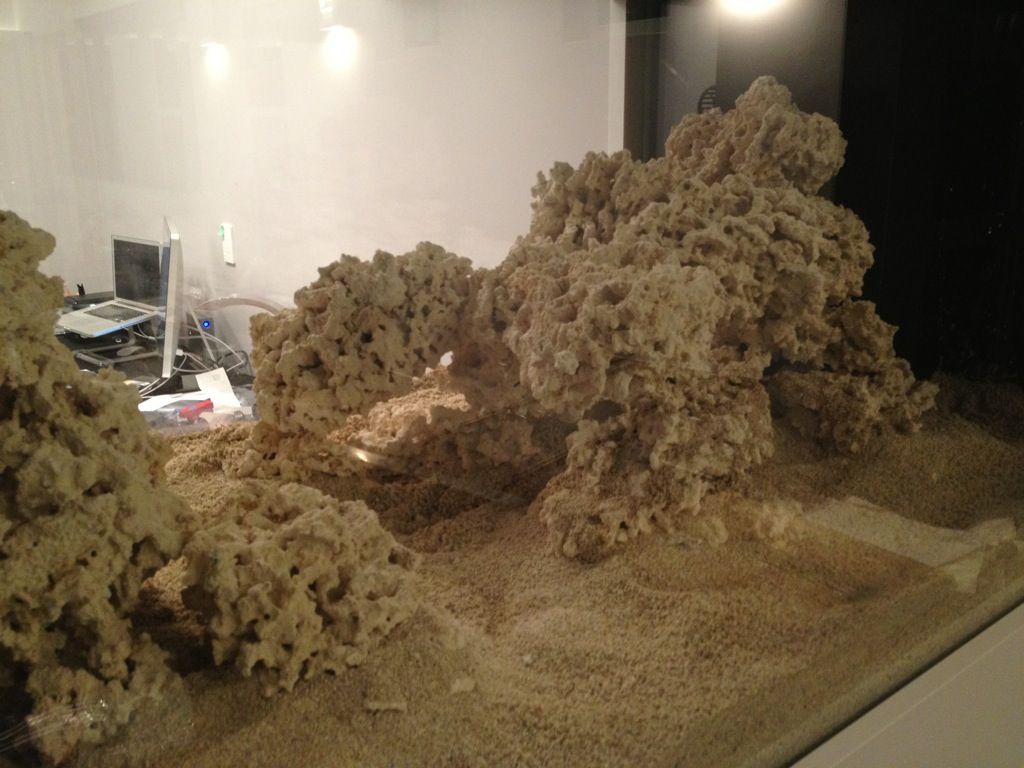 DR north end 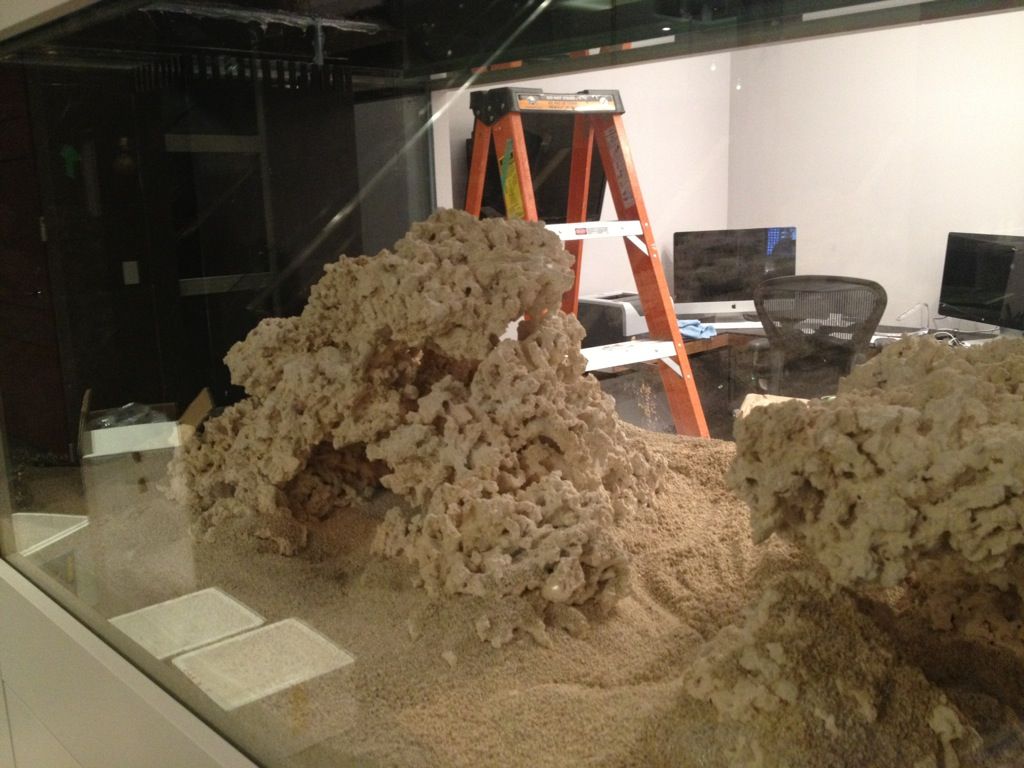 I'm not as happy with the office side, but also keep in mind that without real lights on, the shadowing from the room makes the office side look WAY more like a 'pile o' rocks' than it does in real life. Office side FTS 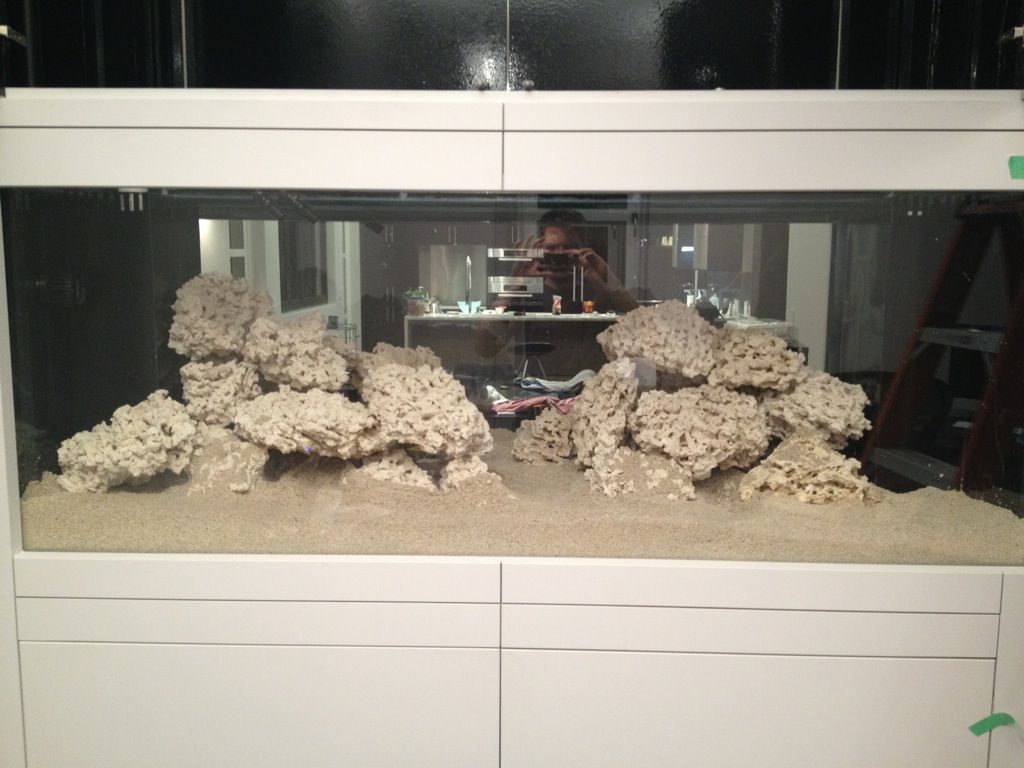 OS South end 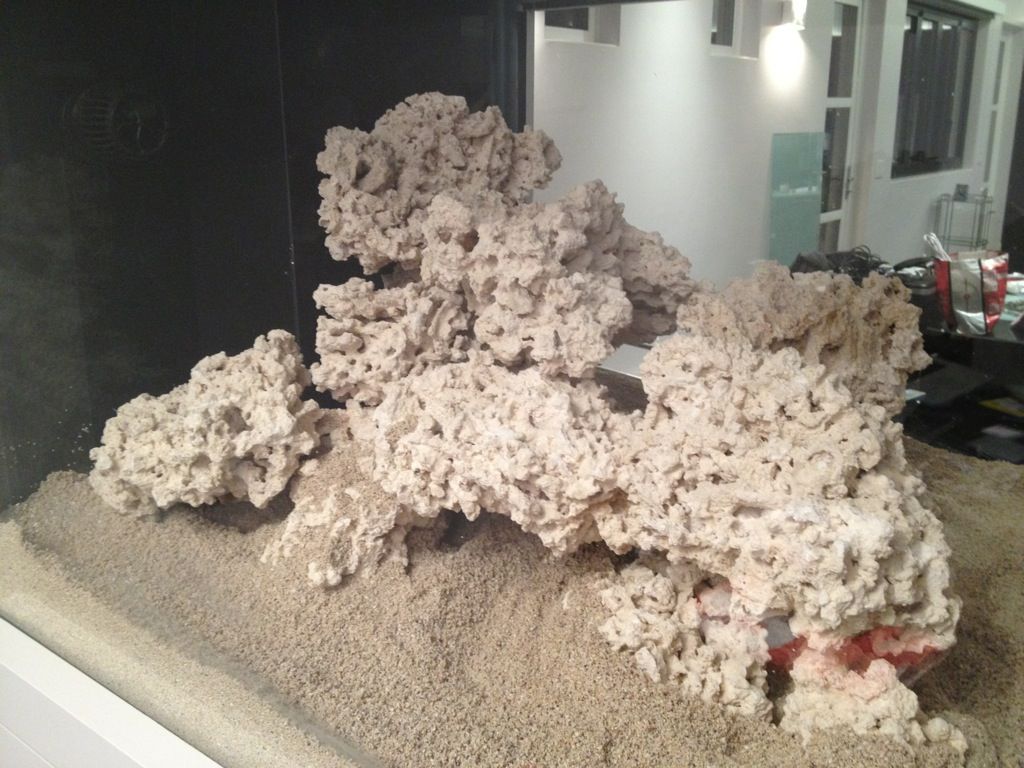 OS north end 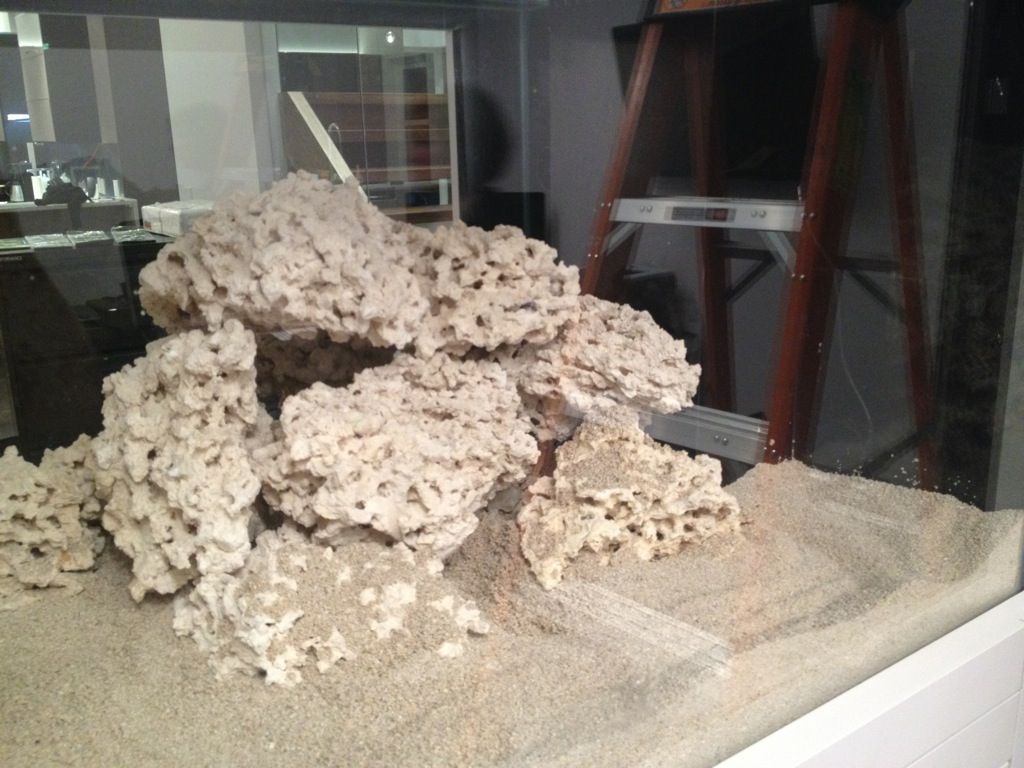 And here's how it looked when I shut the R/O unit down on Friday (I'm now in saskatchewan for a family thing) 
|
|
#139
04-02-2012, 05:10 PM
|
|||||
|
|||||
|
Hey what does RC charge for that Marco Rock?
__________________
Current System 75 Gal with 30 Gal Sump Reef Past Tanks 60 Gallon True Cube 30 Gallon Breeder 165 Eurobraced Starfire Custom 10 Gallon Softy Tank(My First Tank)
|
|
| Thread Tools | |
| Display Modes | |
|
|


 Linear Mode

