
|
|
|
||||||||
| Portal | PhotoPost Gallery | Register | Blogs | FAQ | Members List | Calendar | Search | Today's Posts | Mark Forums Read |
 |
|
|
Thread Tools | Display Modes |
|
#1
 02-11-2012, 09:38 PM
|
||||
|
||||
|
Finally my new build is underway
 I've been wanting a bigger tank for years now, it started about 5 minutes after my 75g was complete haha I've been wanting a bigger tank for years now, it started about 5 minutes after my 75g was complete haha Got a great stand built by The Grizz in Blackfalds. Right now I just sheeted it in 3/4 ply 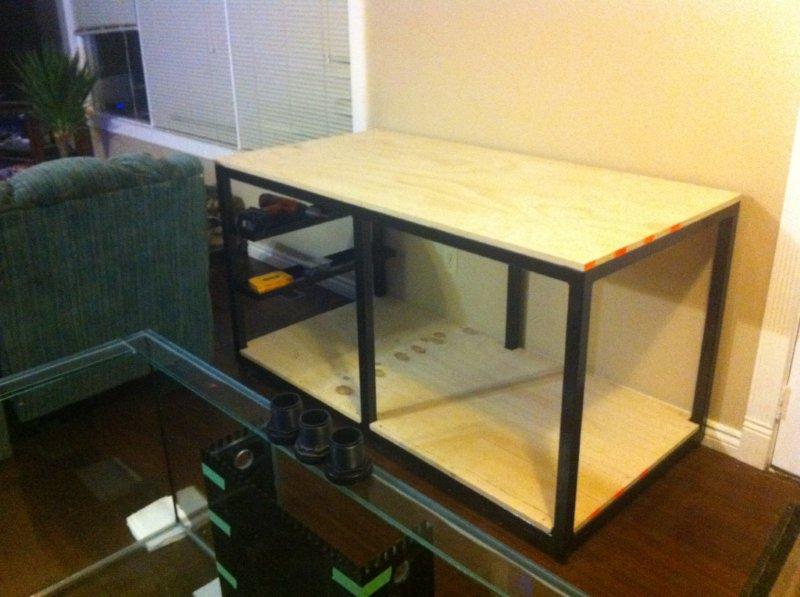 Tank is 60 x 30 x 24 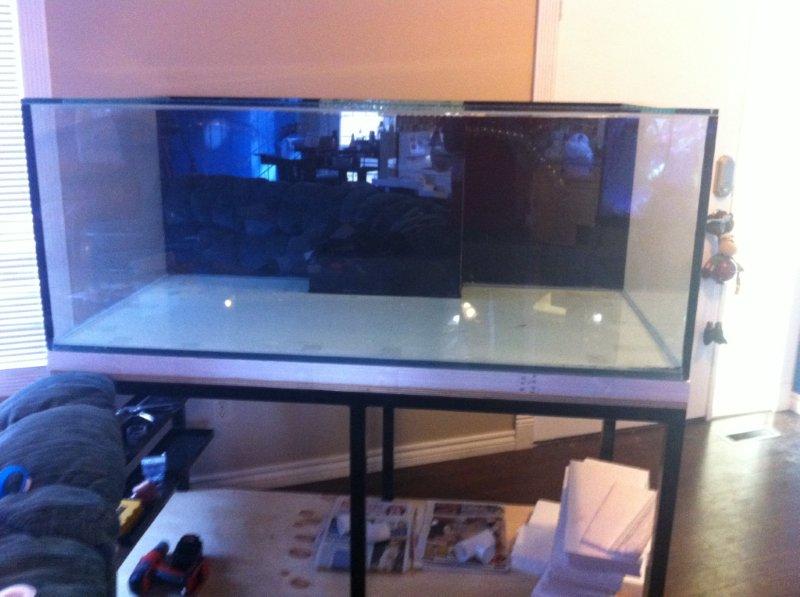 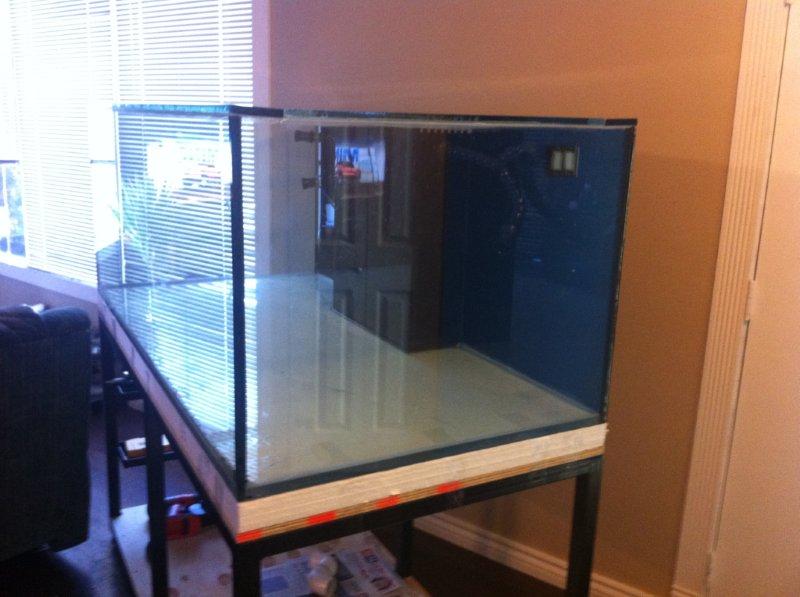 Coming out either side of the overflow I have my returns plumbed into locline with water flow accelerators. 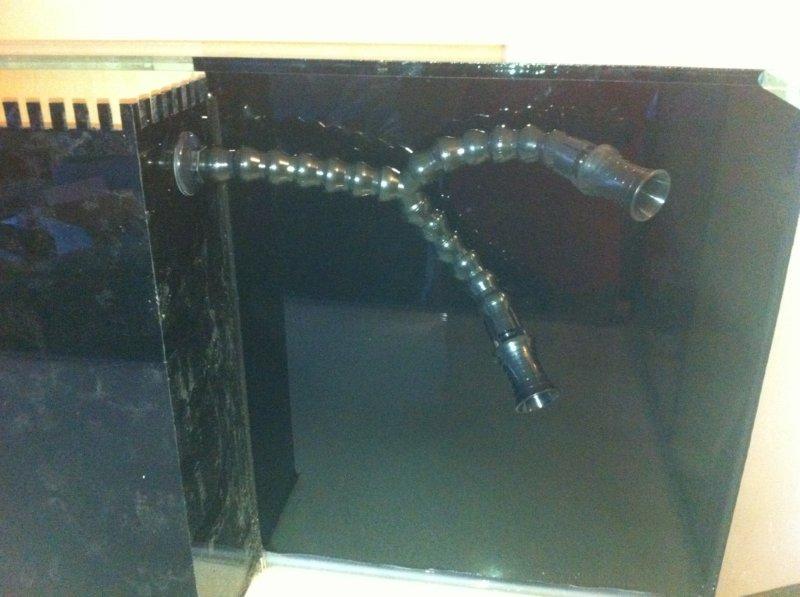 Inside the over flow I decided to use some flex pipe to plumb the returns without using elbows for max flow. You can also see the standpipes here. It will be a herbie overflow. I used threaded bulkheads so the standpipes can be removed and modified easy for some tuning. Going to see how it runs first without a top cap on the secondary pipe. Currently I have the main over flow about 2 inches below the secondary. Not really sure how much lower it needs to be however I can always remove them and adjust later. 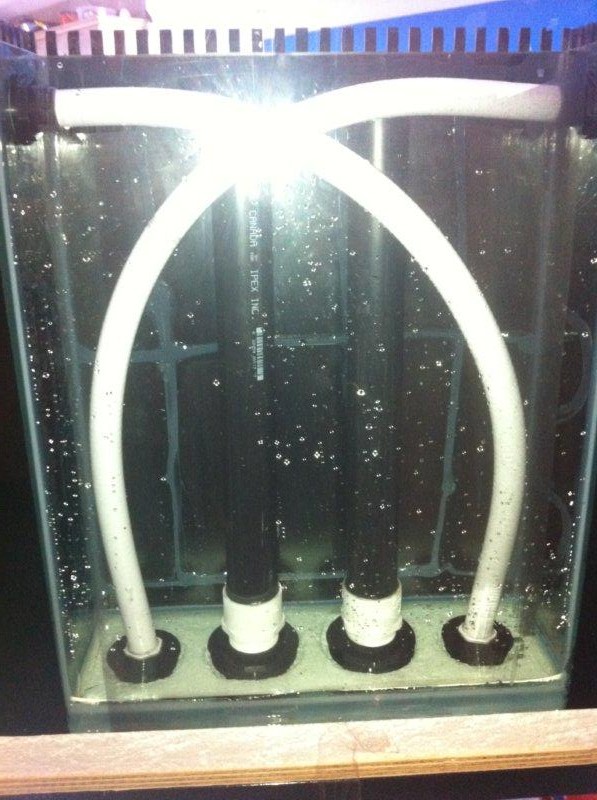 Primary over flow is attached to a gatevalve . 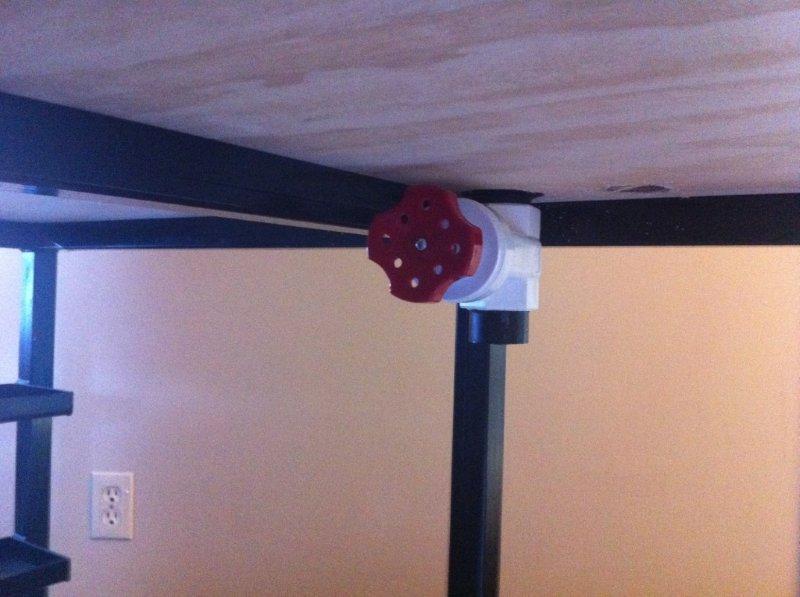 Overflow plumbing is 1 1/2 and the return is 1 inch from the pump reduced to 3/4 after split for the 2 returns. I plan on splitting my overflow 1/2 going to a fuge tank then to the sump and half going to a water changer tank then to the sump. I can by pass the flow from the water changer, drain and refill for easy water changes. More on that later. Thats it for now
__________________
Western Database - Custom database, software design and cloud hosting. 
|
|
#2
02-11-2012, 10:03 PM
|
||||
|
||||
|
Looks great. gives me some plumbing ideas.
|
|
#3
02-11-2012, 10:43 PM
|
|||||
|
|||||
|
Holy heck man look at your tank come to life excellent
__________________
180 starfire front, LPS, millipora Doesn't matter how much you have been reading until you take the plunge. You don't know as much as you think.
|
|
#5
02-12-2012, 12:49 AM
|
|||||
|
|||||
|
so um......whatcha gonna do for lighting???.....metal halide???
__________________
260g mixed reef, 105g sump, water blaster 7000 return, Bubble King SM 300 skimmer, Aqua Controller Jr, 4 radions, 3 Tunze 6055s,1 tunze 6065, 2 Vortech MP40s, Vortech MP20, Tunze ATO, GHL SA2 doser, 2 TLF reactors (1 carbon, 1 rowa). http://www.canreef.com/vbulletin/showthread.php?t=50034 . Tank Video here http://www.vimeo.com/2304609 and here http://www.vimeo.com/16591694
|
|
#6
02-12-2012, 12:54 AM
|
|||||
|
|||||
|
I would go with PC lighting
Tank looks great on the stand Martin, can't wait to see how the flow accelerators work for you. If your doing a herbie you want one pipe ( with the gate valve ) to be about 1/3 up from the bulkhead & the other one ( emergency drain ) to be just above the water level when running. No caps on either.
__________________
Feed the bear goodies, make a new friend, don't feed the bear............... 8' - 165gal Reef DIY LED's Build 2012 Nano Contest Winner Febuary 2013 POTM Winner 300 gal + 60 gal Complete DIY Build Last edited by The Grizz; 02-12-2012 at 12:58 AM.
|
|
#7
02-12-2012, 03:58 AM
|
|||||
|
|||||
|
looking good martin welcome to the year of the 180 build club lol ive lost count but there are a few of us
__________________
Desperately seeking serenity ... 180g custom build http://www.canreef.com/vbulletin/showthread.php?t=81400 50g custom daycare tank... http://www.canreef.com/vbulletin/showthread.php?t=65428
|
|
#8
02-12-2012, 04:05 AM
|
|||||
|
|||||
|
looks awesome! I'm currently doing a 90 gallon build and the tank isnt even wet yet and I want to upgrade...
|
|
#10
02-12-2012, 03:20 PM
|
|||||
|
|||||
|
Quote:
__________________
Feed the bear goodies, make a new friend, don't feed the bear............... 8' - 165gal Reef DIY LED's Build 2012 Nano Contest Winner Febuary 2013 POTM Winner 300 gal + 60 gal Complete DIY Build
|
|
| Thread Tools | |
| Display Modes | |
|
|


 Linear Mode

