
|
|
|
||||||||
| Portal | PhotoPost Gallery | Register | Blogs | FAQ | Members List | Calendar | Search | Today's Posts | Mark Forums Read |
 |
|
|
Thread Tools | Display Modes |
|
#21
 08-05-2011, 08:50 AM
|
|||||
|
|||||
|
1) We lost another halider to the led-side. Nooooo!
2) What are those raised panels on the stand made of? Can you tell more about how you did all that it looks really cool. 3) drawer slides for the win haha! I recently redid my canopy and I mounted drawer slides to each other in opposing directions. This allows me to slide the canopy BOTH ways. 
|
|
#23
08-05-2011, 02:50 PM
|
|||||
|
|||||
|
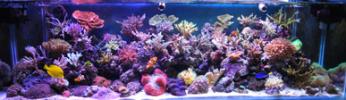
wow that is bright, I was looking at my 150 DE over my nano and looked at my 250's that are super dull compared to the 150. and now looking at the LED's hmmmmmmmmmmmmmmmmmmmmmmmmm i wonder.
__________________
180 starfire front, LPS, millipora Doesn't matter how much you have been reading until you take the plunge. You don't know as much as you think.
|
|
#24
08-05-2011, 11:13 PM
|
|||||
|
|||||
|
Quote:
Oh, but uh.. shananigans? er, I don't know what you are talking about........ And yes, That IS a SWEEET fixture. I am only using like 30% right now to raise it up slowly by like 5-10 percent per day. Sarah Loves that thing too! Good thing I have such good friends who can hook me up with the good stuff in life. The quality of this unit makes me really consider getting the Cerebra too and get the most of it. Now all I need are re-fills of KZ additives since that tank uses them up 4 times faster than my old system.
__________________
 My TOTM Link--> http://www.canreef.com/ftotm/feb10/ My 325 Journal--> http://www.canreef.com/vbulletin/showthread.php?t=77349 My 100g Photo Thread--> http://www.canreef.com/vbulletin/sho...d=1#post365843
|
|
#25
08-05-2011, 11:24 PM
|
|||||
|
|||||
|
Quote:
2) They are actually just drawer fronts. I think they are ridiculously overpriced, but they are still cool. In the picture they appear blue, but that is because I have not taken the protective film off them (this was a trial, the real thing will require my entire canopy to be re-done, which is the plan). The panels are actually high gloss white, not as reflective as the black one (you can see yourself like a mirror) but I like white and so did the wife. Red was just too extreme and took attention from the tank itself. I then just drilled them in to my sliding canopy covers from the back and voila. As you can see in the pictures though, I have yet to finish covering the entire stand and canopy since I always do things half way and leave it. If you want to know more, just drop me a pm. 3) Heck yeah! Sliding rules, but if I could also incorporate my lights being lifted up and down in the canopy that would be even more awesome. You always gotta make it so fancy.. 2WAYS? haha that is cool, maybe i should redo mine... Right now the light rack in the canopy is only designed to slide back and forth, but up and down is cooler.. hmm seems to remind me of a certain tank build from a certain person with a name beginning with B..... wonder who that was....
__________________
My TOTM Link--> http://www.canreef.com/ftotm/feb10/ My 325 Journal--> http://www.canreef.com/vbulletin/showthread.php?t=77349 My 100g Photo Thread--> http://www.canreef.com/vbulletin/sho...d=1#post365843
|
|
#26
08-07-2011, 04:48 AM
|
|||||
|
|||||
|
Quote:
Quote:
You should look into the Illumina as well if LED's spark your interest. I hear a certain Albert is quite knowledgable on this unit, and Dave at Concept is able to get a hold of these units as well
__________________
My TOTM Link--> http://www.canreef.com/ftotm/feb10/ My 325 Journal--> http://www.canreef.com/vbulletin/showthread.php?t=77349 My 100g Photo Thread--> http://www.canreef.com/vbulletin/sho...d=1#post365843
|
|
#27
08-07-2011, 05:53 AM
|
|||||
|
|||||
|
Dude what is the length of that, u have a 8 footer too man and you are running that light. hmmmmmmmmmmmmmmmmmmm really please pm me the price of that light too $$ let me know how that is running for light on the ends too.
what is the difference in the 200 and the 260
__________________
180 starfire front, LPS, millipora Doesn't matter how much you have been reading until you take the plunge. You don't know as much as you think. Last edited by Skimmerking; 08-07-2011 at 06:04 AM.
|
|
#28
08-07-2011, 07:49 AM
|
||||
|
||||
|
Quote:
SR200 - XPE SR260 - XPG, about 30+% brighter
__________________
This and that.
|
|
#29
12-02-2011, 07:56 AM
|
|||||
|
|||||
|
You replaced 6 halides on an 8 foot tank with a 6-foot LED fixture with a somewhat narrow spread. Can you update us on how that's panned out so far?
|
|
#30
03-12-2012, 12:59 AM
|
|||||
|
|||||
|
Quote:
With respect to the corals, I increased the intensity far too quickly. Some of my SPS near mid level and upwards in the tank bleached out quite a bit (even only at about 70% intensity). I turned it down to about 40% on the whites and 50% for both Blue and Royal Blue. I have since slowly increased to 50% white, 70%blue and 70%royal blue (about 2 or 3% increase per week). I have not added any of the red LED modules so cannot comment on that. I did only mount my lights about 8" from water surface, so I added in a 24" glow T5 i had lying around on each end of the tank running back to front to cover the very last 6" of each end of my tank. I suppose that since I am not even using nearly 100% of the Illumina's full capabilities, I could also have raised the unit and allowed the spread of the LEDs to reach the ends as well instead of adding the Glo T5s. Growth is good, colors are coming back on whatever bleached before, and corals on the ones that didn't bleach are popping. I like how you can really play with the Blues and white to configure the look you want. The ability to set how long your sunrise and sunsets last is kind of neat too so you can have things light up more naturally (really nice for new coral additions to not stress them out for the first while that you have them). The fact that you can adjust your LED intensity settings temporarily is also great for adding new fish and corals as well. To sum it up; great choice, would not go back, also strongly recommend to others. Ballast is tiny, wires are easy to manage, easy to mount in a neat and clutter free manner. Hope that helps Brett.
__________________
My TOTM Link--> http://www.canreef.com/ftotm/feb10/ My 325 Journal--> http://www.canreef.com/vbulletin/showthread.php?t=77349 My 100g Photo Thread--> http://www.canreef.com/vbulletin/sho...d=1#post365843
|
|
| Thread Tools | |
| Display Modes | |
|
|


 Linear Mode

