
|
|
|
||||||||
| Portal | PhotoPost Gallery | Register | Blogs | FAQ | Members List | Calendar | Search | Today's Posts | Mark Forums Read |
 |
|
|
Thread Tools | Display Modes |
|
#11
 06-16-2010, 05:37 AM
|
||||
|
||||
|
Thanks, I have enjoyed building it and am already looking forward to the next build/upgrade.
The skimmer has turned out quite interesting, as you know the pump died and I had no skimmer over the weekend. Kevin from Red Coral kindly loaned me a reeflo dart to tide me over. I replaced the plumbing to the skimmer and turned it on with great reservation. The skimmer manufacturer recommends a 1000gph pump to get best results, the dart theoretically kicks out about 3600gph and I had visions of water spraying around etc. The skimmer has never worked better and almost instantly started producing a lovely thick foam. I must admit all thoughts of replacing the skimmer have been put on hold for the moment. I may well be heading up to RC for a new dart to power the skimmer. Strange how things work out! Have you got all your bits sold yet? 
|
|
#13
06-16-2010, 03:46 PM
|
||||
|
||||
|
Quote:
The Dart pump is great. Sooo quiet for such a large pump & you can restrict the output with a gate valve to control the flow without damaging it! which is good. i have sold around 90% of the equipment now & the tank S.
__________________
Nothing! No Tank, No Skimmer, No Zeovit, No Sump! Just Nothing.......At the moment Simplycorals 165g Upgrade.
|
|
#16
06-17-2010, 03:46 AM
|
||||
|
||||
|
Electrical supply from mains board, it helps having a brother who can frame as well as being an electrical contractor!!!!!!
[IMG] 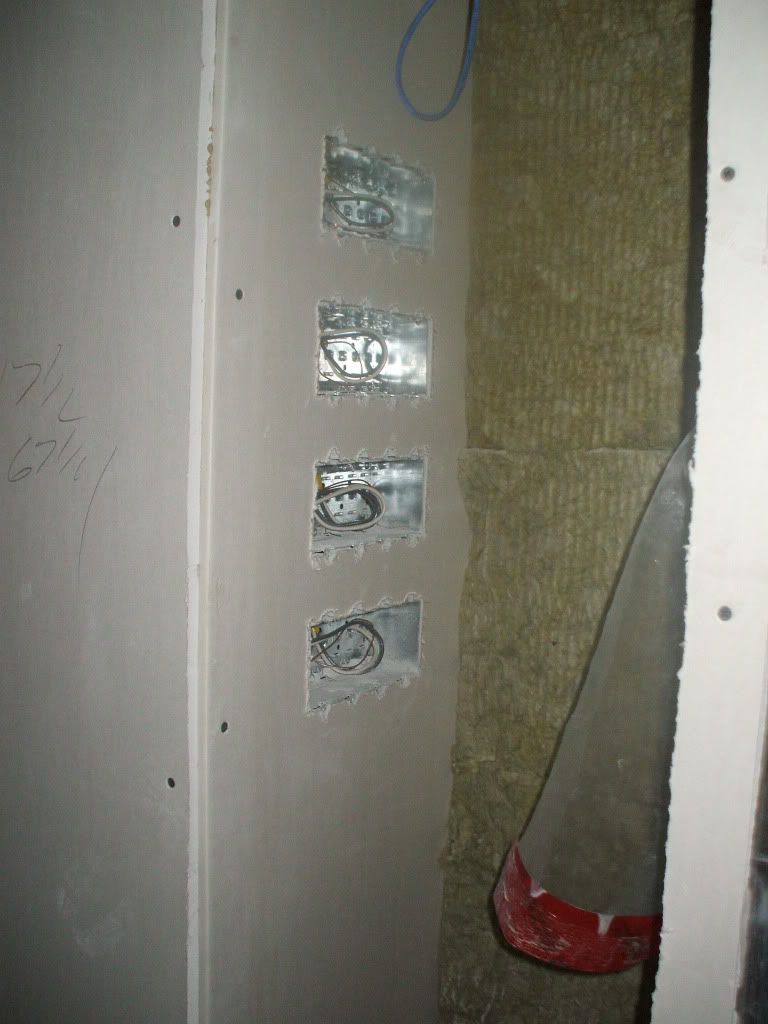 [/IMG] [/IMG]The top up and water change will be carried out in the mechanical room with an RO unit plumbed into the mains supply, a bit more framing and the tanks were installed. 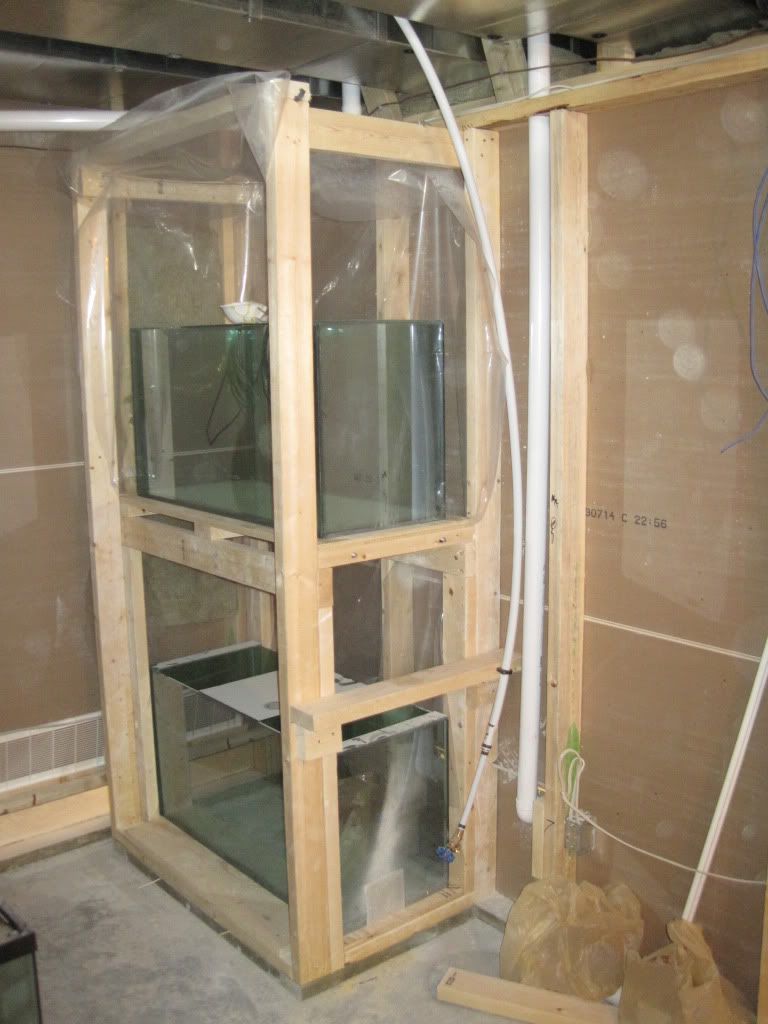 The display tank in the wall and the top up system are connected by a pipe in which all of the plumbing runs, it can be seen to the right and top of the frame holding the top up tanks: [IMG] 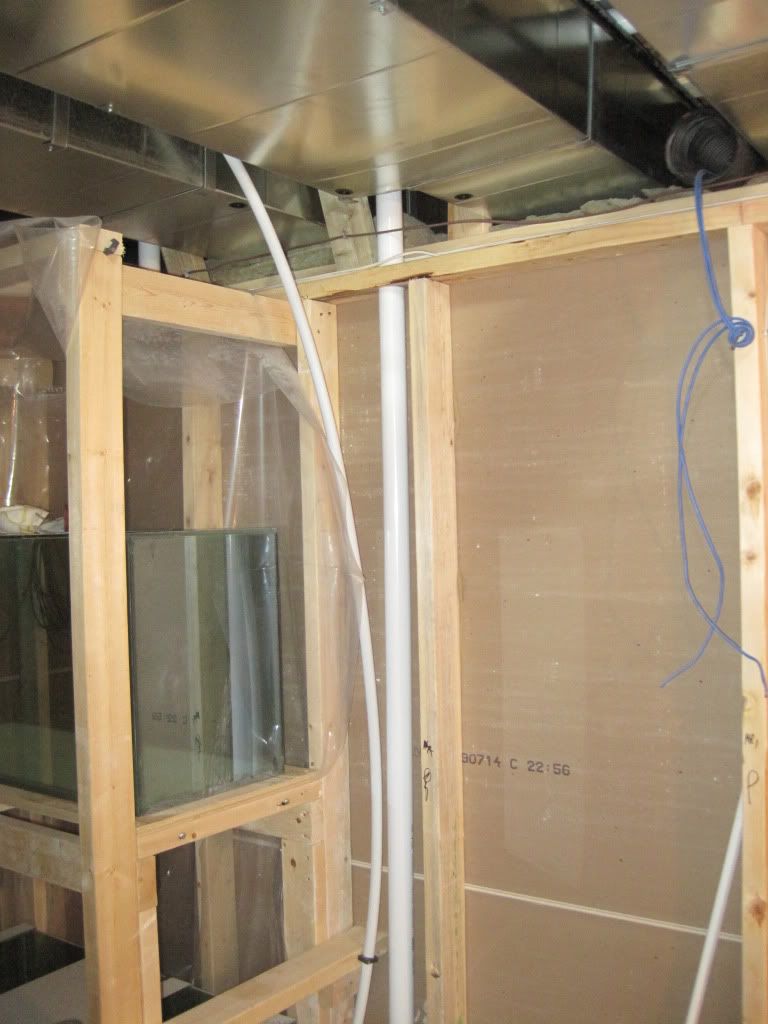 [/IMG] [/IMG]
|
|
#17
06-17-2010, 04:17 AM
|
||||
|
||||
|
The overflow was fitted with a herbie style drain to keep the noise down.
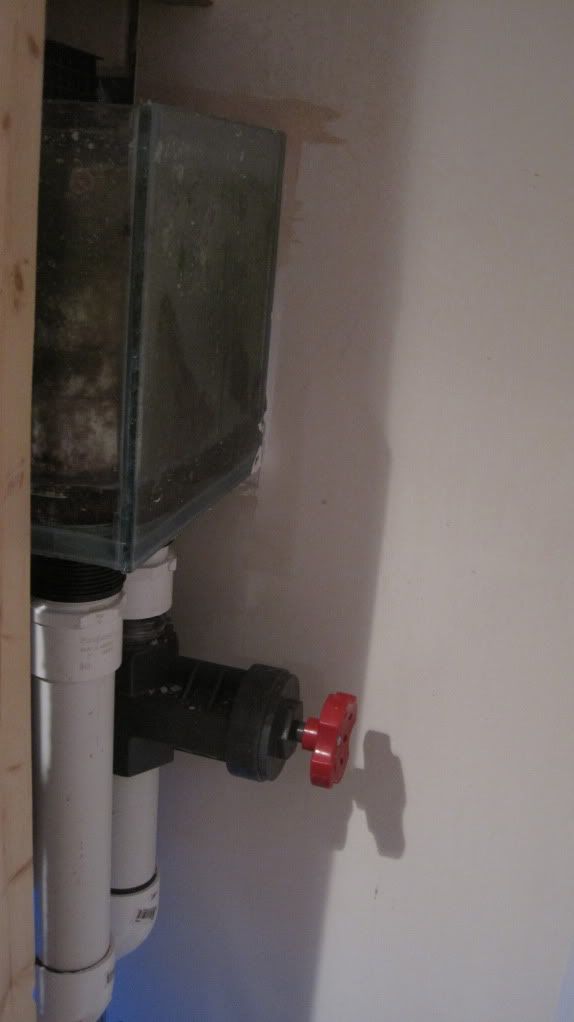 The OM4 connected to a dart was installed beneath the tank, first major mistake! Having drawn out the plan on the floor in the early stages a 24" wide wall looked way too thick so it was decided to go down to an 18" wall. Problem turned out that it was extremely difficult to fit the OM4 and the plumbing in with such a narrow wall. With much scheming and far too many 90 degree bends I finally got it all in..... [IMG] 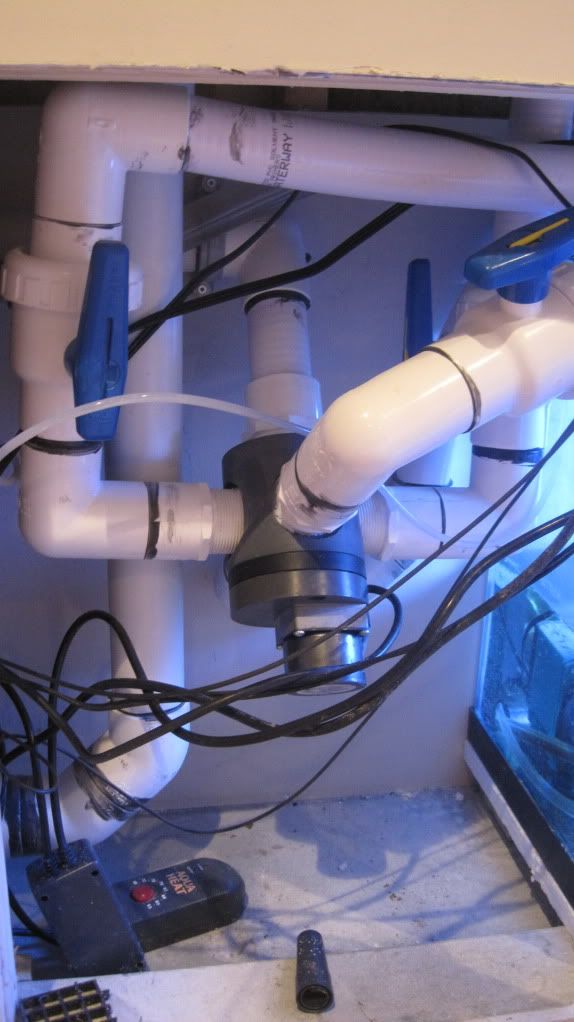 [/IMG] [/IMG]
|
|
#18
06-17-2010, 04:27 AM
|
|||||
|
|||||
|
Very exciting build. Can't wait to see the tank and the room. Tagging along.
__________________
210 Gallon slowly gaining population. Foxface, Naso, Coral Beauty, 2 Clowns, 2 Chromis, Orange Anthias, and Striped Goby.
|
|
#19
06-17-2010, 04:30 AM
|
||||
|
||||
|
Next major mistake turned out to be the same issue, too little space between the walls for any commercially available T5 lighting units that could offer more than 2 bulbs which as I hoped to keep sps would not be very useful.
My brother took me down to EECOL for a visit and I came away armed with commercial 48" T5 ballasts, 8 of them. It turned out that despite the fact that I only had about 10" of space between the walls above the tank I could fit 4 of the commercial ballasts side by side allowing a total of 16 x 48" 54w T5 bulbs over an 8' length. Better still was the cost, saved a fortune! Bolted together on an aluminium frame and connect to plugs the light was ready to go. [IMG] 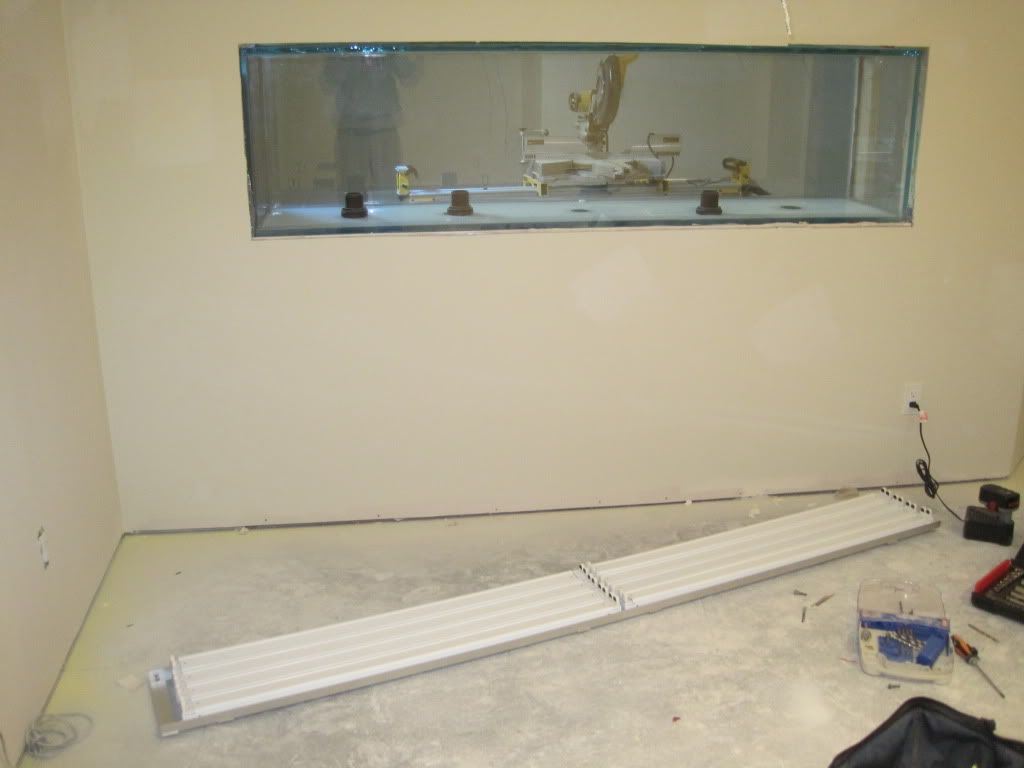 [/IMG] [/IMG][IMG] 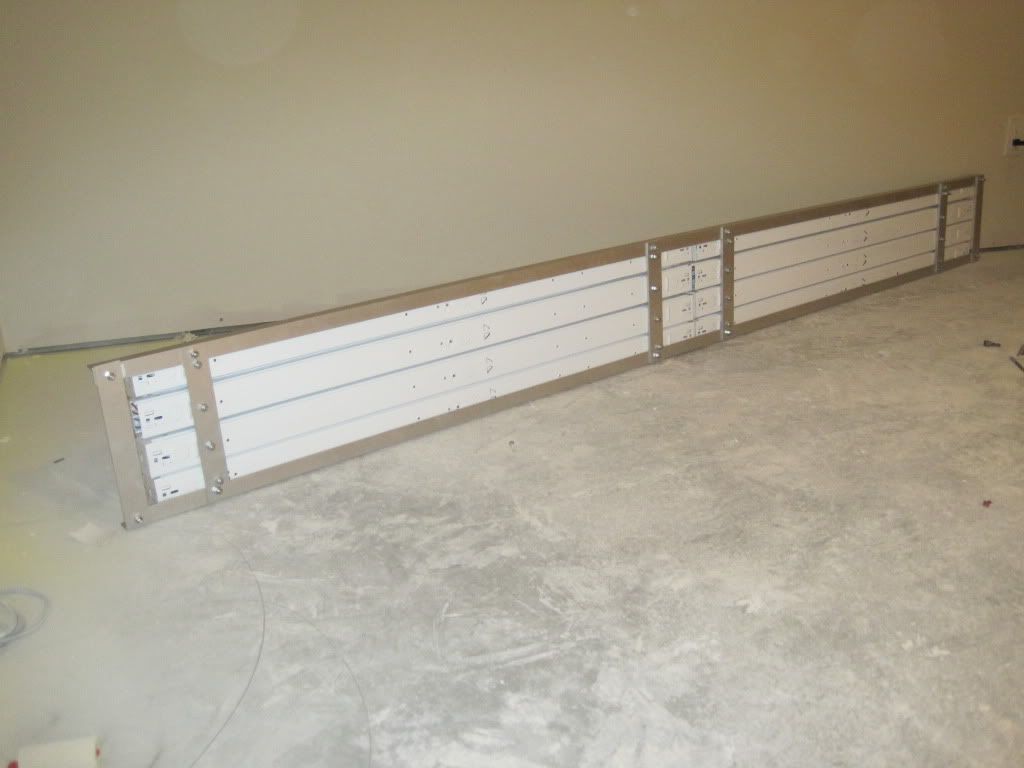 [/IMG] [/IMG]
|
|
#20
06-17-2010, 04:43 AM
|
||||
|
||||
|
I had seen an amazing tank - http://www.underseadiscovery.net/ which used an ETSS skimmer, thought to myself, that looks good to me so I departed from the needle wheel skimmers I have used in the past and got the 900XR with a collection vessel. The recommended pump for this downdraft skimmer is an iwaki 55RLT, I was advised that an equivalent pan world would do the job equally as well and went down that route "saving" some money.
The skimmer did not perform as well as I had expected until the pump died. Kevin from Red Coral in Calgary offered to loan me a dart pump which is 3600gph, over 3 times more gph than is recommended. I changed the plumbing and fired up the beast expecting to have to make serious use of the ball valves I had installed to reduce the flow. What a difference, Kevin will have to surgically remove the dart from me!!!! Thanks kevin. Anyhow the skimmer is now working like a dream and producing well, decide for yourselves... 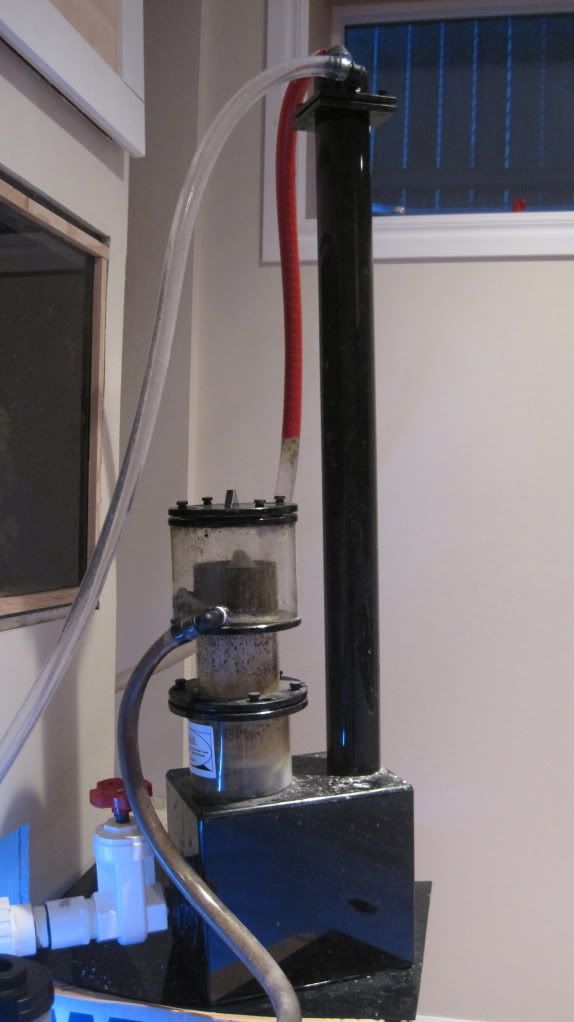 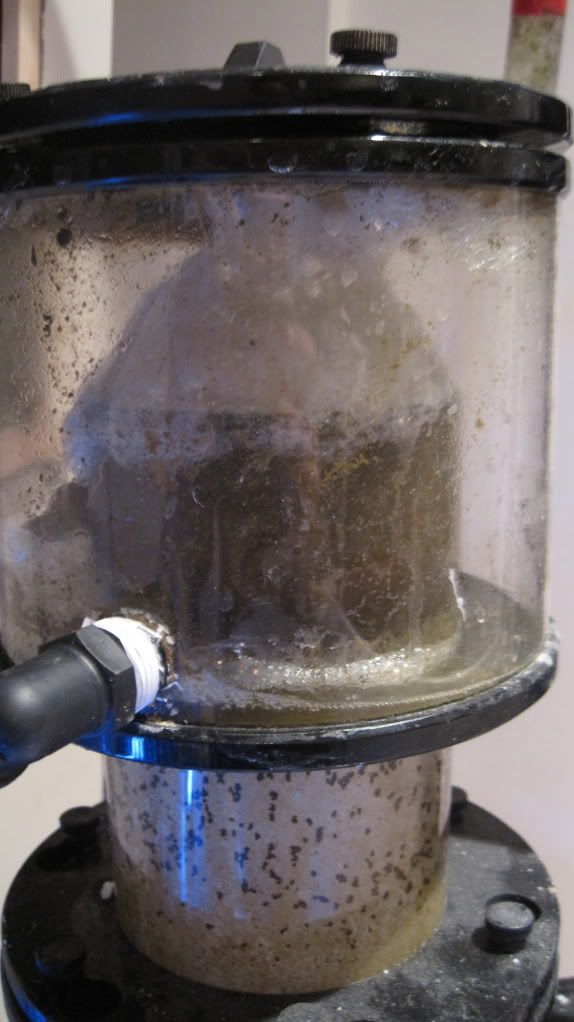 The collection vessel comes with a built in shut off to prevent the skimmate from overflowing if it gets too full, it works too! 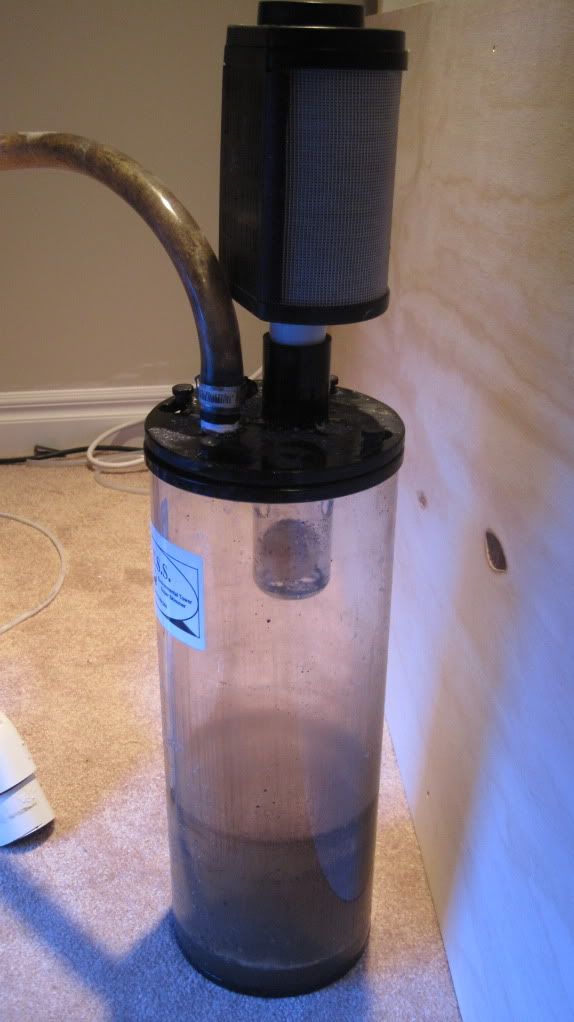
|
|
| Thread Tools | |
| Display Modes | |
|
|


 Linear Mode

