
|
|
|
||||||||
| Portal | PhotoPost Gallery | Register | Blogs | FAQ | Members List | Calendar | Search | Today's Posts | Mark Forums Read |
 |
|
|
Thread Tools | Display Modes |
|
#351
 04-09-2010, 11:40 AM
|
|||||
|
|||||
|
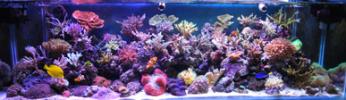
Before I get started I thought it would be fun to see a before and after. Here's a shot of the tank in its infancy, pretty much day one (August 2009), and the second shot is what it looks like today (April 2010).
August 2009:  April 2010: 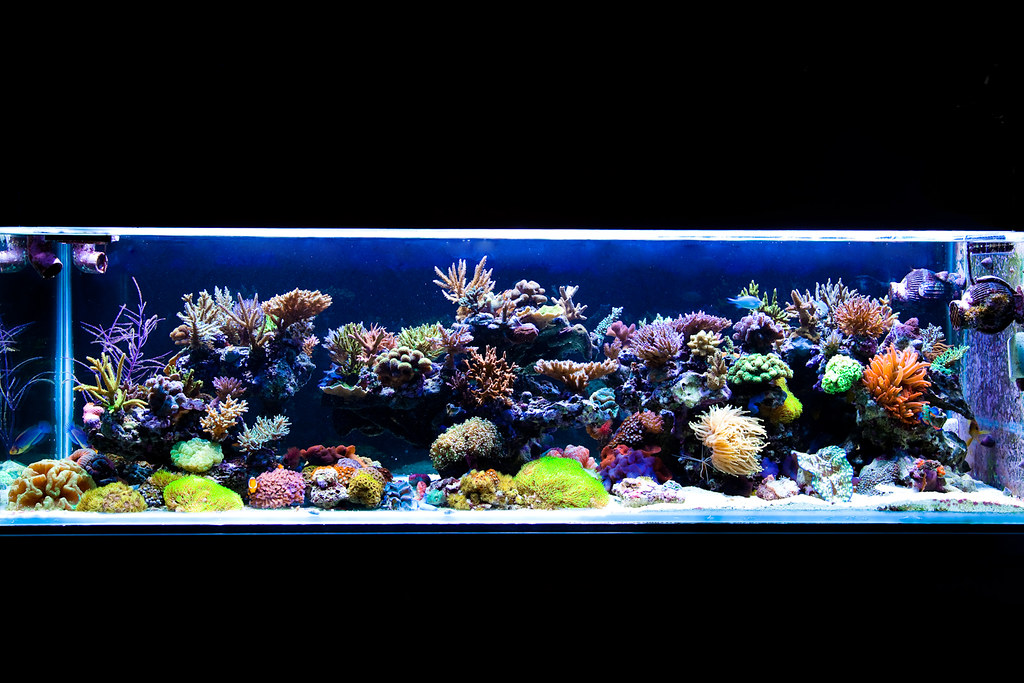 
|
|
#352
04-09-2010, 11:47 AM
|
|||||
|
|||||
|
Quote:
|
|
#354
04-09-2010, 05:56 PM
|
||||
|
||||
|
Quote:
Kevin
|
|
#356
04-09-2010, 06:25 PM
|
|||||
|
|||||
|
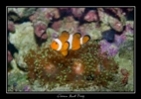
Great before and after shots ! What difference. Been awhile since I read through the build but is that RBTA on the right side ? Be interesting to see what you have for change coming up.
__________________
Mike 150g reef, 55g sump, T5's, Vertech 200A, Profilux III - German made is highly over rated, should just say Gerpan made. Reefkeeper - individual obsessed with placing disturbing amounts of electricity and seawater in close proximity for the purpose of maintaining live coral reef organisms.
|
|
#357
04-09-2010, 07:07 PM
|
|||||
|
|||||
|
Quote:
__________________
 My TOTM Link--> http://www.canreef.com/ftotm/feb10/ My 325 Journal--> http://www.canreef.com/vbulletin/showthread.php?t=77349 My 100g Photo Thread--> http://www.canreef.com/vbulletin/sho...d=1#post365843
|
|
#358
04-10-2010, 03:22 PM
|
|||||
|
|||||
|
Quote:
Quote:
Quote:
|
|
#359
04-14-2010, 08:00 AM
|
|||||
|
|||||
|
So if you've been following along you'll know that I run a Profilux II to control my various aquarium equipment. Well, the Profilux 3 came out not too long ago and I jumped on the upgrade bandwagon pretty much right away. Got a smoking deal on it from my favourite LFS (Red Coral Aquariums - thanks Kevin!!). Haven't had a chance to install the it until now though..
Ever wonder what the guts of a Profilux looks like?  The hardware upgrade itself was pretty easy once I found the instructions (online). One complaint I do have though is the fact that every set of instructions I found said in step 1 to remove the top of the controller, but none of them said how to do that! It took me a little while to figure it out. Those blue tabs just click in and out of place, then the top and bottom halves slide apart. No screws involved. Anyway, here is the reassembled controller with the Profilux 3 upgrade installed.   The hardest part about the whole thing was actually reapplying all the settings as the upgrade pretty much wipes them all out. Good thing I wrote down everything. And here we are back online! 
|
|
#360
04-14-2010, 08:59 AM
|
|||||
|
|||||
|
Earlier this year I started thinking about setting up a FOWLR tank. At first I wanted that tank to be separate from the main 150g mixed reef, but after playing around with my 104.72g lagoon for a while I decided that a separate tank of that size just isn't going to work for me. If I'm going to add another tank it HAS to be plumped into the 150 some how so that I can leverage one sump, which means one water change, one dosing location, one heating location, etc..
So speaking of sumps, that's where we begin. I took this opportunity to modify the existing sump while adding two additional sump tanks, one to be used as a connector sump to the main sump and one as a water change tank (more on this later). The 3 sump system looks some thing like this.  Both tanks will have their own return pumps. I found that this is easier to control the herbies in each tank, rather than having one massive return pump with a splitter or manifold. Plus now I can electronically cut supply to each tank individually which is handy. The sump tanks are fairly small in comparison to the 104.72g lagoon tank that I built so again I decided to build the sump tanks myself. First up is the primary sump. Here it is held together with just the corner brace to dry fit it.  Once I'm happy with the fit I drop down one of the side panels and apply a bead of silicone to the bottom of the pane.  Lift that pane of glass back up, hold it in place with the corner braces, and lightly push the bottom in but NOT too hard as to squish ALL the silicone out. You never want glass on glass because that's just a weak point that will likely fail!  Repeat for the other side panel. Now we drop down the back panel and apply silicone on 3 sides and push that panel into place.  Once that panel is in place secure with a piece of nylon tape on the top and bottom.   Repeat for the front panel. Now we apply a bead of silicon in all the corners and crevasses and squish in with a finger. The other two tanks pretty much went the same way. I decided that since these were sumps and I was in a bit of a time crunch I skipped the taping and masking on these tanks. It makes for very ugly siliconing but the sumps are going to get ugly anyway. Here's the trio.  Here's the new Primary Sump back in place.  Here's my new ghetto sensor array.   Return section with the two pumps.  Full Sump Shot. 
|
|
| Thread Tools | |
| Display Modes | |
|
|


 Linear Mode

