
|
|
|
||||||||
| Portal | PhotoPost Gallery | Register | Blogs | FAQ | Members List | Calendar | Search | Today's Posts | Mark Forums Read |
 |
|
|
Thread Tools | Display Modes |
|
#1
 03-12-2008, 05:54 PM
|
||||
|
||||
|
So last night, I finally started my modification to my 36" Aqualight Pro. I say "started" because I only finished half the job in the time I expected to complete it all. I will be finishing the rest of it this weekend and providing lots of pics.
Anyways, here's the background on the mod. I have an Oceanic 70G tall tank. Like many new reefers, I got into the hobby by taking the best advice from my local LFS, which included buying whatever they had in stock. That included a 36" 150W MH Aqualight Pro. Because my tank is 24" high, it seems that my current lighting could just never give the coverage that I needed it to, especially at the bottom of the tank. Not to mention, the Coralife PC's Actinic supplementation was pathetic. I've tried different bulbs and it was my last bulb change that pushed me into this modification. In order to improve PAR, I recently put in a new Ushio 10k bulb, but the lighting it gave me was really too yellow for my liking. See pic...  To fix this I purchased 4 of the 36" sunblaster T5HO strip lights. They come with 6700k bulbs so I also picked up 4 additional bulbs from Hidden Reef. 1 Fiji Purple, 1 AquaBlue+, 2 50000k in the hopes of putting color back into my tank. Taking apart the fixture is actually very easy. In the end, it was a good thing that I decided to do this mod as I found one of the original connectors in the light for my PC's completely burned up and probably a real fire hazard. Unfortunately, my camera died before I even got my first picture taken, but since I only did half the fixture so far, I will correct that when I take it apart again on Saturday to finish the job. I promise to document each step in case someone else would like to replicate this. To say the least, here is a picture with just the front PC bay containing two T5HO 39W lights now. Notice that when you look at the fixture, you can see light along the entire reflector versus the back compartment where only the 22" PC bulb exists still.  Right now, I'm using the Fiji Purple and one 50000k bulb in that first compartment. I'm already impressed with the huge difference in lighting. Let me know what you think. Again I promise to really document the mod so that you can see all the steps that I've taken once the weekend roles around.
__________________
Mark... 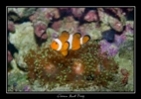 290g Peninsula Display, 425g total volume. Setup Jan 2013. 
|
|
#2
03-12-2008, 06:14 PM
|
|||||
|
|||||
|
Hey mark,
If your allowed to play one day, perhaps you would like to come over and attept (help) me do the same thing to my 6ft Coralife. i have been contemplating swappin the PCs for T5s. was gonna do 8 39Ws i think. your like looks phenominal for color.!!!
|
|
#3
03-12-2008, 06:21 PM
|
||||
|
||||
|
Wait until the weekend when you see how it wasn't all that hard. 8 lights the way that I'm doing it would be pretty expensive though. I'm using the Sunblasters and their ballasts. You might be better off using the original coralife ballasts to run t5 caps. I just couldn't do that because I wanted 4 x 39w which was 156w while the ballast could only run 2 x 65 (130w).
__________________
Mark... 290g Peninsula Display, 425g total volume. Setup Jan 2013.
|
|
#4
03-12-2008, 06:29 PM
|
|||||
|
|||||
|
Wow Mark, that's a huge difference. Congratulations!
If we can make it work I would like to come by and check it out this weekend and pick up the extra bulb too Have you noticed any difference in the temperature of the unit?
__________________
Setup Mar 2004 50g tank 23g DIY Acrylic Sump\Refugium Sold Dec 2009  Vacation Fun: http://members.shaw.ca/cabin54/
|
|
#6
03-12-2008, 06:38 PM
|
|||||
|
|||||
|
Quote:
Controlling heat is a big issue with my tank. Thanks
__________________
Setup Mar 2004 50g tank 23g DIY Acrylic Sump\Refugium Sold Dec 2009 Vacation Fun: http://members.shaw.ca/cabin54/
|
|
#7
03-12-2008, 06:49 PM
|
||||
|
||||
|
I was planning to watch the unit's temp quite closely anyways, since I now have ballasts running along a thin wall beside the MH reflector. I don't think they will get too hot but you never know.
As for the water temp. I've had a cheap coralife thermometer for ages and I don't trust it at all. I just got a new pinpoint wireless thermometer this week and once I have batteries for it, I'll let you know how the tank temp varies. If I do trust the coralife, then my tank is always too cold at 73 degrees 95% of the time. Sometimes in the middle of my lighting cycle, it will get to 73.7 degrees. My heater (an ebo jager) is set to have a 78 degree temp and it doesn't run all the time so that's why the new equipment was purchased.
__________________
Mark... 290g Peninsula Display, 425g total volume. Setup Jan 2013.
|
|
#8
03-12-2008, 08:14 PM
|
|||||
|
|||||
|
Hi Chris, Chin Lee was talking about doing this mod by swapping out the end caps. I've had the same idea but am not too electrically inclined so I've been waiting for a good step by step instruction before trying it. My idea was to use 4 24" T5's as the Coralife ballast can't drive 4 36" T5's.
I even drew a pretty picture to show Mark in hopes he was better at electrical tinkering than I am. I'll throw it on here incase someone with more skills than I have wants to upgrade their Aqualight and write me a step by step manual :mrgreen  I just dawned on me. I'm not really good with drawing pictures either Quote:
Quote:
__________________
Setup Mar 2004 50g tank 23g DIY Acrylic Sump\Refugium Sold Dec 2009 Vacation Fun: http://members.shaw.ca/cabin54/
|
|
#9
03-12-2008, 09:53 PM
|
||||
|
||||
|
Now Kevin,
You shouldn't be too hard on yourself. I saw your pic of your fuge and so I downloaded google sketch...yikes, that's not easy to use! Quote:
__________________
Mark... 290g Peninsula Display, 425g total volume. Setup Jan 2013.
|
|
#10
03-17-2008, 05:36 PM
|
||||
|
||||
|
Okay, so I finished the rest of the modification on my Aqualight pro on the weekend.
Now I've seen lots of mod threads before and no matter how much you document, it's hard to explain it all. I've taken a lot of photos, but please let me know if you have a question and I'll help if I can. Here's a shot of the full light with only half the modification done. You can see how the PC bulbs would provide less coverage. 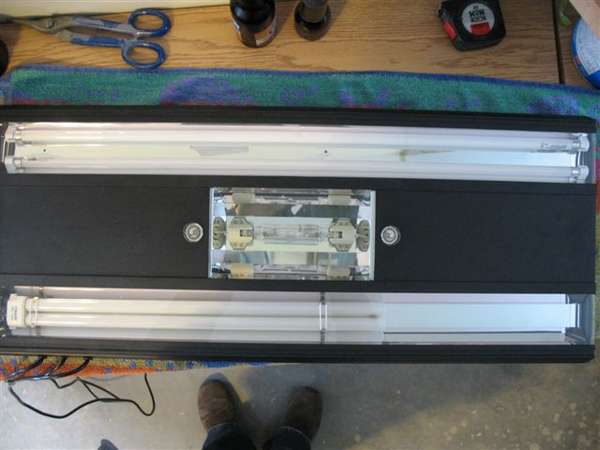 Here is what we start with at the PC endcap. Notice the grommet that allows the quick-connect to come through...the needs to come out. 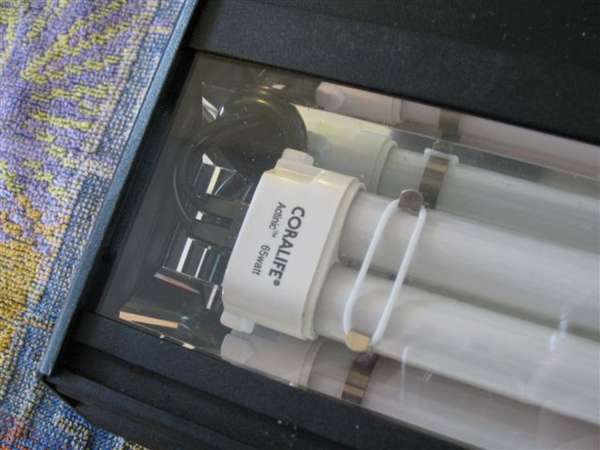   Unfortunately, that leaves you with a hole larger than you want for your T5 endcap, and it means the bulbs beside it needs to be cut just as far in. Because this cut is so far into the reflector, your T5's are slightly to one side of the light (by about 3/4" total) When you cut the reflector material back, you bend it behind the reflector so as to add a little strength to that area.  You will trim the reflector at both ends for both bulbs. The opposite end from the grommet end will only be cut enough into the reflector to fit the T5 endcap. Now you have to drill out the PC bulb clips so that you go from this:  to this:  Now you need to prepare the replacement T5HO light. I used the Sunblaster T5HO strip light.  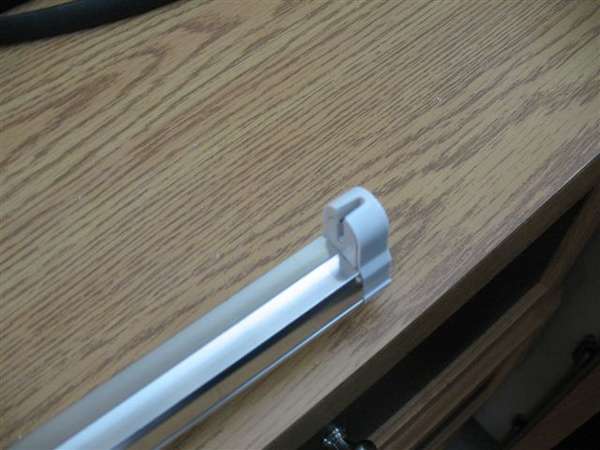 They endcaps come off to look like this:  The top of the endcap snaps out (attached with 2 red wires) and you need to cut the power leads. It's important that you do this only at the end of the light that receives power. (I say this because this T5 strip light is able to daisy chain and the opposite end gives power to the next fixture rather than receiving it.) Make sure you leave as much wire as you can with the endcap so that there is room to put in Mar-connectors. If you are wondering why use connectors rather than solder and heat shrink tubing? My understanding from electricians is that you shouldn't solder 120V wiring as it can heat up and melt the solder. Besides, mar-connectors are easy.  Next you pull the opposite endcap out and after stuffing the top part of the endcap (part with red wires from the end you cut) into the metal housing, you can pull the entire ballast out the opposite end. 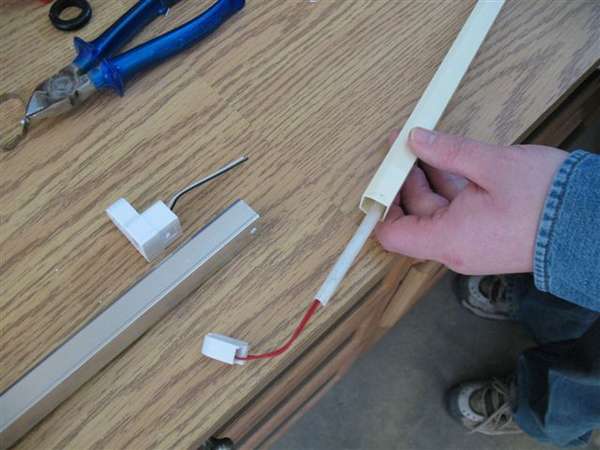 You'll notice that the Sunblaster has a plastic body around the ballast. This makes for a tight fit into the Aqualight, but it also makes it easy to work with. Next you need to strip the power wires.  Next, you dry fit the endcaps into the notches you cut into the reflector and make sure that the distance is right to properly insert the bulb. This works better if you have an extra set of hands.  After you determine that you've got the distances right, you glue in the end-caps. I used a hot-gun. It worked really well, especially because it dries so quickly. 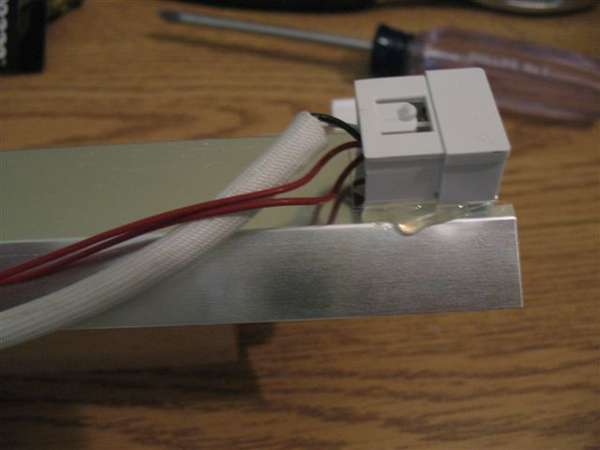
__________________
Mark... 290g Peninsula Display, 425g total volume. Setup Jan 2013.
|
|
| Thread Tools | |
| Display Modes | |
|
|


 Linear Mode

