
|
|
|
||||||||
| Portal | PhotoPost Gallery | Register | Blogs | FAQ | Members List | Calendar | Search | Today's Posts | Mark Forums Read |
|
|
Thread Tools | Display Modes |
|
#6
 03-17-2008, 05:36 PM
|
||||
|
||||
|
Okay, so I finished the rest of the modification on my Aqualight pro on the weekend.
Now I've seen lots of mod threads before and no matter how much you document, it's hard to explain it all. I've taken a lot of photos, but please let me know if you have a question and I'll help if I can. Here's a shot of the full light with only half the modification done. You can see how the PC bulbs would provide less coverage. 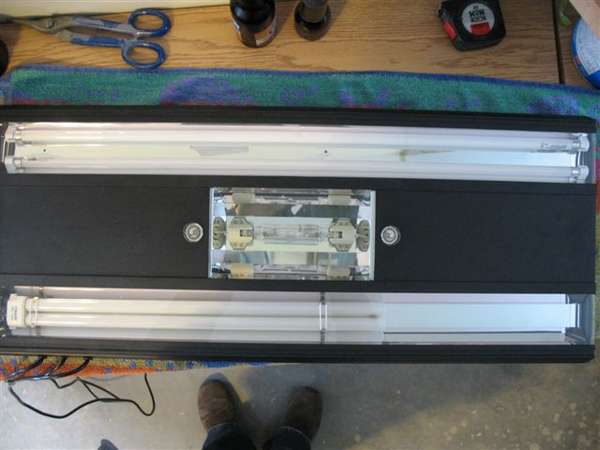 Here is what we start with at the PC endcap. Notice the grommet that allows the quick-connect to come through...the needs to come out. 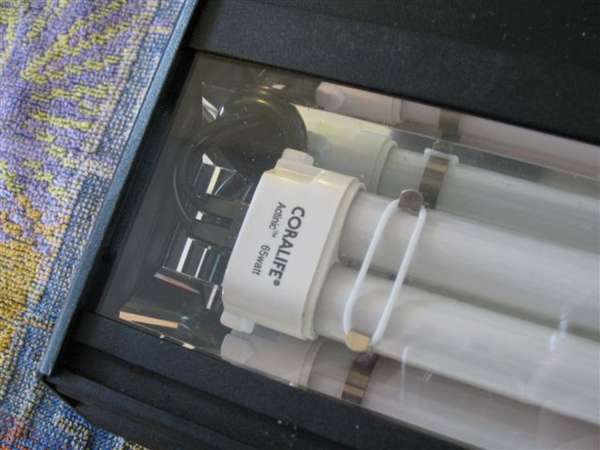   Unfortunately, that leaves you with a hole larger than you want for your T5 endcap, and it means the bulbs beside it needs to be cut just as far in. Because this cut is so far into the reflector, your T5's are slightly to one side of the light (by about 3/4" total) When you cut the reflector material back, you bend it behind the reflector so as to add a little strength to that area.  You will trim the reflector at both ends for both bulbs. The opposite end from the grommet end will only be cut enough into the reflector to fit the T5 endcap. Now you have to drill out the PC bulb clips so that you go from this:  to this:  Now you need to prepare the replacement T5HO light. I used the Sunblaster T5HO strip light.  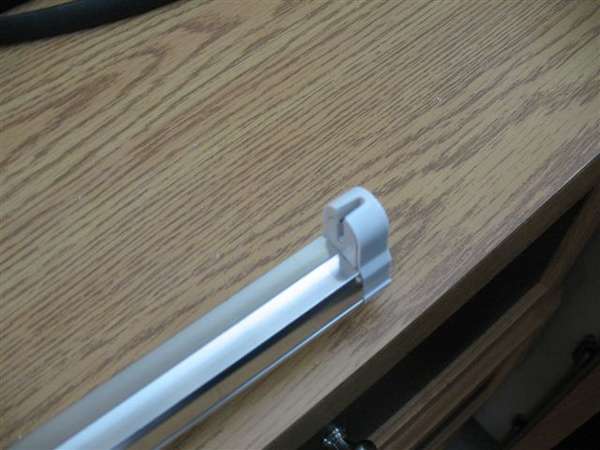 They endcaps come off to look like this:  The top of the endcap snaps out (attached with 2 red wires) and you need to cut the power leads. It's important that you do this only at the end of the light that receives power. (I say this because this T5 strip light is able to daisy chain and the opposite end gives power to the next fixture rather than receiving it.) Make sure you leave as much wire as you can with the endcap so that there is room to put in Mar-connectors. If you are wondering why use connectors rather than solder and heat shrink tubing? My understanding from electricians is that you shouldn't solder 120V wiring as it can heat up and melt the solder. Besides, mar-connectors are easy.  Next you pull the opposite endcap out and after stuffing the top part of the endcap (part with red wires from the end you cut) into the metal housing, you can pull the entire ballast out the opposite end. 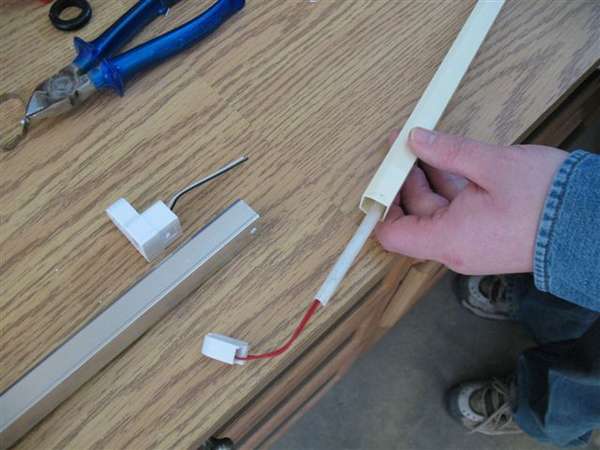 You'll notice that the Sunblaster has a plastic body around the ballast. This makes for a tight fit into the Aqualight, but it also makes it easy to work with. Next you need to strip the power wires.  Next, you dry fit the endcaps into the notches you cut into the reflector and make sure that the distance is right to properly insert the bulb. This works better if you have an extra set of hands.  After you determine that you've got the distances right, you glue in the end-caps. I used a hot-gun. It worked really well, especially because it dries so quickly. 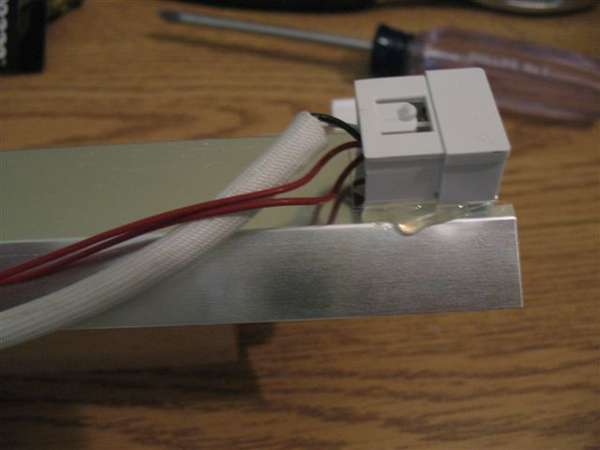
__________________
Mark...  290g Peninsula Display, 425g total volume. Setup Jan 2013. 
|
| Thread Tools | |
| Display Modes | |
|
|


 Threaded Mode