
|
|
|
||||||||
| Portal | PhotoPost Gallery | Register | Blogs | FAQ | Members List | Calendar | Search | Today's Posts | Mark Forums Read |
 |
|
|
Thread Tools | Display Modes |
|
#11
 09-30-2010, 03:01 PM
|
|||||
|
|||||
|
You're going to have so much room to 'scape in that; it'll be great. Any ideas on rockwork yet? As for the overflow, are you considering some sort of grating/guard so you don't get any critters in there?
As for SketchUp: if you go to File-->3D Warehouse, you can do a search for models that you can import. A search for PVC plumbing yielded some promising results. Graeme 
|
|
#12
09-30-2010, 03:04 PM
|
|||||
|
|||||
|
Quote:
might throw up some quarter inch clear fish netting (as opposed to ugly starboard everyone in reefing seems to love  ) ) I saw the drawing but how do you "Assemble" the pieces? I only watched the beginner movies so far. I only have the free version so i dunno if i can still do an align via centre points.
|
|
#13
09-30-2010, 03:13 PM
|
|||||
|
|||||
|
This is the dry scape i have had in my 23long for some time now. I want to epoxy it together then transfer it;
 another angle 
|
|
#14
09-30-2010, 03:46 PM
|
|||||
|
|||||
|
I spent about 10 minutes or so messing around in the free version of SketchUp but I was using prefab'ed straight PVC and couldn't separate the one I wanted from the other sizes to show you how they assembled. In any case, you should be able to get them to fit them together if you use the tape measure to set a guide point. Then, you should be able to drag the corresponding point on the other piece so that it lines up with the guide point and they fit. There may be a clearer method to do this but I taught myself without the videos :P. Hope this helps.
Graeme
|
|
#15
10-02-2010, 10:00 AM
|
||||
|
||||
|
Quote:
Also, did you get that TEK light from ReefGeek? I look forward to seeing what's to come.
|
|
#16
10-13-2010, 06:18 PM
|
|||||
|
|||||
|
Quote:
Yep - thats exactly what I am doing now - have look one page back to see the tank design that utilizes a "through cabinet" overflow design.I got the Tek light from another local reefer who was downsizing. Its a 6x39w model that I would love to trade for a 8x39w retrofit if anyone is offering
|
|
#17
10-13-2010, 06:19 PM
|
|||||
|
|||||
|
Did he just repost something I said earier?
|
|
#18
10-13-2010, 06:21 PM
|
|||||
|
|||||
|
Quote:
- did you get my pm about border shopping?
|
|
#19
10-13-2010, 07:14 PM
|
|||||
|
|||||
|
Thanksgiving was productive
- ate a ton and worked on the stand some more. Painted and caulked the frame with some outdoor paint. Also made some adjustments and added a couple more finishing panels. I have three more panels to cut (right sump door is cut but we are going to mount with a piano hinge - which i still have to buy :angry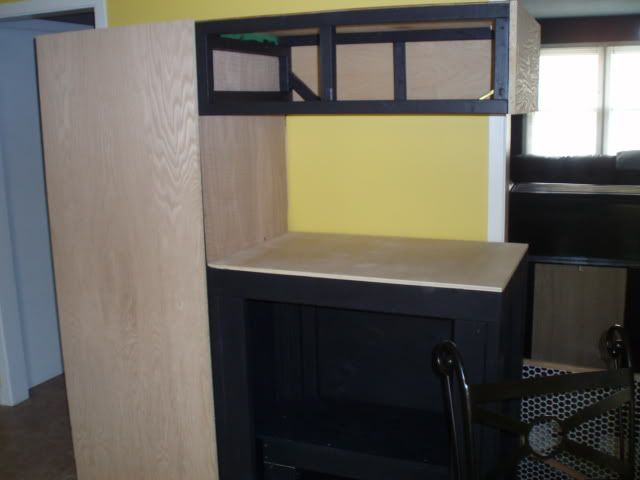 the left side is made of two panels, i still have to sand that filler - i am already $300 into this build so i cant keep buying full sheets of plywood for each side, lol. Plus you wont be able to see that side head on due the layout of my living room - AND its going to be stained satin black - maybe 5-6 coats. I like my black  door open - my goofy three year old saying CHEEEEEEESEEEEEEE to give a size perspective  had to fully notch the 2x4 to get this euro hinge to sit right. Used a 2x2 to re-brace it. The top portion of the stand will only hold electronics and test kits so its not a big deal. Plus the entire box has two 1/2" panels (left and back) holding things square. Theres also a 1/4" panel up top.  hood panel closed  hood panel open  heres the "holding" mechanism i used - ten bucks at HD as opposed to $30 for a mini shock  and pose...  Last edited by phi delt reefer; 10-13-2010 at 07:32 PM.
|
|
#20
10-13-2010, 07:16 PM
|
|||||
|
|||||
|
looking great!!!!
__________________
75 gallon with 20 gallon sump in the works. R. Bacchiega. Tattooer I didn't smack you, I simply High Fived your face. I've got so much glue on my pants it looks like a Friday night gone horribly wrong.
|
|
| Thread Tools | |
| Display Modes | |
|
|


 Linear Mode

