
|
|
|
||||||||
| Portal | PhotoPost Gallery | Register | Blogs | FAQ | Members List | Calendar | Search | Today's Posts | Mark Forums Read |
 |
|
|
Thread Tools | Display Modes |
|
|
|
#1
 06-07-2013, 03:12 PM
|
|||||
|
|||||
|
Finally getting to post this process. The beginning was a lot smaller system and a Volcano replica tank... But after seeing the size of the small 50 Gallon tank.... I just couldn't do it. I needed to go big again.
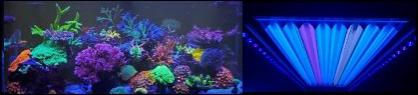
So now i'm going permanent, and slow. Making sure things are done right to the best of my abilities (and budget lol). Unfortunately I was going to use a 7.5 foot X 20" X 20" display that I purchsed, but it incurred some damage sitting in my garage, chips on the corners, so I will get more into that later. But needless to say I think i'm in for buying a new display. Goals: Easy water changes. This is HUGE for me, as I absolutely hate lugging around hoses and buckets. So this system will have a full water change system with a built in drain. Nothing but a couple of valves turned and switches flipped for a full water change. System Volume. I want a lot of filtration water volume. Lots of room to add things like different types of fuges, remote DSB, Mangroves etc etc. I could go the simplistic way here, but thats not what I like to see when I see fishrooms. I like to see large, multi-tank filtration systems with ease of access to all of them. I like having multiple tanks with lots of different types of macro etc. Access. No more bending over to try and squeeze under a stand to get at something in the back of the sump. Anyone who has met me knows that me and tight spaces simply wouldn't work lol! Simplistic design in the DT. I'm going with the simple, minimal open space look in my display. I've always had tanks with lots of live rock in them, so this time I'm going for a few smaller island stacks of rock, and lots of swimming room for the big fishies. Ventillation. Becauseall of my filtration will be housed in a closet type environment, I will need to be able to vent the humidity out. Luckily, the way my house is designed, it will be easy to do this. Quarantine. My biggest change, will be having a large quarantine setup. In my last FOWLR, I lost an emperor angel, flame angel, cleaner wrasse, and others because I introduced a Powder Blue Tang without quarantine. Stupidest mistake ever. I will be utilizing 3 48" tanks in this setup (one un-divided for larger fish, one divided for smaller fish and a DSB for wrasses, and the sump). Excuse the Paint drawings... for some reason I like the simplicity of it VS. sketchup! Here is the basic design for the system.  And the Quarrantine tanks. 
__________________
 They call it addiction for a reason... Last edited by kien; 01-20-2015 at 07:48 PM. 
|
|
#3
06-07-2013, 03:29 PM
|
|||||
|
|||||
|
Here is my equipment list so far:
SWC 250 S2 Skimmer 3 X 250W Sunlight Supply Reef Optix 3 pendants & 3 X Icecap 250W MH Ballasts Mag 24 Return Pump (display) Mag 18 (salt mixing/water changes) Mag 9.5 (quarantine) 2 X WP40 powerheads from fish-street 2 X Koralia 3's for frag tank 2 X Koralia 2's for RO storage/mixing tank 2 X JBJ ATO w/ MJ1200 (display and quarantine) JBJ True Temp 1000W Titanium heater & controller (display) Jager 300W heater (quarantine) Jager 200W heater (salt mixing bucket) Cadlights Cone Biopellet reactor 4 X TLF Phosban 150 reactors 3 X American DJ switchable powerbars BRS chloramines deluxe 6 stage RO Unit 2 X 35 Gallon Brute mixing bins 8 X 4" filter socks
__________________
They call it addiction for a reason...
|
|
#4
06-07-2013, 03:32 PM
|
|||||
|
|||||
|
Wow, that looks like a serious build!!! I like the set up, should make for somewhat easy maintenance!!
Subscribed!!
__________________
My 180 GL Reef Tank http://www.canreef.com/vbulletin/showthread.php?t=81842 My 55 GL Reef Tank - shut down http://www.canreef.com/vbulletin/showthread.php?t=87764
|
|
#5
06-07-2013, 03:34 PM
|
|||||
|
|||||
|
Started the closet for my original build (50 gallon, small tank).
 It turned out like this: 
__________________
They call it addiction for a reason...
|
|
#6
06-07-2013, 03:56 PM
|
|||||
|
|||||
|
BUT.... then I decided to go big again. So the design changed. Here is where I am at now.
Both closets are painted with Kills Premium. All wood work in the main sump closet (right) is done.  The challenge was getting the drain, electrical, water and ventillation into/out of the closet. Luckily, I live in a 4 level split house, so the beams run all the way into my basement laundry/furnace room. So I cut a hole in the drywall, and ran the 1.5 ABS drain, 4" vent, electrical from 1 of the 3 circuits, and 1/2 pex water line for my RO.       I made a panel (that needs a good cleaning after touching it with dirty hands lol) for everything to come through the wall.     AND YES I KNOW ITS A BRASS FITTING.... BUT IT'S GOING BEFORE THE RO UNIT LOL
__________________
They call it addiction for a reason... Last edited by FishyFishy!; 06-07-2013 at 03:59 PM.
|
|
#7
06-07-2013, 04:07 PM
|
|||||
|
|||||
|
Building the left closet's stand for the frag tank, DSB/Fuge, and ATO holding tank.
  Also decided to reinforce two of the legs on the Brute storage bin stand. The other side I wont bother, as these will be bolted to wall studs on that side. Here are the stands, still have to paint the reinforced Brute stand.  SO thats where I am at now. This weekend I am going to start drilling holes for the plumbing to go through the walls between the closets, and probably start plumbing! Yaaaay!
__________________
They call it addiction for a reason...
|
|
#9
06-07-2013, 05:32 PM
|
|||||
|
|||||
|
looking good Mango like the progress
__________________
180 starfire front, LPS, millipora Doesn't matter how much you have been reading until you take the plunge. You don't know as much as you think.
|
|
#10
05-09-2014, 09:30 PM
|
|||||
|
|||||
|
Looking good!
|
|
| Thread Tools | |
| Display Modes | |
|
|


 Hybrid Mode
