
|
|
|
#1
 03-17-2007, 02:21 AM
|
|||||
|
|||||
|
So it only took me about 2 months to get my sump up and going, and just as freakin' long to get some new pictures, which I blame on the new 14k bulb not letting me take any pictures that don't make my tank look like... well, a blueberry.
Okay - so here goes, first the main tank:  Left side of sump, overflow going down into the skimmer. Please forgive the ugly baffles, they suck and I know - I used enough silicone to make Pam Anderson jealous  Also - that's my light BEFORE I went and knocked it into the tank. Amen for grounding probes. 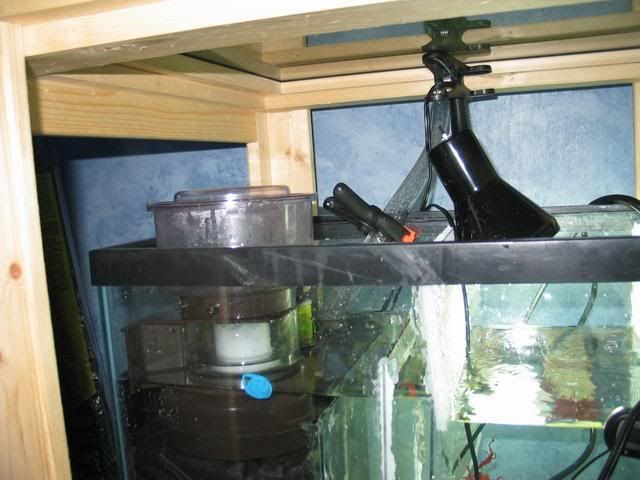 Here's the "fuge" - I've added a bit more macro and a nice size piece of rock since this picture, also took away a powerhead. To the far right you'll see the return area, I've got my heater, AC1000 with my UV Sterilizer, and my MJ1200 return to the display. If I was to do it over, I'd try and make my initial baffles after the skimmer smaller, as I burn about 2L of water a day - yowsers. However, that's less than before I had the sump. 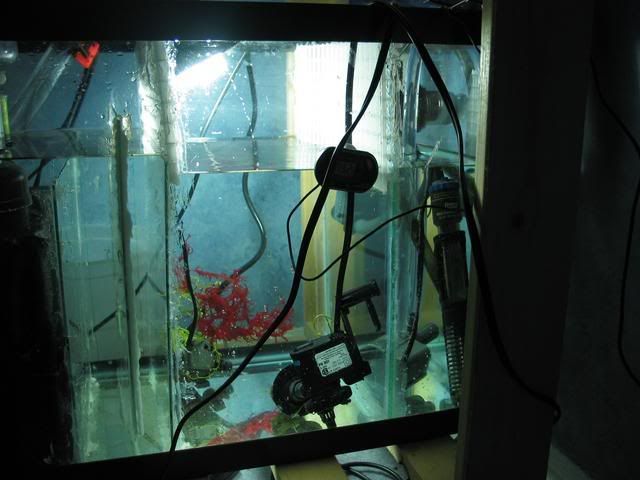 and there she is! The skimmer is pulling out about 300ML of gunk every 2x a week, it's not SUPER thick, but it's decent and I'm happy after about 2 or 3 weeks. So there it is!!! It's not amazing, but I love it  I'm SO glad I had the grounding probe, I don't know what would have happened to the tank without it.... ugh. I'm SO glad I had the grounding probe, I don't know what would have happened to the tank without it.... ugh.
|
|
#4
03-17-2007, 06:12 AM
|
|||||
|
|||||
|
That is a huge leather there in the front. That thing looks like a tree!!!
Great looking tank. Kris
|
|
#5
03-17-2007, 06:38 AM
|
|||||
|
|||||
|
Quote:
So for anyone that PM'd me about one, I figure this coming week will be my time to get my frag on
|
|
#7
03-17-2007, 05:42 PM
|
|||||
|
|||||
|
Quote:
Tank is 24x24x18 Sump is 24x12x16.5 Cube tanks are the bomb!
|
|
#8
03-18-2007, 12:20 AM
|
|||||
|
|||||
|
That tank is a good dimension, looks cool. How do you like the skimmer? It is a euro reef correct?
|
|
#9
03-18-2007, 12:26 AM
|
|||||
|
|||||
|
The skimmer is pretty darn good, it's a Tunze DOC, old school model (902 or something?) but it's been collecting some good gunk, I'm glad it's not working TOO well, I need some gunk for my fuge
Now if only I could get my flow straight, I'd be happy. Either there's too much flow somewhere, or not enough elsewhere... Maybe I need a few nanostreams Oh honey... HONEY....
|


 Linear Mode

