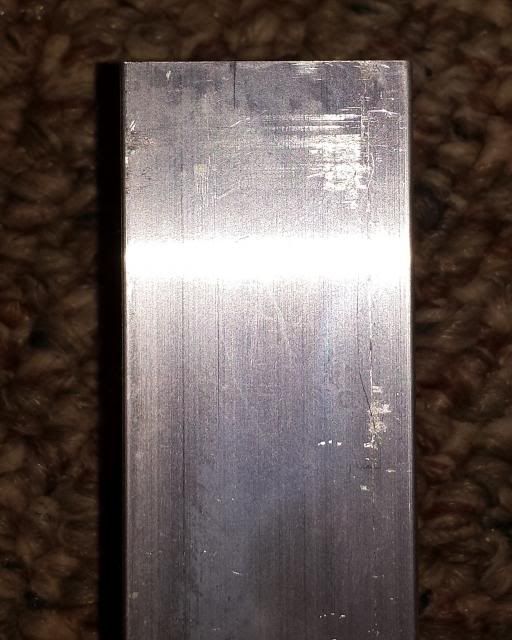
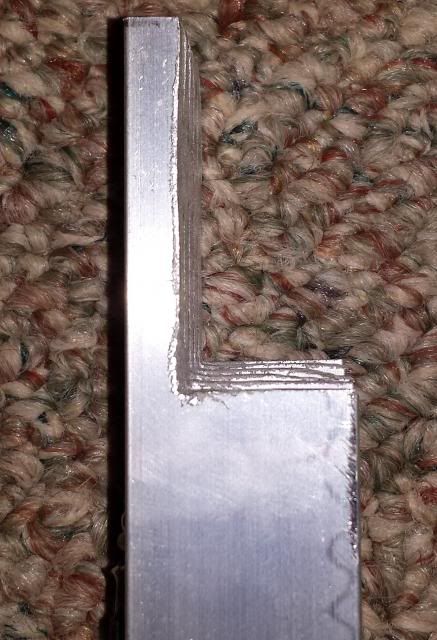
Step 7) Notch heatsinks. The 2 outside heatsinks profile's were too tall to fit inside the fixture with the glass shields in place so I had to notch the ends of the heatsinks as well as both sides of these heatsinks to accomodate the T5 ballasts below them and the LED drivers beside them. I didn't snap pics of the notches cut out for the ballasts and LED drivers as they weren't very asthethically pleasing.... The central heatsink which had 2 strings of LEDs mounted side by side with the moonlight seperating them had a thinner profile and gladly didn't need any modifications.
Before
After
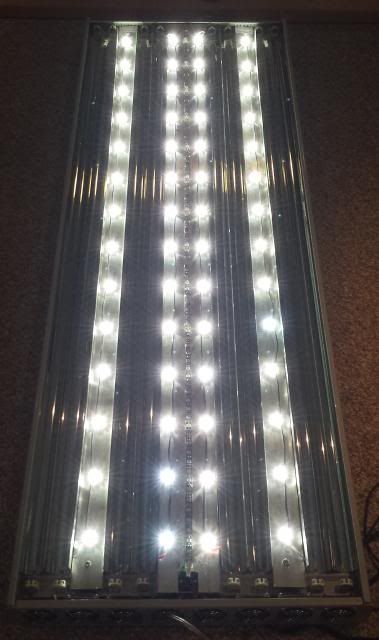
Step 8) Mount LED strings on heatsinks to fixture. After removing the T5 endcaps from the aluminium channel on each end of the fixture, I drilled a small hole through the end of each heatsink and bolted them to the existing channel. I then wired the LED strings (14 x 3 watt CREE XTE cool whites) to the 4 LED drivers.
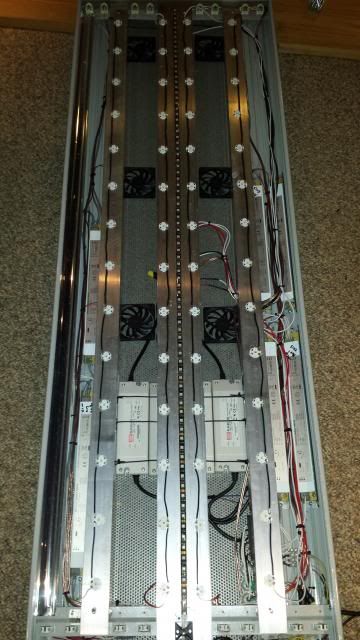
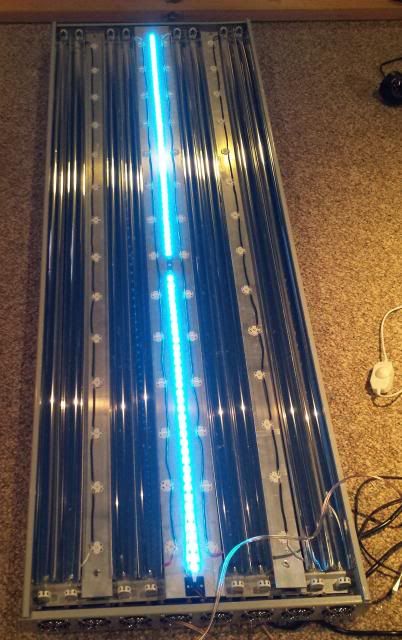
Step 9)Wire in moonlight lighting and install T5 bulb reflectors. I replaced the old 3528 blue led moonlight with a waterproof 5050 SMD blue led string that was mounted directly to the heatsink. I also have a potentiometer wired inline to dim the moonlight which I'm hoping will also help to keep the LEDs cooler and prolong their life. After firing them up, I noticed that 3 of the 5050 chips in the center of the string did not want to come on but I did not feel like replacing the whole string for this faulty section of the strip. The moonlight strip has 83 5050 chips on it each consuming 0.24 watts of power so I used a 1.7 AMP 12 V power supply seeing as I needed 1.66 amps to power this string properly. I am currently running the string at the dimmest possible setting and will not run it at full capacity as this would definitely decrease the lifespan of the moonlight.
Step 10) Test LEDs. In reality, I did this step much earlier but also did it again at this stage. The first time I tested the LEDs, all 4 strings came on but at ~1% of their total brightness no matter where I set the dimming potentiometer. I actually had to turn the lights off in my basement to see if the LEDs were on or not. This was then followed by ~3 hours of troubleshooting/random cursing.
The first thing that I tested was the built in pot in the meanwell drivers. This can be turned down or up to modify the max amperage output of the driver so that you don't burn out your LEDs as the max output of these drivers is 1.3 Amps. I had previously opened up all of the drivers and turned the built in pots as far as they would go clockwise but I thought I may have turned them all the way down by mistake. After putting the unit back together, I fired it up with the same result of the LEDs barely lighting up.
Seeing as that didn't work, I tested each LED string independently with a 700 mA non dimmable meanwell driver to make sure I didn't have any cold solder joints. All 4 strings light up perfectly and I proceeded to see spots for the next half hour.
I then assumed the problem was coming from the dimming feature of these drivers as the non dimmable driver fired the LED strings just fine. I removed the dimming + and - leads from all 4 drivers and used a 9V battery to give a reference voltage so my LEDS should have come on at 90% intensity. After plugging in the string, I got the same result of the LEDs coming on at 1% intensity. I didn't even bother checking the solder joints at the dimming pot as this obviously wasn't the problem. At this point I proceeded to stop troubleshooting the fixture for a while and focused all of my energy entirely on randomly cursing until I felt slightly better about myself.
After that much needed break, I completely took the fixture apart removing all the heatsinks (which was a PITA to do as the nut securing the bolt to the aluminium channel is near impossible to hold in place with your finger). Once I had the heatsinks out I immediately noticed the problem. The neutral lead of the 110V line into the LED drivers had popped out of the stock fixture's port. It was a tight fit as I soldered all 4 of the neutral lines coming out of the LED drivers together and the "plug" I had made was now slightly larger than the stock plug as the wiring Sfiligoi used was thinner than the meanwell's wiring. My new "plug" had fit into the stock socket however when I secured the heatsink in place above this wiring, it obviously just popped out of place.
After really jamming the neutral line back into the socket and securing it much tighter than I had originally, I installed the heatsinks again and wired the dimming + and - leads of the LED drivers back to the dimming pot. I plugged the 10V power supply for the dimming pot in as well as the 110V line for the LEDs and crossed my fingers.
Finally! We have light! I didn't even mind seeing spots at this point I was so happy the LEDs were actually working and the dimmer was operating fine as well.
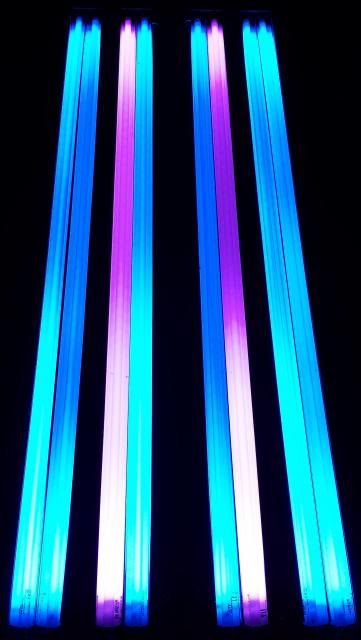
Step 11) Replace T5 reflectors (again) and test T5 bulbs. I thought I was homefree at this point but as my luck would have it, only 7 of the 8 T5 bulbs lit up. FRAK! After trying a different bulb, I decided another short bout of random cursing was necessary. I then followed the wiring from the T5 endcap to see which ballast was causing the issue after removing the 2 reflectors that were directly overtop of the ballasts on that side of the fixture. I luckily had 2 extra brand new ballasts that I had ordered from Sfiligoi when they had sent me the 2 replacement ones for free. I replaced the faulty ballast, put the reflectors back in place and all 8 T5 bulbs fired for me.
Hazaa!
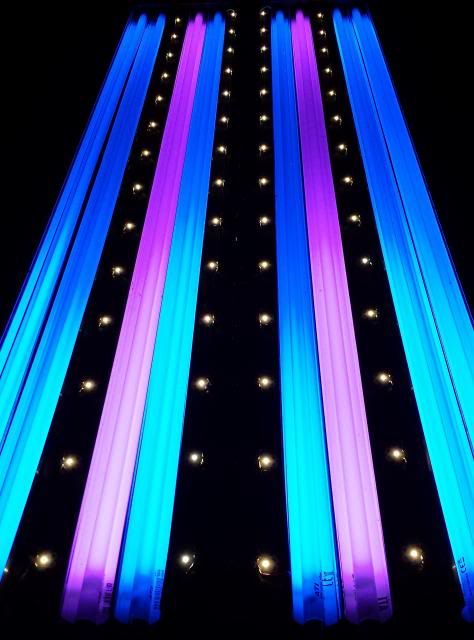
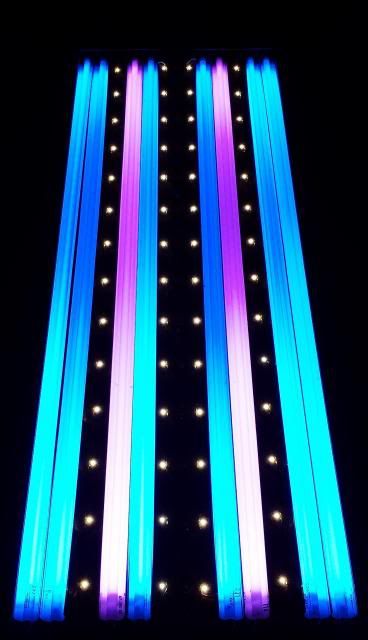
Step 12) Fire up LEDs, T5s, and both sets of fans, just to make sure...
Step 13) Clean and replace the starfire glass inserts that protect the bulbs and hang it back over my tank. With the 3 heatsinks installed, this fixture is now ~50 lbs heavier than it used to be so I placed 2 pieces of 2x4s over the tank to make sure I don't have any unexpected surprises while I'm away at work if the aircraft cable suspending the fixture decides to break.
Step 14) Drink a victory beer and relax for an hour by catching up on the Walking Dead.
Overall, the project took me ~14 hours to install the LEDs, add the fans, replace the broken fans and grills and replace the burnt out T5 ballasts. I'm sure I could have had it done in ~8 hours had that neutral line stayed in place as opposed to me having to troubleshoot every aspect of the wiring. It took another 2 hours or so to mount the LEDs to the heatsinks with thermal epoxy and to tin and solder all of the LEDs and wiring for the 4 LED strings.
At present, I am running 6 ATI Blue plus bulbs and 2 ATI purple plus bulbs in addition to the 56 x 3 watt Cree XTE cool white LEDs. I set the LEDs to the lowest brightness possible using the dimming pot and will slowly ramp up the intensity over the next few weeks in order to acclimate the corals to their new source of light.