Seeing as golfing, fly fishing and camping season have come to an end, I figured I would give my build thread a bit of an update.
It has been a fairly rough summer in the reef as I pretty much let it do its own thing for the past few months. I continued to do 50 gallon water changes every 4-6 weeks and topped off the dosing salt containers with fresh mix when needed but other than that, I hardly put my hand in the tank except for cleaning the glass every few weeks.
The SPS corals have pretty much been at war all summer as most have grown into their neighbours usually leaving one colony the victor and the other severely damaged. I'd say at least 50-60% of the SPS corals have also browned out significantly due to decreased tank maintenance but predominantly from the fact that 4 of the 12 T5 ballasts in my fixture burnt out on me between May and now. So the tank has basically been running at only 2/3 of the PAR that the corals are used to and the result is not very pretty.
Last year I also replaced 2 of the ballasts so in total, I've had to replace 50% of the ballasts in this fixture in 3 years. Even though the first 2 ballasts died on me after the 1 year warranty, Sfiligoi was good to deal with and sent me replacement ones for free. But obviously there is an issue here seeing as there is no way these ballasts should be dropping like flies after only 3 years of use, especially since this is a high end fixture which cost over $2000 new.
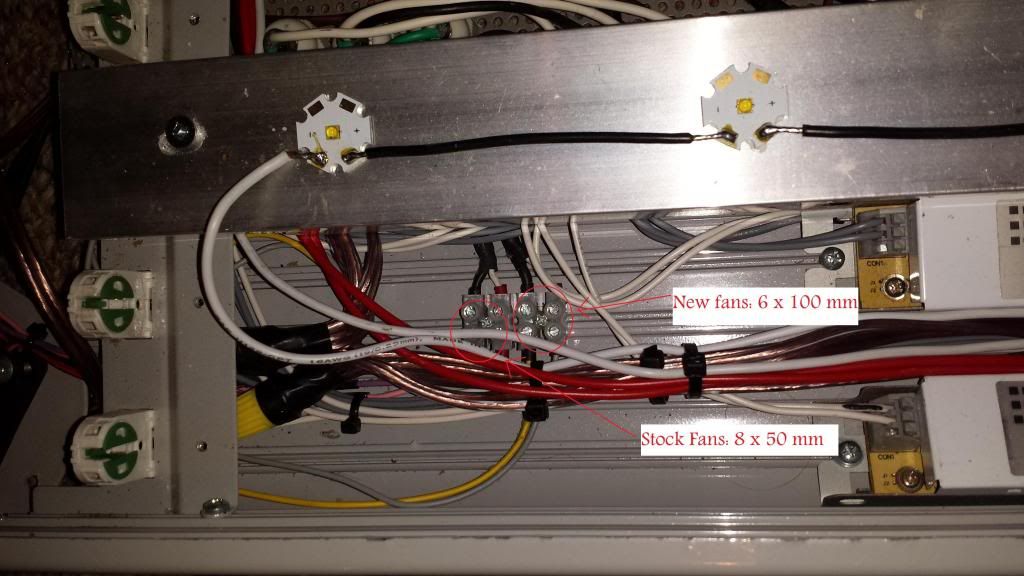
Based on the fact that Sfiligoi added a 2nd set of 8 x 50 mm fans to the opposite end of the fixture on the Stealth T5 models the year after I purchased mine, overheating of the internal components is likely the cause for the excessive ballast failure rate. It would have been nice if this would have been dealt with like a recall and current owners of older models would have been sent a kit to install the 2nd set of fans themselves. This however was not the case so I decided to make some serious mods to this fixture to better suit my reef tanks needs.
I had ordered some DIY LED supplies on a few black Friday sale last year as I was planning on swapping out 4 of the T5 bulbs for LED strings to try and increase PAR, cut down on electricity, cut down bulb change costs and get some shimmer back into the aquarium. I knew that this would be a huge undertaking so I was not looking forward to this project and this was part of the reason I prolonged doing it until now. After seeing how rough many of my beloved colonies looked, I finally took the plunge and removed my Sfiligoi Stealth fixture from the tank earlier this week.
Step 1) Remove the 4 ballasts and associated wiring for the 4 bulbs that will be replaced with LED strings. I also replaced the burnt out ballasts with the 4 ballasts that were removed to make room for the LEDs. In order to get to the ballasts on these lights, you have to remove the bulbs and then the individual reflectors to gain access.
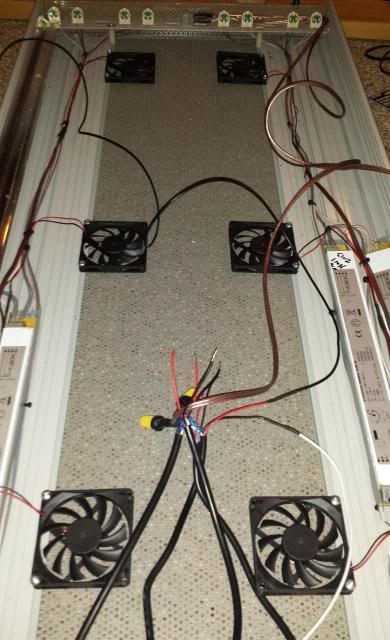
Step 2) Install more active cooling. I added 6 x 100 mm fans which I wired into the old moonlight (removed due to having burnt out as well, common theme hey) 12V power supply. Since the fans were too big to mount on the far end of the fixture, I mounted them on the top of the fixture similar to how ATI powermodule fans are mounted. I also have them mounted so that they will pull hot air out of the fixture and vent it through the perforated top of the fixture.
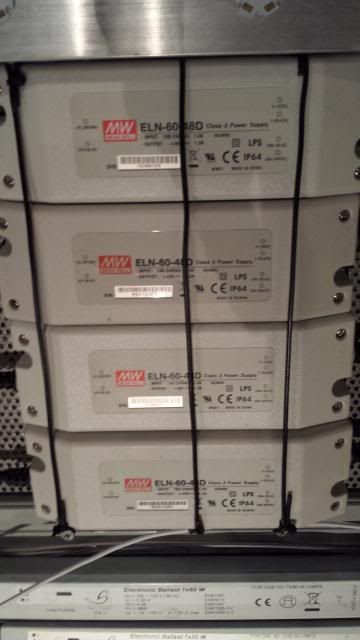
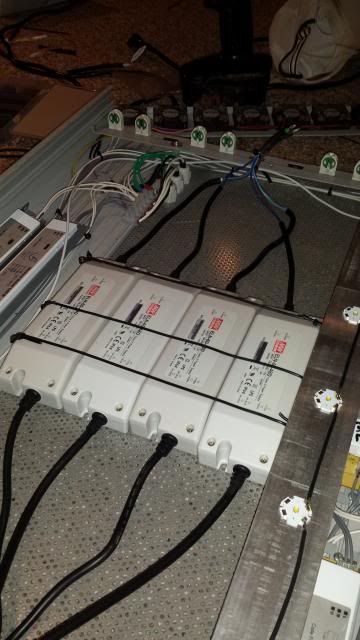
Step 3) Mount LED drivers
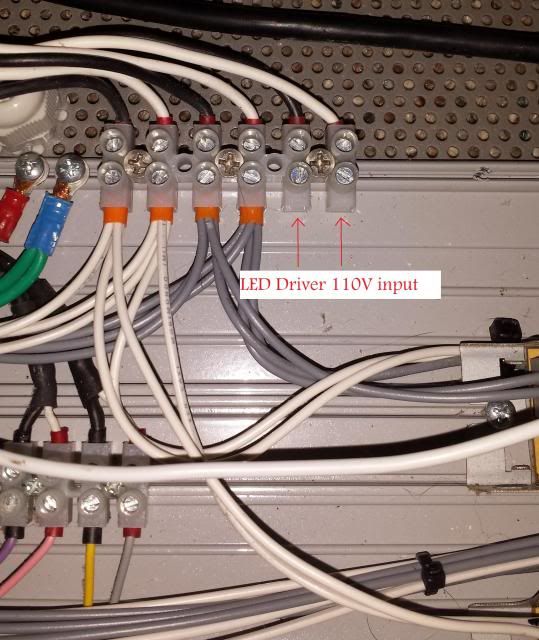
Step 4) Wire LED drivers to 110V power. This fixture came with 3 power cords, each of which operated 4 x 80 watt T5 ballasts. I removed the stock wiring and wired the 4 LED drivers into the 3rd power cord that I had my white T5 bulbs running off of previously
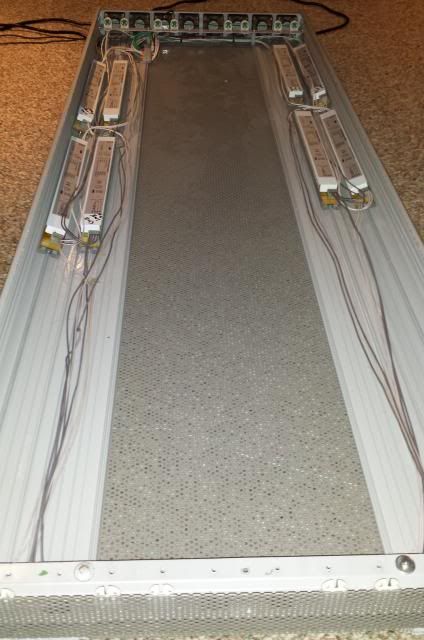
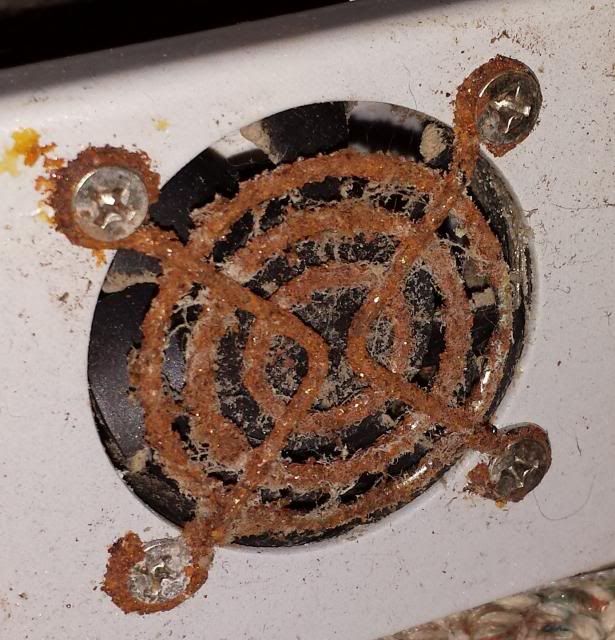
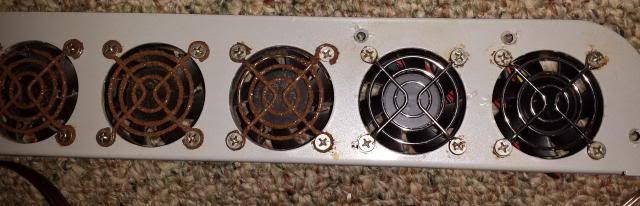
Step 5) Replace 2 burnt out fans and rusted fan grills (I replaced all the grills, not just the 2 shown in the pic). I'm guessing this is the reason that a few of the ballasts ended up croaking on me. The 2 fans on the far end of the fixture had died but that didn't explain why the other 2 ballasts on the opposite side of the fixture also grenaded on me...
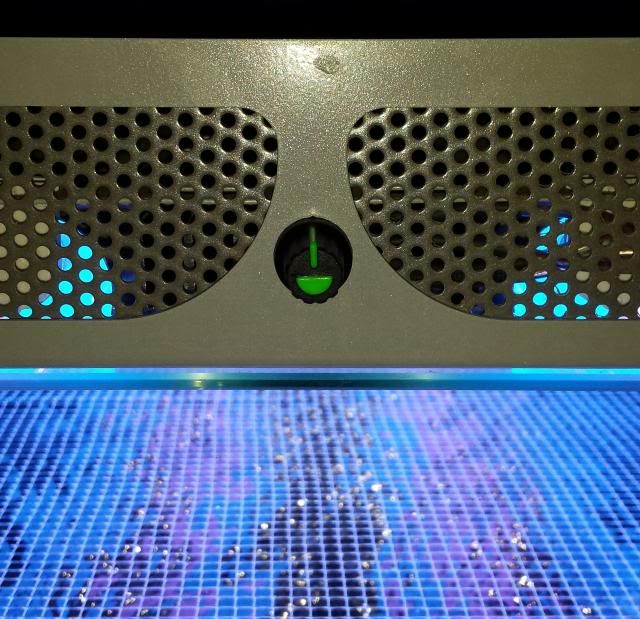
Step 6) Wire in potentiometer for dimming. I had already pre-soldered a 10V power supply to a dimming pot so all I had to do was drill a hole through the end of the fixture to mount the dial. Here is a pic of where the pot is mounted for easy adjustments. I still need to pick up a new knob cover as the black and green dial just doesn't jive with the silver and grey of the Sfiligoi fixture.