Well I have been slacking at keeping up with my build thread but work has been absolutely chaotic for nearly this entire year. I work out of town and have been away from home for 26+ days out of most months so needless to say, my tank hasn't been receiving much atttention.
With that said, I finally did some work to my tank here this week more out of necessity than anything.
I purchased a Vertex Alpha 250 skimmer last year since my previous external skimmer had a tendency to flood my house if enough salt creep built up in the venturi. Since I'm usually gone for 7+ days at a time, this was obviously not the most ideal situation. I thought that an in sump skimmer would solve my problems as if anything were to go wrong, the skimmer would just overflow back into my sump and the worst that would happen would be a slight nutrient spike from the skimmate running back into the sump.
Oh how I was wrong. In the event of a power outage and the level in the sump goes up past 10", or if a small piece of algae gets sucked into the skimmer pump's needle wheel, my skimmer starts to overflow in about 5 seconds. Once the collection cup is full of water, the collection cup basically gets air locked and a geysier of air and water erupts out of the 4 vent holes in the lid of the collection cup. This water then sprays all over the inside of my stand, coats all of my electronics in a saltwater mist and I end up with a ton of salt creep not to mention a nice puddle of saltwater in the base of my stand.
So after spending $75 on a couple of float switches and a regulator module, I should never see my skimmer flood again.
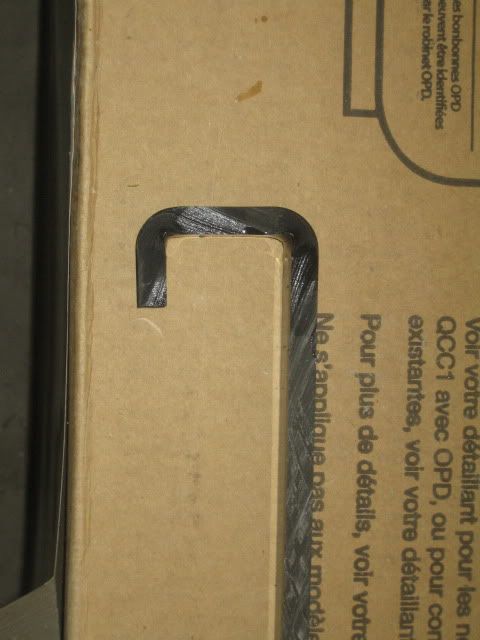
First off, I started with a narrow strip of black acrylic
After a generous application of heat from a butane torch and some careful bending I ended up with this
I then trimmed off the excess acrylic and drilled holes in both ends. One to accomdate the 1/4" NPT threads on the float switch. The other to accomdate the 1/4" standard threads on a nylon screw
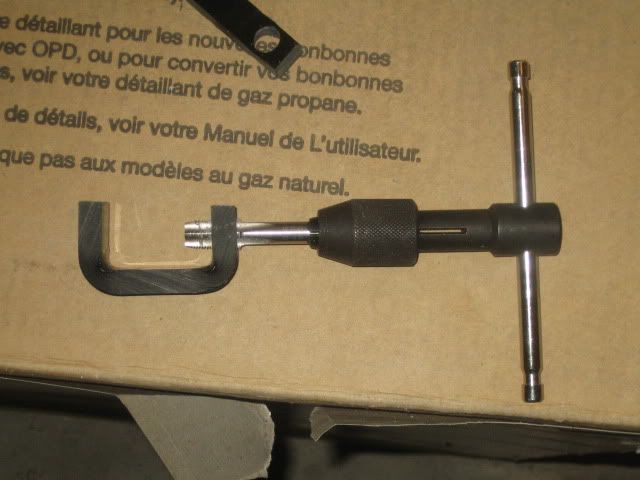
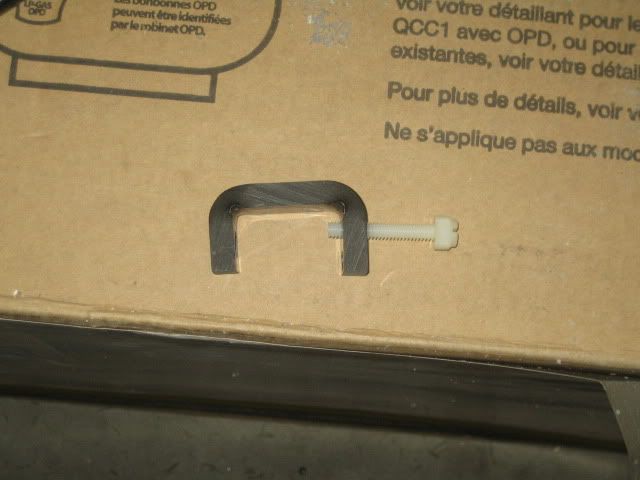
Here is a pic of the unit fully assembled with the float switch installed
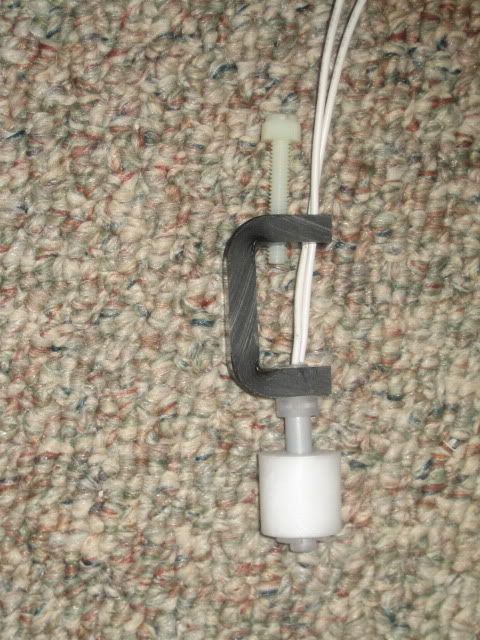
All I had to do then was push the float switch wires through one of the vent holes in the lid of my collection cup and then thread the nylon screw through the same hole to secure the float in place
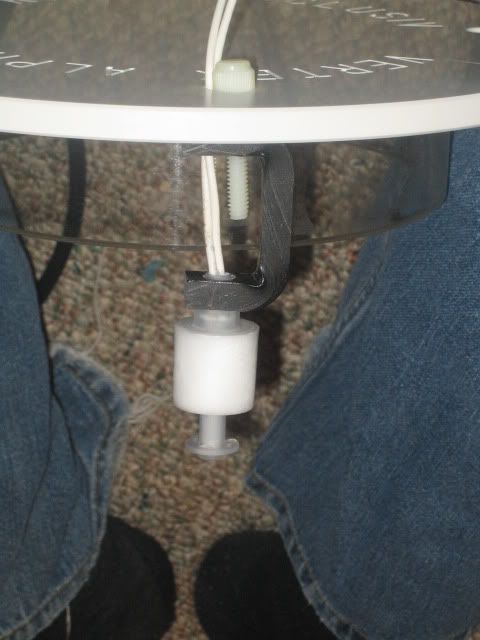
After installing the unit into my skimmer, I ended up changing the design to make the acrylic bracket shorter as well as shaped like an "S" instead of a "U". This was because the new shape allowed me to position the float so that it wasn't touching the outside or inner wall of the collection cup whereas with the "U" shaped bracket, I could not adjust it enough to clear both walls. I also installed male and female moisture proof connectors so that I can easily remove my collection cup for cleaning.
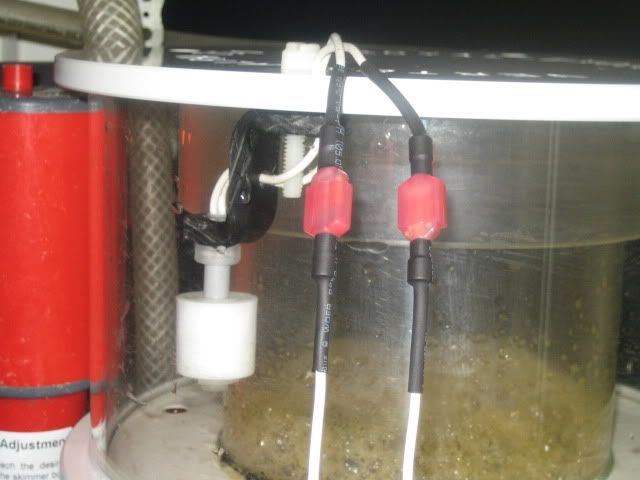
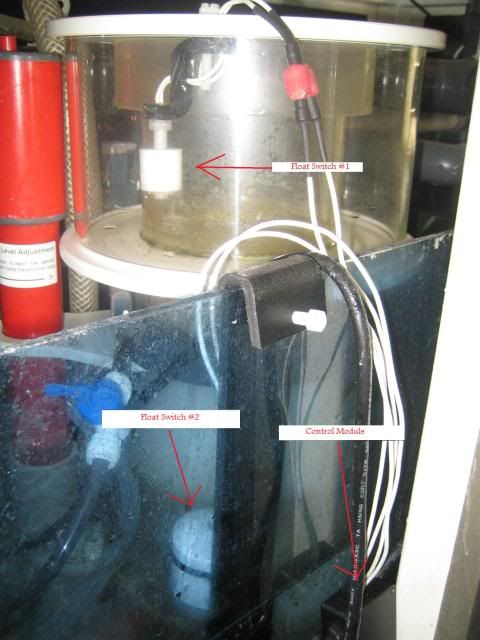
Here is an overview of the whole setup. Basically, so long as float #1 in the collection cup and float #2 in the sump are both suspended out of the water, the skimmer pump will be energized. If either switch floats up, the power will be immediately cut to the skimmer pump and will not be engergized until the float switch drops back down to its fully open position. This way, if my sump level comes up past 10" which it always does after a power outage, my skimmer pump will remain off until my sump level returns to normal thus preventing the collection cup from overflowing. If for some reason, my skimmer still decides to give me some unnecessary grief and start overflowing, the switch inside the collection cup will kill power to the skimmer as soon as it floats up to the closed position. This scenario is less ideal since the collection cup will have to be drained before the skimmer will resume operating however it will also prevent the dreaded saltwater geyseir that ends up flooding my tank stand.